Manage Number Worlds/Building Blocks 2015 Classes
Learn how teachers manage classes in Number Worlds and Building Blocks 2015, including creating classes, adding students, and managing logins.
- Math
- Getting Started & Orientation
- Intervention
- SSO & Manual-Rostering
- Customer Support
- Number Worlds 2015
- Class Management
- Direct Login & Manual-Rostering
- Classroom Teacher
- Building Blocks 2015
- PreK-12
- Preschool
- Elementary School
- Middle School


Direct Login and Manual Rostering
Single Sign-On (SSO) and Manual Rostering
This article applies to Manual Rostering districts. Manual Rostering means that teachers manually redeem program content and roster their own classes.
SSO applies to districts that use an SSO portal, district website, or Learning Management System (LMS) to access McGraw Hill digital programs, and Direct Login means that teachers, students, and administrators log in at my.mheducation.com.
Not sure which Access Service your district uses? Click here to learn more about the four Access Services that we support.
Article Contents
Create a Class
1. Launch Number Worlds Teacher Edition.
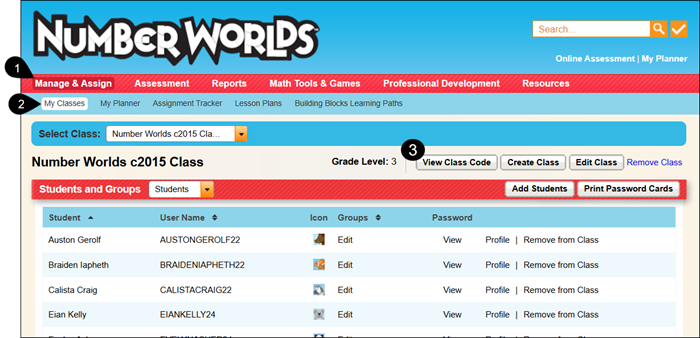
2. Click on Manage & Assign on the Navigation Menu.
3. Click on My Classes.
4. Click the Create Class button.

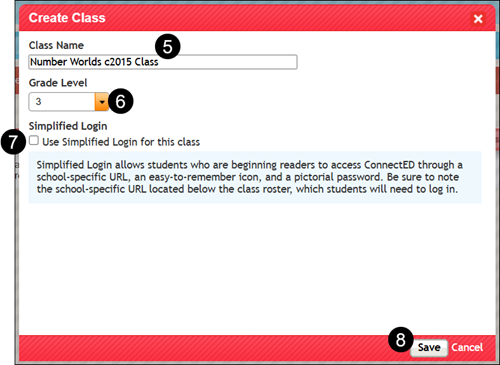
5. On the Create Class pop-up, enter a Class Name.
6. Select a Grade Level from the drop-down.
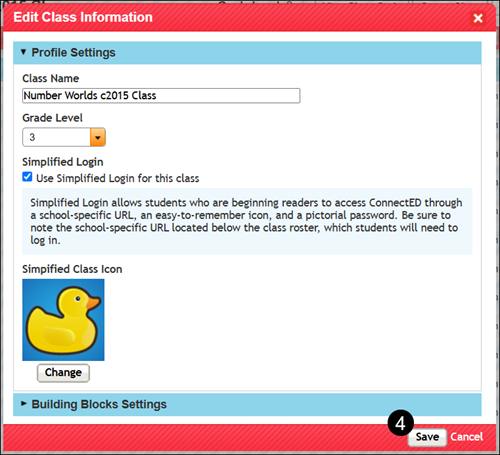
7. Check the Simplified Login for this class box, if desired.
The Simplified Login option allows students to sign into their account by clicking on images instead of entering a username and password.
8. Click the Save button.
View Class Code
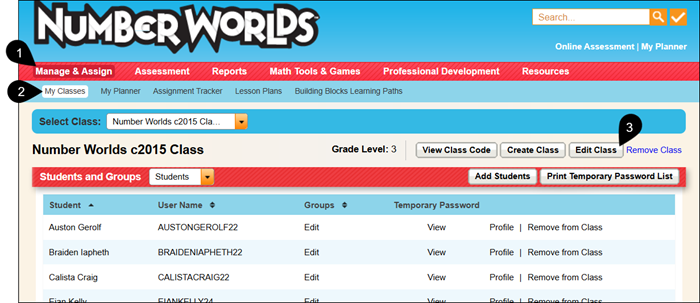
1. Click on Manage & Assign.
2. Click on My Classes.
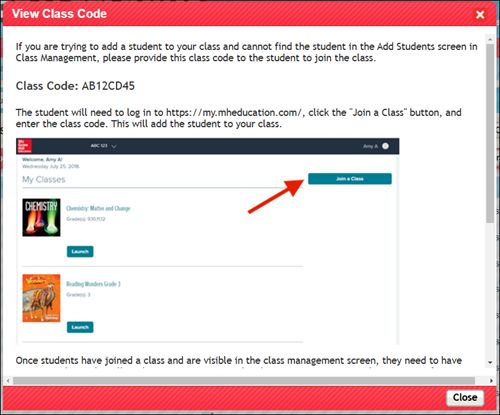
3. Click the View Class Code button.
4. From the View Class Code pop-up, provide the 8-character class to the students who need it. Students only need this class code if you want them to add themselves to the class from their student profile instead of you manually adding them to the class.
Add Students to Class
1. Click on Manage & Assign.
2. Click on My Classes.
3. Click the Add Students button.

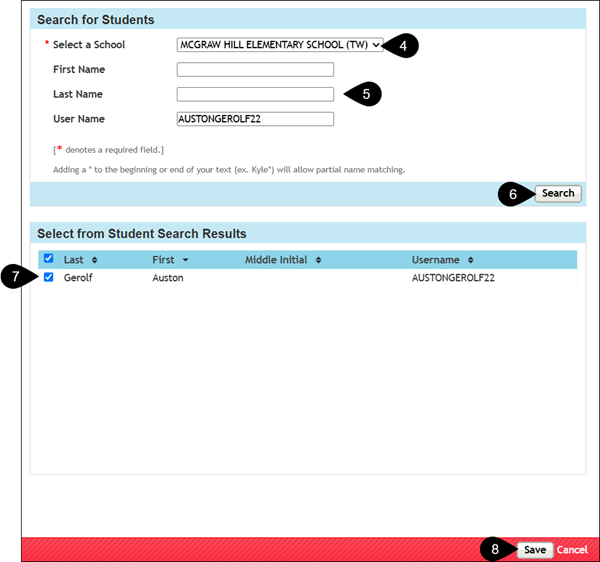
4. If assigned to multiple schools, select the correct School from the drop-down.
5. Enter the student's First and Last Name and/or User Name.
6. Click the Search button.
7. Check the box next to the student's name.
8. Click the Save button.
Repeat these steps until all students are added to the class.
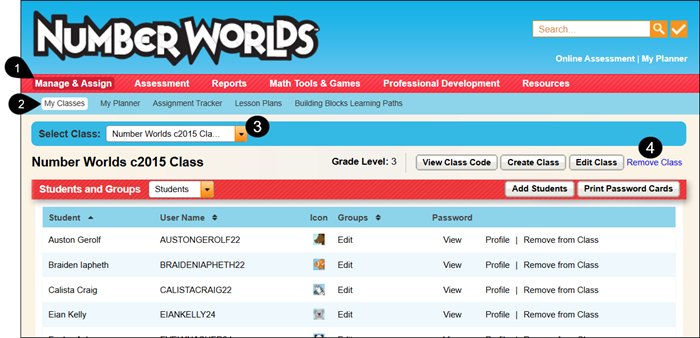
Print Passwords
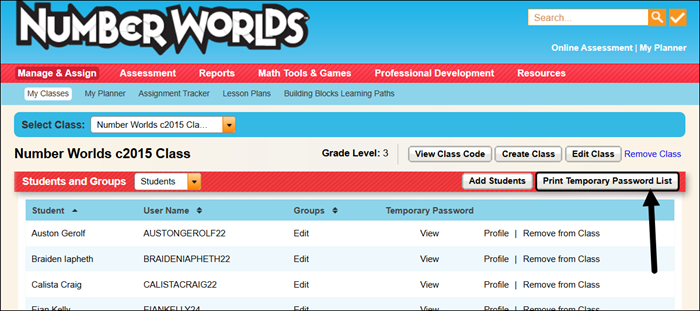
On the My Classes page, click the Print Temporary Password List button at the top-right of the student list.
If you have the Simplified Login option checked (see Create a Class or Edit a Class), it will download a PDF of the class cards to provide to the students.
If you do not have the Simplified Login option checked, it will provide a XLS file.
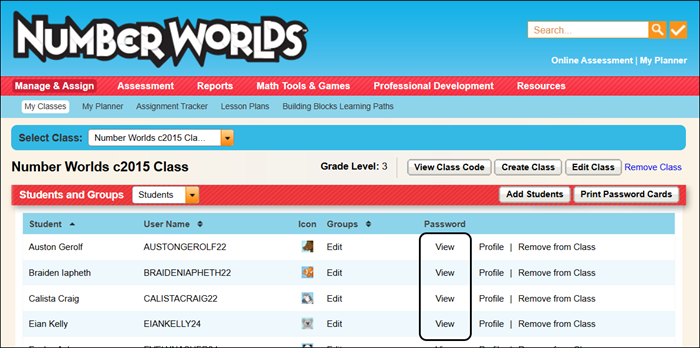
To view and/or print an individual student password, click the View link in the Password column.
Edit a Class
1. Click on Manage & Assign.
2. Click on My Classes.
3. Click the Edit Class button.

4. On the Edit Class Information pop-up, make desired changes and click the Save button.
Remove Student from Class
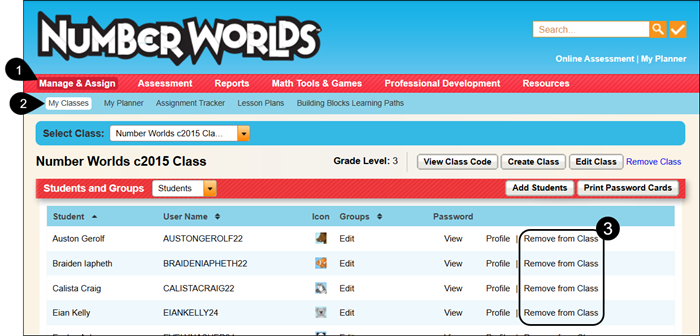
1. Click on Manage & Assign.
2. Click on My Classes.
3. Click the Remove from Class link to the right of the student.
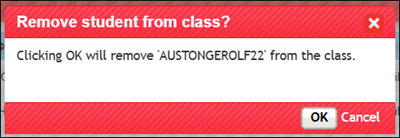
4. On the Remove student from class pop-up, click the OK button.
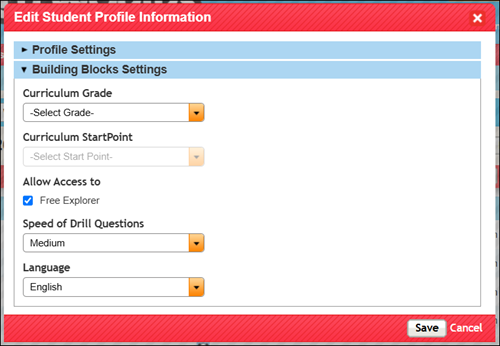
Edit Student Profile
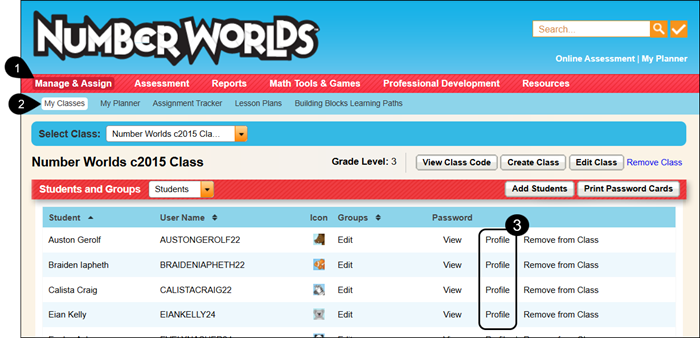
1. Click on Manage & Assign.
2. Click on My Classes.
3. Click the Profile link to the right of the student's name.
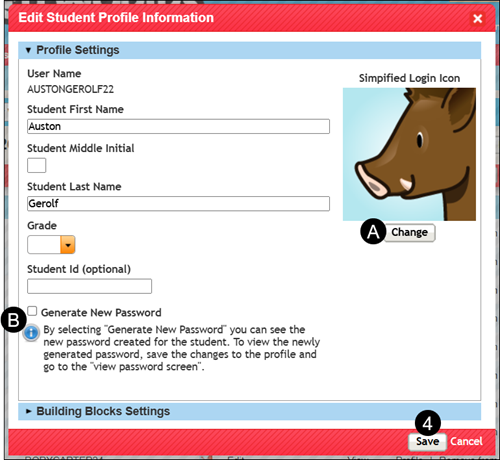
4. Make desired changes and click the Save button.
A. If you have the Simplified Login option activated, click the Change button under the Simplified Login Icon to select a different option for the student.
B. If you have the Simplified Login option activated, check the box next to Generate New Password to change the Simplified Login password for the student.
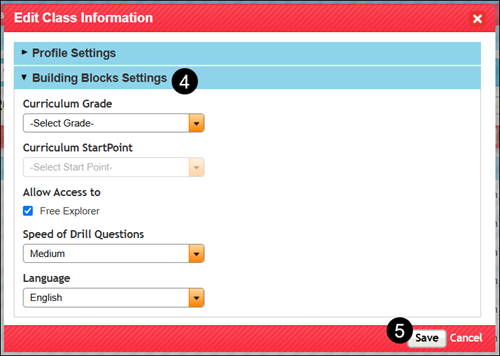
Building Block Settings
1. Click on Manage & Assign.
2. Click on My Classes.
3. Click the Edit Class button.
4. Click on the Building Blocks Settings blade.
5. Make desired changes and click the Save button.
To adjust a specific student's Building Blocks Settings, click on the Profile link to the right of the student's name.
Click on the Building Blocks Settings blade. Make the desired changes for the student's profile and click the Save button.
Delete a Class
1. Click on Manage & Assign.
2. Click on My Classes.
3. If you have multiple classes created, select the Class you want to remove.
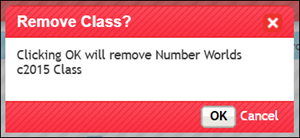
4. Click the Remove Class link.
5. On the Remove Class pop-up, click the OK button to confirm.