Create and Roster WonderWorks 2022 Classes
Set up WonderWorks classes for the new school year, including creating the class planner and rostering students.
- Direct Login & Manual-Rostering
- Add-On Content
- Getting Started & Orientation
- Classroom Teacher
- Wonders 2023 2020 2017
- Literacy
- SSO & Manual-Rostering
- PreK-12
- Customer Support
- Elementary School
- Back-to-School Setup
- Class Management
- Middle School
- Kindergarten
- 1st Grade
- 2nd Grade
- 3rd Grade
- 4th Grade
- 5th Grade
- 6th Grade
- Intervention


This article walks teachers through creating and rostering WonderWorks classes.
Before you get started, make sure you have redeemed both Wonders and WonderWorks licenses in your account. Students in WonderWorks will also need both Wonders and WonderWorks licenses.
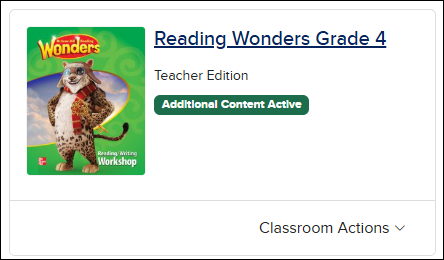
Your ConnectED Programs page should have a Wonders class, along with a message stating “Additional Content Active.”
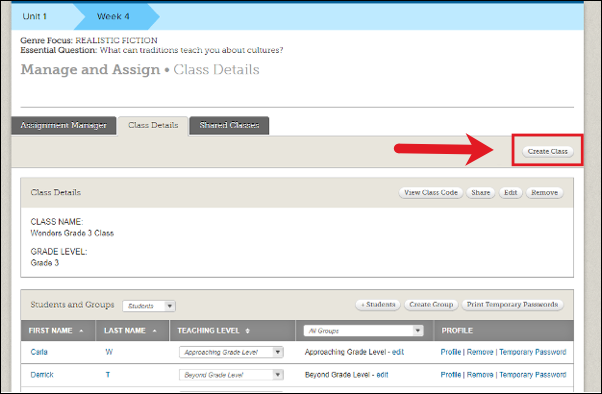
1. From the Manage & Assign menu, select Class Details.

2. Select Create Class.
3. Enter a Class Name for your WonderWorks class. You'll want to make the WonderWorks class name distinct from your Wonders class name so you can easily identify each class.

4. Under Select Planner, select Existing Class Planner, and then select your existing Wonders class from the drop-down menu. Click Next.
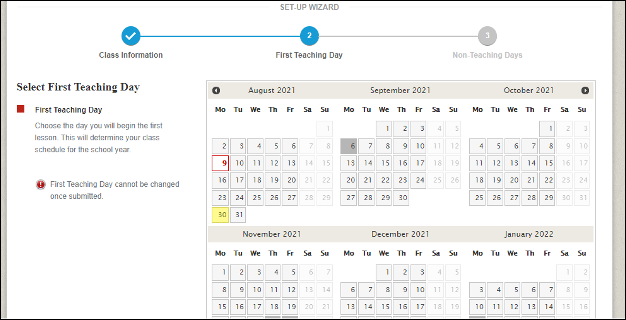
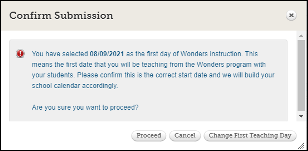
5. Select a First Teaching Day using the calendar. This should be the same First Teaching Day as your original Wonders class, so the two classes match up. Your planner will use this date to begin scheduling lessons. Click Next to continue.
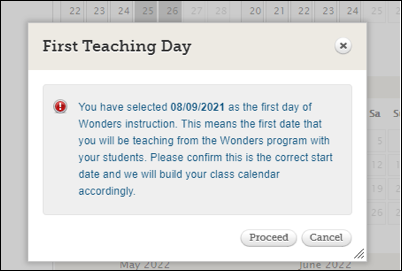
6. Confirm the date displayed is correct and click Proceed.
7. Select any Non-Teaching days on the calendar. (If you already selected these on your Wonders calendar, you don’t need to pick them again.) Once completed, click Save.
8. You will once again be prompted to confirm your First Teaching Day selection, since this cannot be modified once your class is created. Click Proceed to finish creating your class.
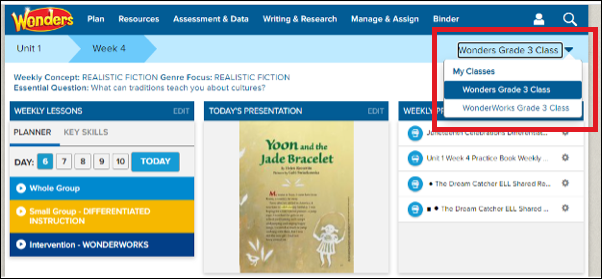
Once your class is created, you can toggle between your Wonders and WonderWorks classes using the drop-down menu at the top right.
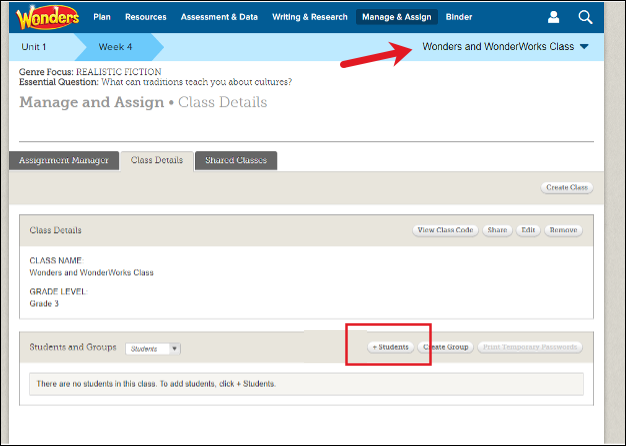
9. To add your WonderWorks students to your new class, select Class Details from the Manage & Assign menu.
10. Make sure your WonderWorks class is selected at the top right. Click the Add Students button.
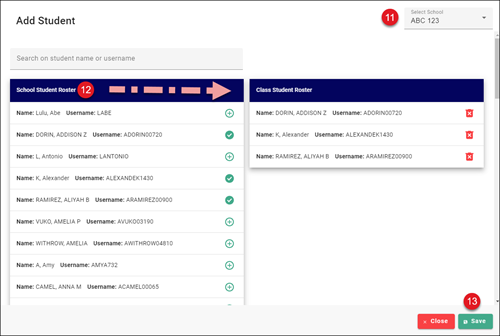
11. If you're associated with multiple schools, select the school the student(s) is associated with.
12. In the School Student Roster column on the left, click on the student(s) you want to add to the class. This will add them to the Class Student Roster column on the right.
13. Click the Save button.
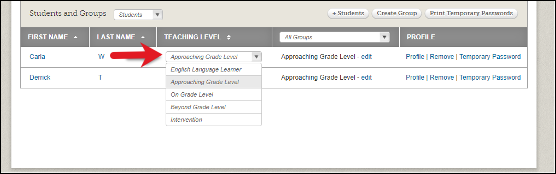
14. Change each student's Teaching Level to Intervention.
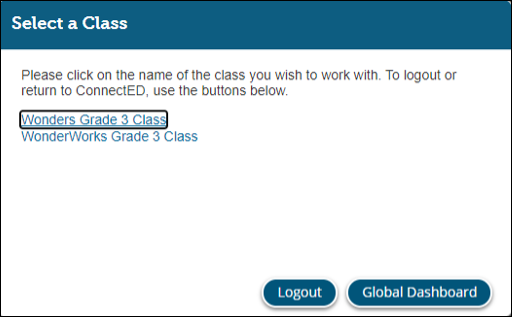
When your WonderWorks students log in, they can select their Wonders or WonderWorks class to access their content.
Your students are now enrolled in both classes. We recommend going back to your original class to export any data you wish to save. Once you have backed up your data, you can delete your original class so students only see one class option when they access their Wonders dashboard.
Note: Be sure to back up any data you wish to save before deleting your original class. Once it is deleted, the data will no longer be accessible.