How to Integrate the Thorax Cross-Section 3D Model Into Your Course
Help your students learn spatial relationships with the thorax cross-section 3D model.
Looking for a way to integrate the thorax cross-section 3D model into your course?
This article will provide an overview of the key anatomical learning objectives of the thorax cross-section 3D model. At the time of writing this post in April 2023, eight human anatomy 3D models have been added to Anatomy & Physiology Revealed (APR) since January 2020. The thorax cross-section 3D model was released in November 2020. This model is a companion to the thorax 3D model that covers the complete anatomy of the entire thoracic region, and to the separate heart 3D model that details external and internal anatomy, coronary vessels, and the conduction system.
The image below shows the thorax cross-section model when it first loads in APR.
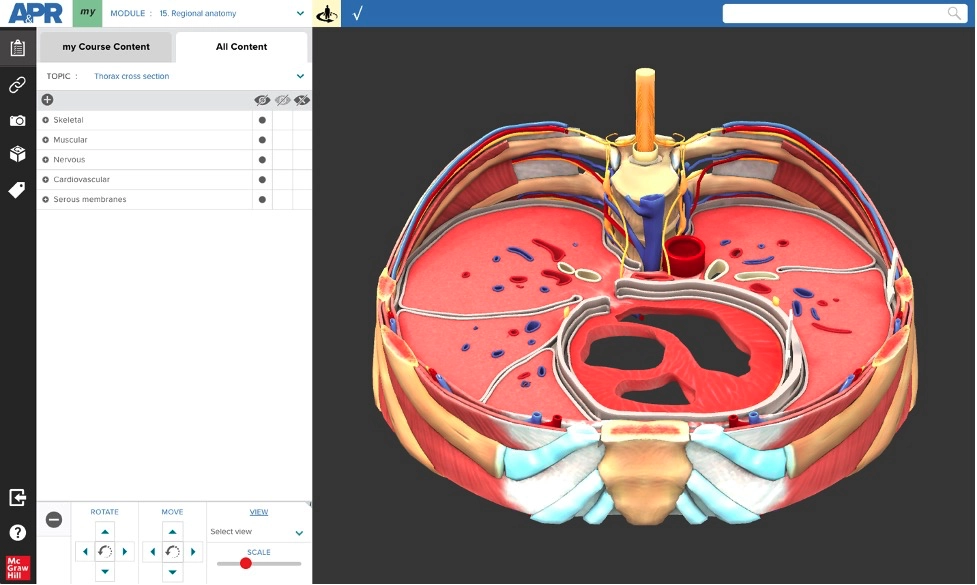
This 3D model was designed with several key anatomical learning objectives in mind. The team took full advantage of the capabilities of 3D modeling by creating a unique pro-section that is sectioned at the level of T7 but has the bodies of T6-T8 and the posterior part of ribs 6-8 fully intact. The heart, pulmonary vessels, lungs, and bronchi are identifiable in the cross section. The team decided to show the repetitive nature of the anatomy of a typical intercostal space by showing a few intercostal spaces where a learner may identify several objectives, including:
- Identify components of the intercostal neurovascular bundle and their relationship to the intercostal groove of a rib.
- Identify the relationship of the intercoastal neurovascular bundle to the internal and innermost intercostal muscles.
- Identify the components of a typical spinal nerve.
- Identify connections between the PNS to the Sympathetic ANS through gray and white rami communicantes, the sympathetic trunk, and greater thoracic splanchnic nn.
- Identify the deep venous drainage of the thorax through associated vessels and the azygos vein.
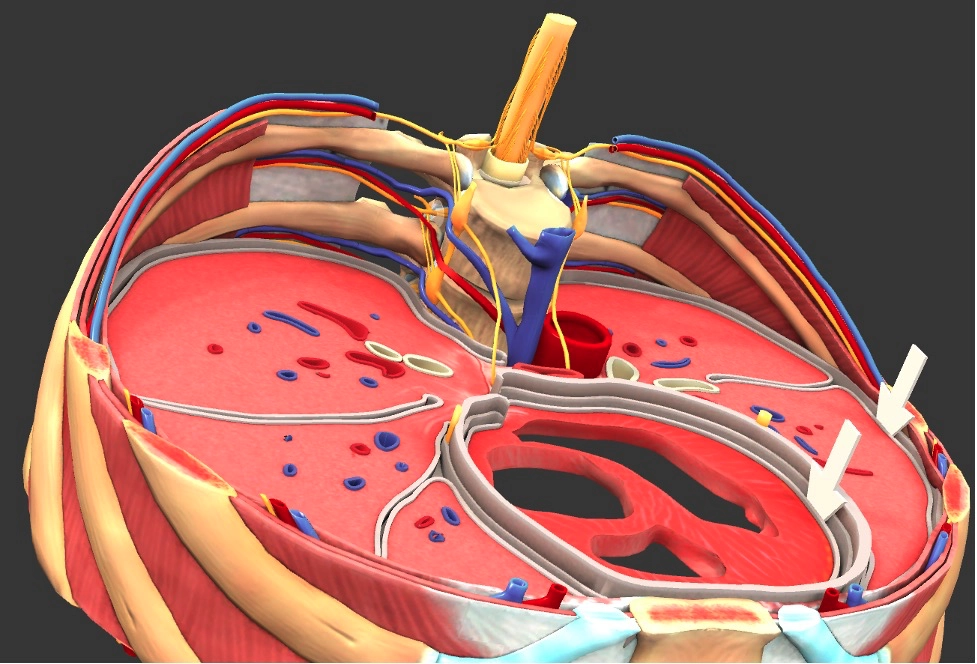
The image below shows a close-up view of the intercostal spaces in the model.
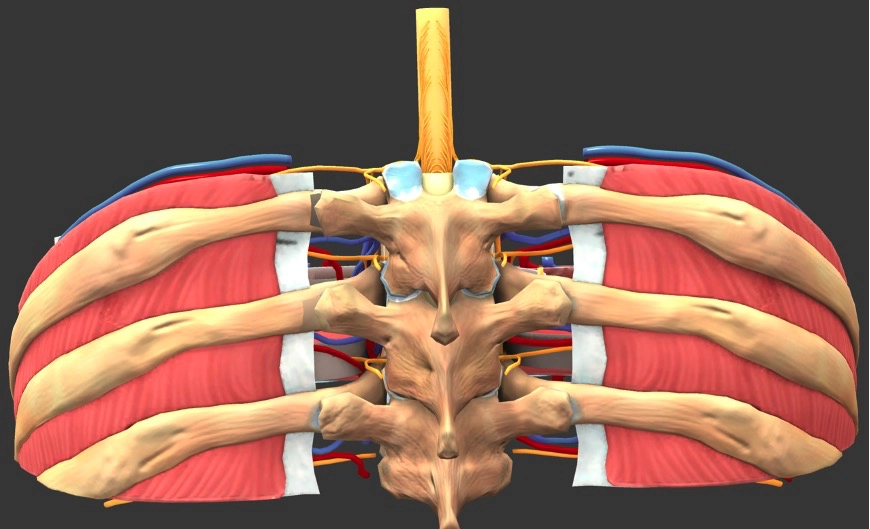
This model can also be used to learn the anatomy of the skeletal and muscular systems in the thorax. The three layers of intercostal muscles and their associated membranes can be identified—and how this differs anteriorly versus posteriorly can be appreciated. The osteology and articulations of the thoracic cage may also be reviewed.
The image below shows a posterior view of this model.
One of the unique features of this model is the three-dimensional functionality when depicting the serous membranes and cavities. The design team intentionally included two large arrows in the model. One of them indicates the pleural cavity. When the pleural cavity is selected from the menu or rolled over in tag mode, the arrow and actual pleural cavity will both highlight. The purpose of the arrow is to draw attention to this small, potential space.
The other arrow indicates the pericardial cavity. Notice the three layers of the pericardium were created at different heights to make it easier to appreciate each of the different layers present. Also note the inclusion of the phrenic nerve to help differentiate the mediastinal parietal pleura layer from the fibrous pericardium.
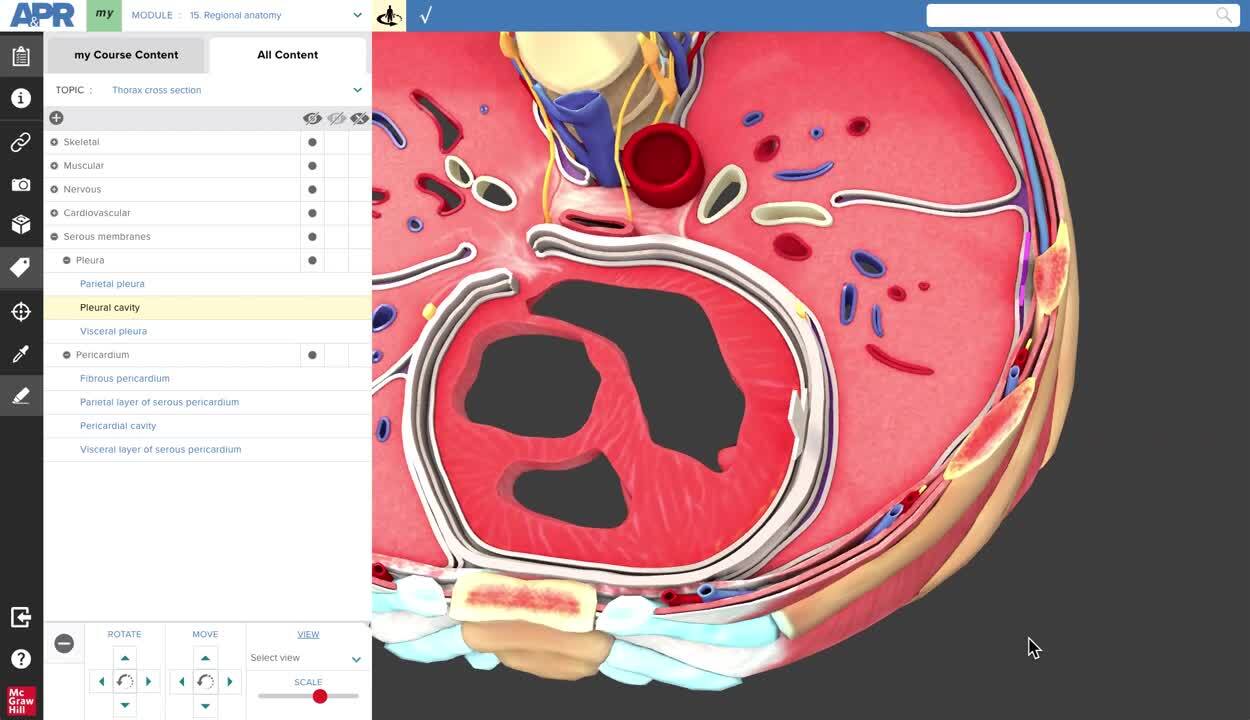
See how users are able to select the pleural cavity, layers of pleurae, arrow in the pericardial cavity, and layers of the pericardium in the thorax cross-section 3D model of APR:
In summary, the thorax cross-section 3D model can be used to cover learning objectives in the thorax for the skeletal, muscular, nervous, and cardiovascular systems. Additionally, the model may be used to learn about the pleural and pericardial serous membranes of the lungs and heart.
This 3D model can be assigned to your students in Connect using the APR Connect Assignment and can be customized to include structures specific to your learning outcomes. Be sure to read the blog post “Teach Spatial Relationships with Interactive 3D Models” to learn more about the functionality of the many 3D models in APR. Explore how-to documents and videos for the APR Connect Assignment at the APR Connect Assignment Resources webpage.
Let us know about your favorite APR 3D model and how you have incorporated them into your course! We'd love to hear from you!

Dr. Michael Koot is a Senior Director of Digital Content and Pedagogy for McGraw Hill. Before joining McGraw Hill, Michael taught human anatomy at Michigan State University where he won a campus-wide teaching with technology award. At McGraw Hill, he works at the intersection of content, pedagogy, accessibility, and technology with both internal and external stakeholders to develop effective teaching and learning tools.