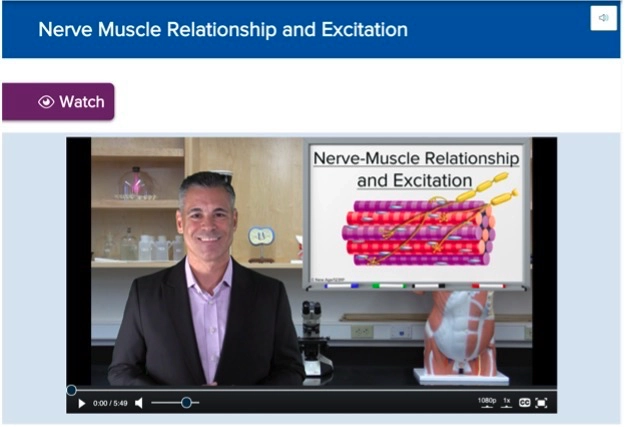
Teach Spatial Relationships with Interactive 3D Models
Are you looking for engaging ways to allow your students to explore spatial relationships in human anatomy?
- Succeed in A&P
- Article
- Student Engagement
- Blog
- Higher Education
Are you looking for engaging ways to allow your students to explore spatial relationships in human anatomy?
This article will discuss how you can leverage the various 3D models available in Anatomy & Physiology Revealed (APR) to help your students explore spatial relationships. It will also highlight beneficial features of the 3D models and provide a few implementation ideas for incorporating 3D models into your anatomy and physiology, human anatomy, or human physiology course.
The dissection study area in APR already allows for students to identify anatomical structures and use the slider bars to better understand spatial relationships, especially those superficial to deep, amongst structures. The 3D models in APR allow for an even better appreciation of spatial relationships as students and instructors alike can interact and rotate the 3D model for a specific anatomical region.
Discover the basic functionality of the APR 3D models using the Head and Neck model. You can see how different parts of the model can be set to visible, transparent, or hidden, how the model can be moved around, and how a user can use either “Tag mode” or select a structure from the menu list to highlight it on the model.
Helpful Features for Interacting with 3D Models: Create link
The “Create link” feature in the APR website allows a user (instructor or student) to configure the 3D model in any manner they wish and then create a link that bookmarks a specific configuration and orientation of the model. Simply configure the model in any manner you wish by changing the view and hiding different components (typically body systems) of the model and then select the “Create link” icon from the left-hand navigation menu.
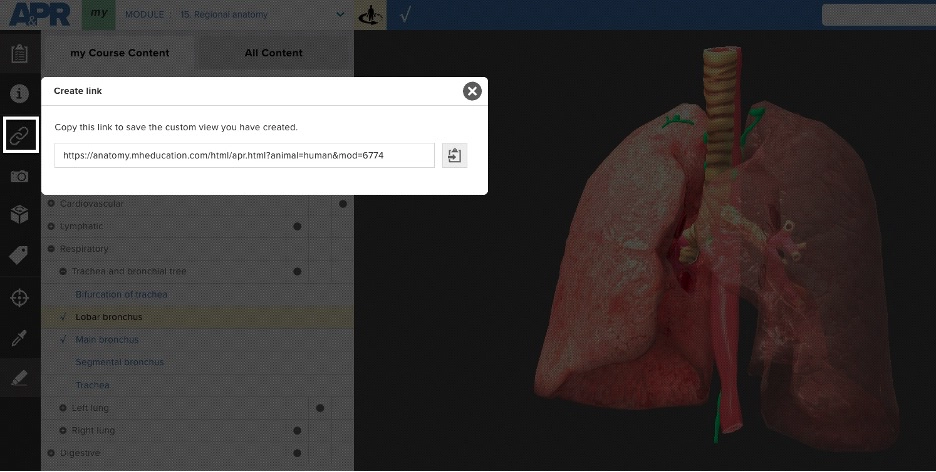
Here’s how the Thorax 3D model can be configured and then a custom link saved to this specific view.
Instructors can use this feature to curate a list of specific configurations and views of different models, then save in a document or even bookmark in their web browser. Once a user logs into Connect or APR and then selects one of these links, APR will open to the 3D model exactly in the state that was present when the link was created. An instructor can use these custom 3D model links during lecture and lab for demonstration and instruction purposes, or when using the 3D models to make recorded videos.
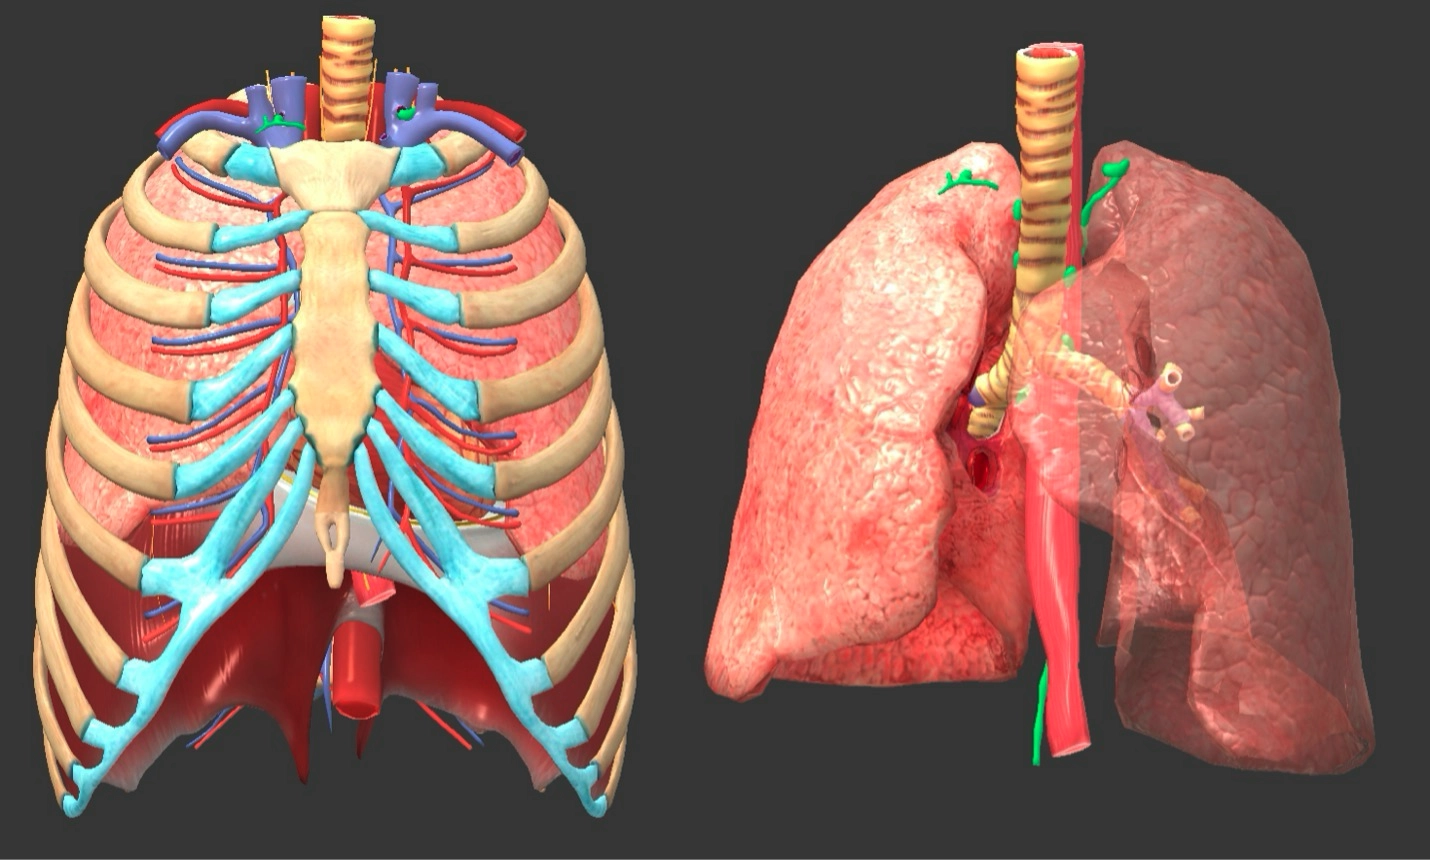
The image below is a comparison of the default view of the Thorax 3D model on the left and a customized view on the right. The model on the right has the skeletal, cardiovascular, and nervous systems hidden and the left lung set to transparent. The model on the right is also slightly rotated to better show the highlighted left and right lobar bronchi. Try out this custom thorax view yourself.
The ability to use the create link feature for customized views of the 3D model is also available to student users of the APR website. Students can create their own list of custom configurations as study resources.
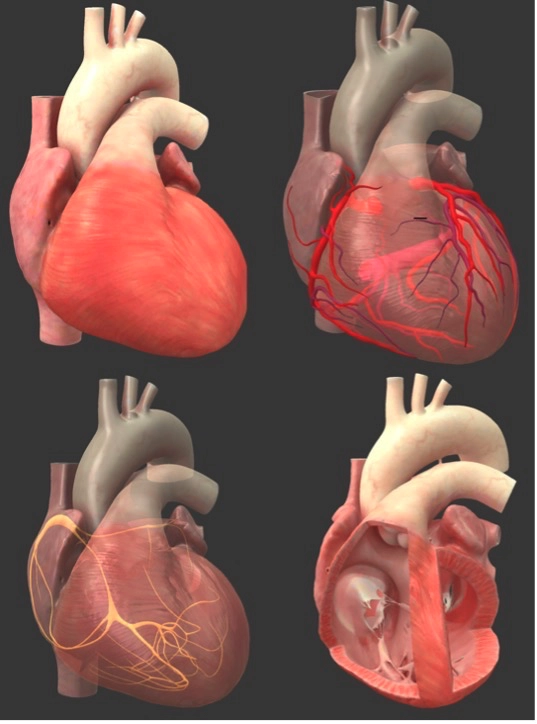
You could also leverage this feature for active learning activities. Assign small groups of students a topic to teach to the rest of the class using one of the 3D models. The students can create and save link(s) to the 3D model they will use to teach their classmates. For example, a group could be tasked with teaching their classmates the external anatomy of the heart, coronary vessels of the heart, the conduction system, and the internal anatomy of the heart. The image below shows the configurations of the heart model that the group selected as the starting point to teach each topic to their classmates.
Find Structure
When a structure in the 3D model study area is selected from the menu it highlights, but what if this structure is not something that is found superficially? In this case, the typical novice learner won’t know where to find this structure. A beneficial feature for novice learners is the “Find structure” button (target icon) in the left-hand menu of the 3D model viewer. Clicking this button when a structure is highlighted will change the configurations and orientation of the model to give a student the best view of this structure.
For example, if a student opens the Abdomen 3D model and has the thoracic duct highlighted in the list of lymphatic structures, they can click the “Find structure” button and the model will change to give the student the best view of this structure. The student can now interact with the 3D model on their own or click the “Reset model” button (box icon) on the left-hand menu to reset the model to the original view. Watch this demonstration that shows the Find structure and Reset model buttons in action.
Dissection views
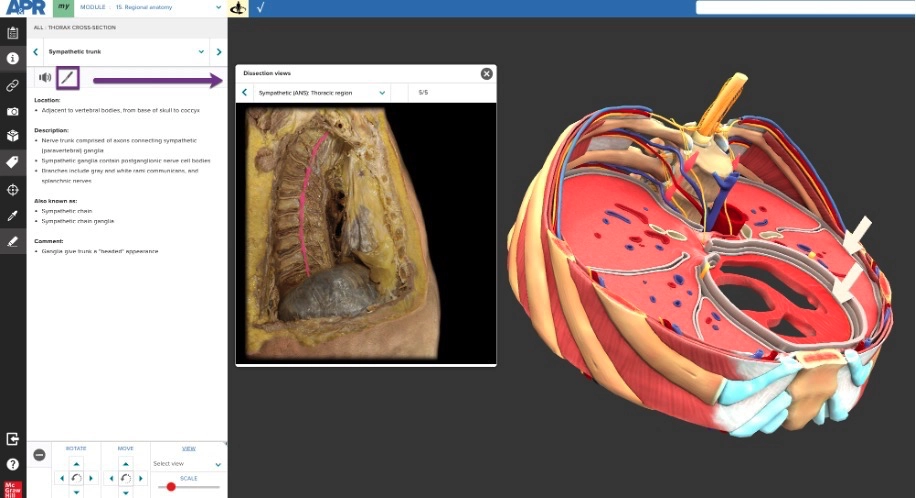
Another useful feature in the 3D model viewer is the “Dissection views” button. When a structure is highlighted and structure information is displayed, this button can be selected. This opens a smaller window that shows photos of this structure from the dissection study area. This feature is useful because it offers more context to a novice learner by providing a two-dimensional photo for comparison to the 3D model. In the image below, the “Dissection views” button (scalpel icon) is indicated and you can see how this feature is used when looking at the sympathetic trunk in the Thorax cross-section 3D model.
3D Models Can Be Assigned
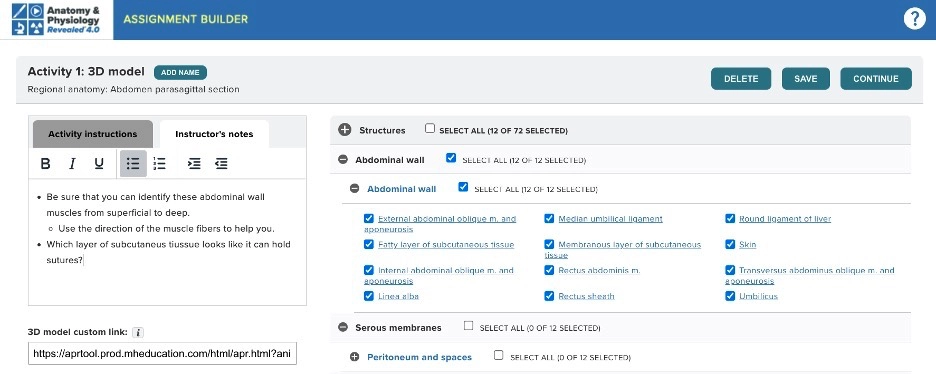
The 3D models can be included in APR Connectâ Assignment(s) that you create for your students. This means when you are building these customized anatomy modules, these activities can include one of the 3D models.
You have complete control over the content your students need to study when you include a 3D model in an APR Assignment. You also have the option to have students start with the standard default view of the 3D model or copy and paste one of your 3D model custom links for them to start from a different configuration of the model.
In the video below, the Abdomen parasagittal section 3D model is assigned an activity. There are 72 different structures available in this model, but the instructor just selects 12 structures of the abdominal wall to assign to students. The instructor also makes the decision to have students use the model from a custom view instead of the standard view, so the custom ‘Create link’ is copied and pasted into the appropriate field in the assignment creation page. You can also use the “Instructor’s notes” area to write custom notes to your students. You may want to remind them of a specific spatial relationship, give them a tip for identifying structures, or even ask them a thought-provoking question. Students will see this note when they begin the 3D model activity in their assignment.
https://video.mhhe.com/watch/1kE2F2EnNz7BebzHFmG9kJ?
3D Model Quizzes
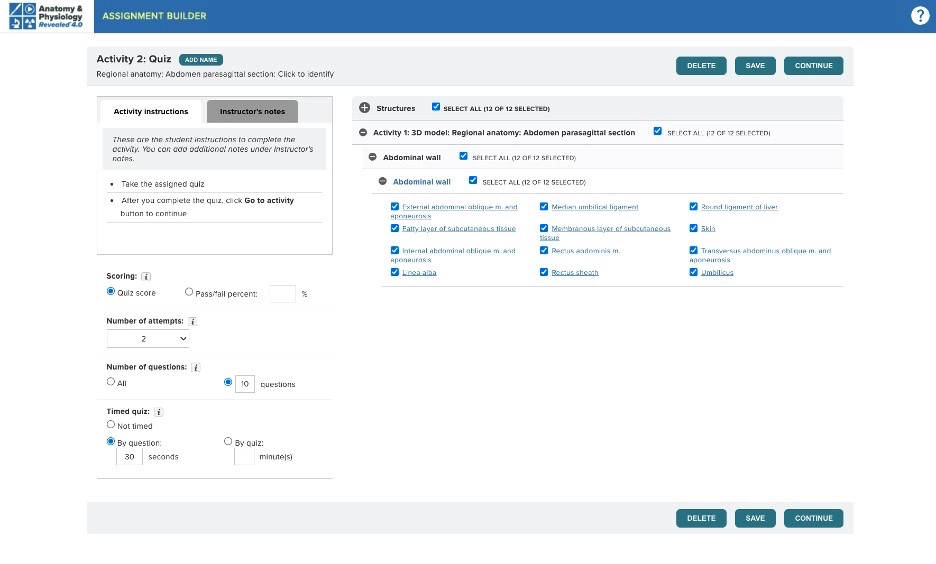
All the structures in the 3D models have associated quiz questions, thus instructors can create a 3D model quiz activity in APR Connect Assignments. Using the option of “Quiz” or “Quiz (from assigned activities)” in the activity type menu, instructors can select the structures they would like to have included in a quiz. Available quiz types include multiple choice, 'click to identify', or lab practical. Additionally, there are several different quiz settings available for the 3D model that include scoring, number of attempts and whether the quiz is timed or not. In the image below, you can see this instructor selected a ‘click to identify’ quiz that will randomly ask questions about 10 of the 12 assigned structures. The student has two attempts at the quiz and will have 30 seconds per question.
In the video below, you can see an example of a student answering a click to identify quiz in an APR Connect Assignment using the female perineum and pelvis model.
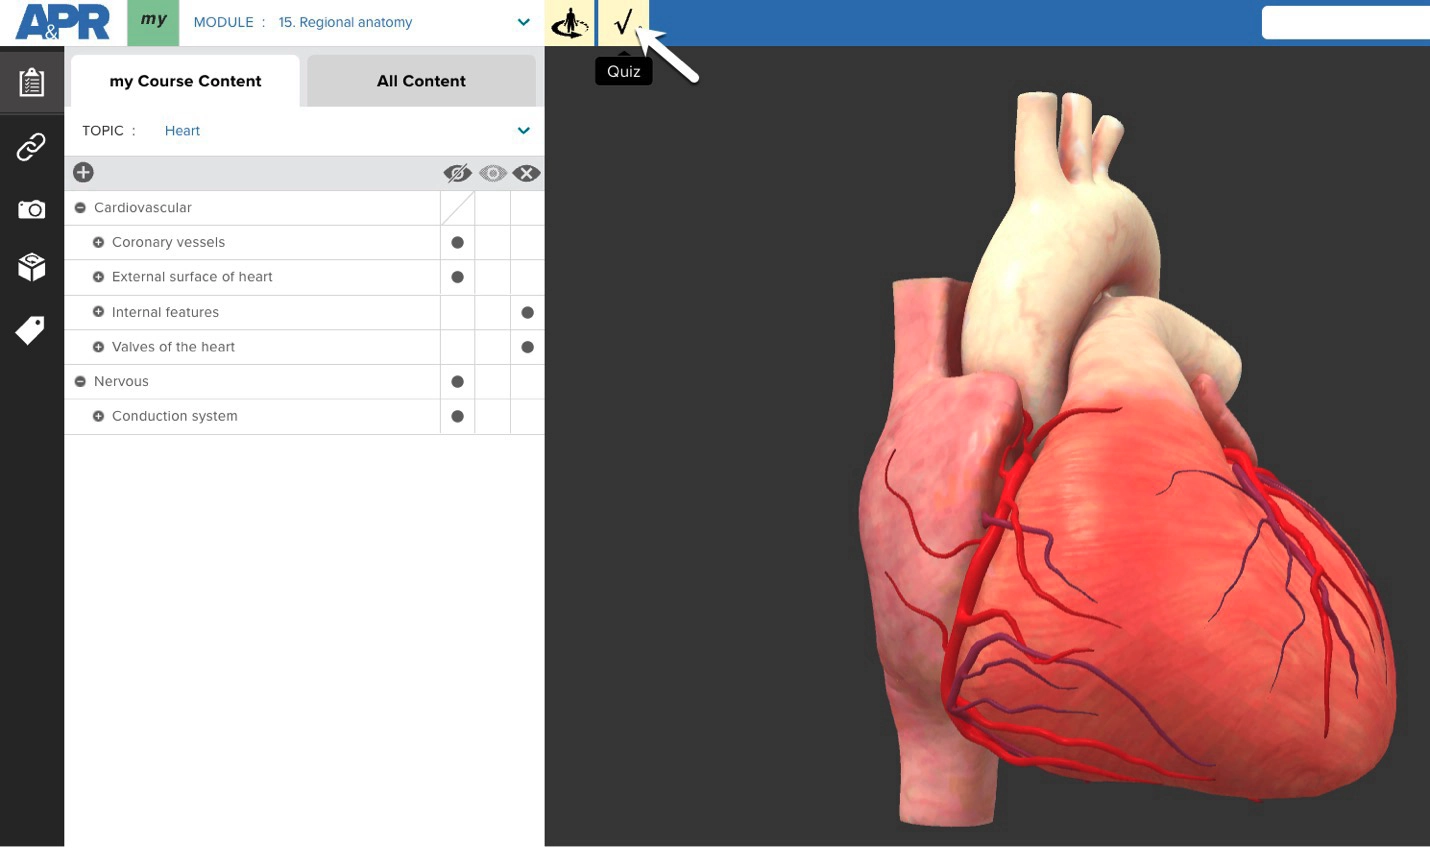
Additionally, students who are using the APR website can also quiz themselves on the available 3D models by simply clicking the checkmark icon (quiz). This allows students to practice quizzing themselves on the structures in the various 3D models.
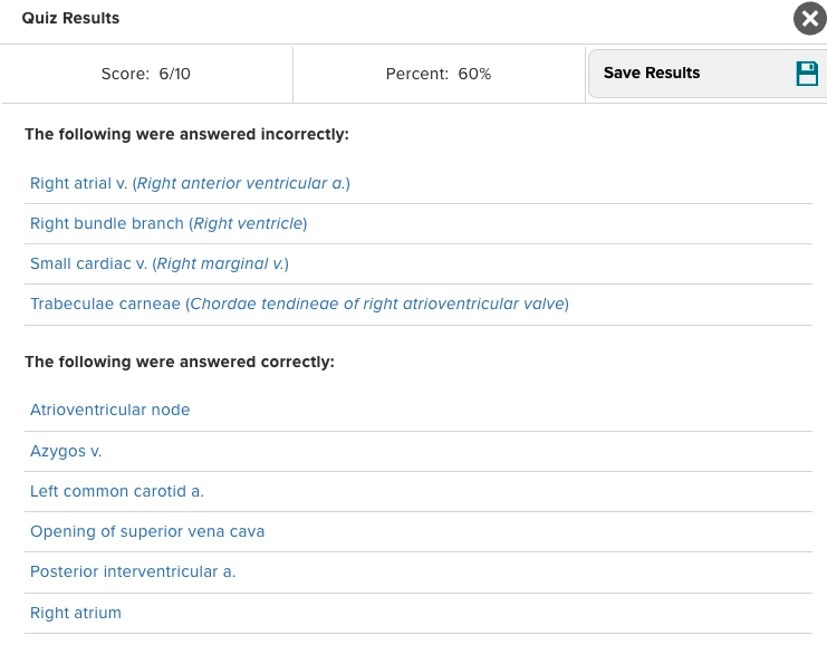
Regardless of whether a student takes an assigned quiz as part of an instructor-created assignment or a self-quiz on the website, students can learn from their mistakes.
A student will receive immediate feedback after each question as to whether their answer is correct or incorrect. At the end of the quiz, they also see a display of their results that lists structures answered incorrectly and correctly under two different headings. For the incorrectly answered structures, the student’s incorrect answer is listed in italics and parentheses after the actual structure name. These quiz results provide a student with an actionable report to be used for further studying of these structures. An example of these quiz results is displayed below.
Helpful Resources for Using the 3D Models
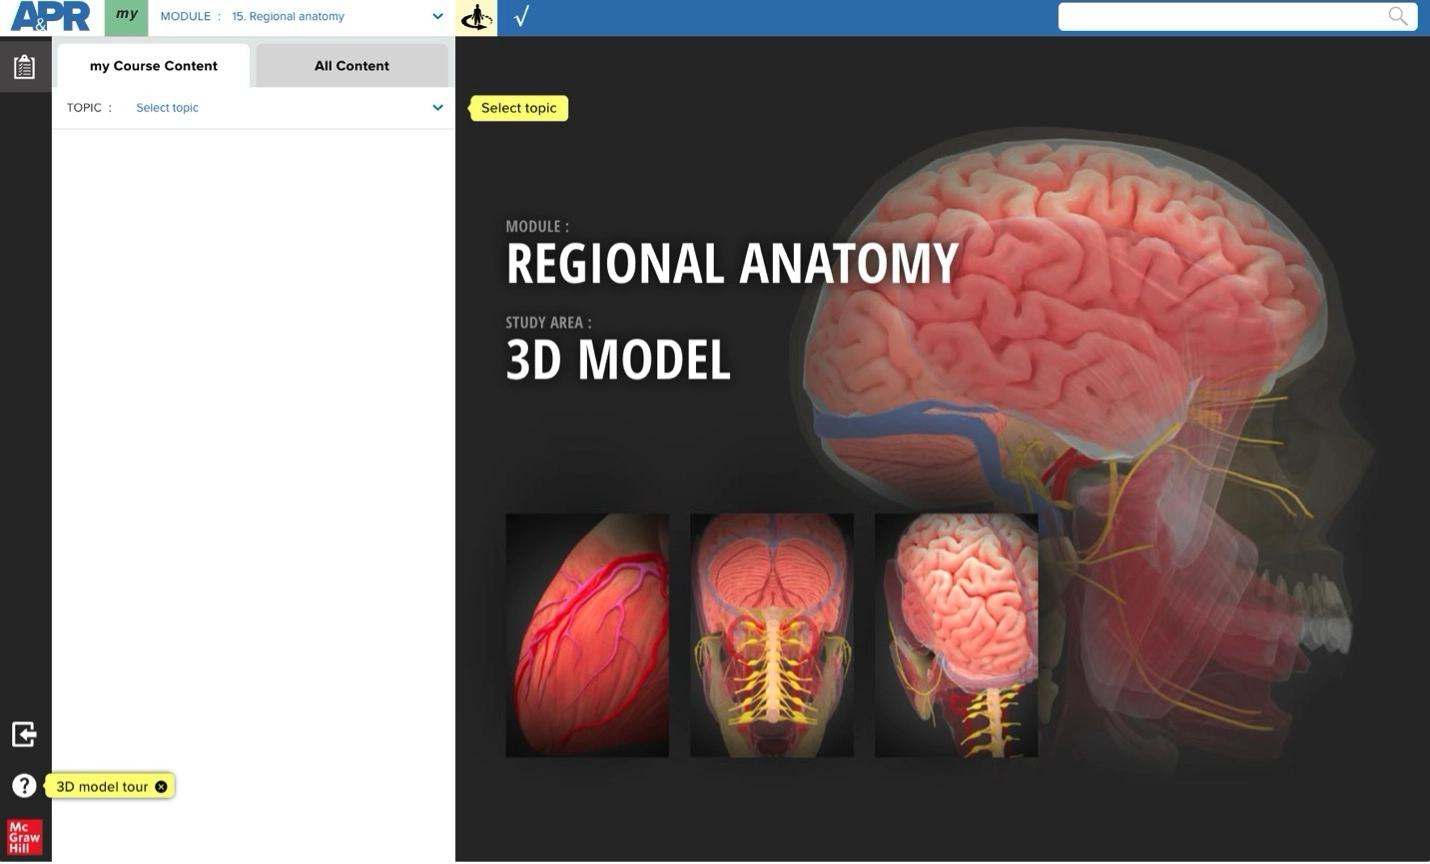
The first time you land on one of the 3D model pages, you are alerted in the lower left-hand corner of the screen about the available 3D model tour that provides a tutorial on how to navigate the 3D model and use all the available features.
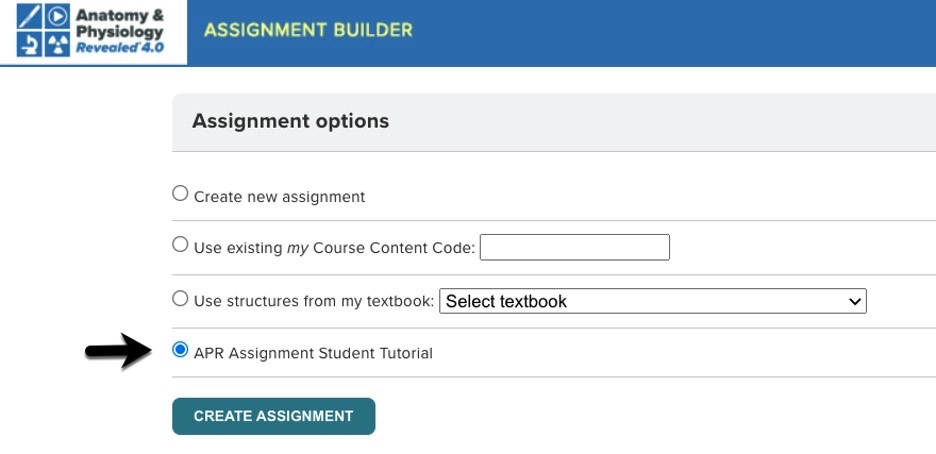
If you use the 3D models in the APR Connect Assignment it is a best practice to assign the available APR Assignment Student Tutorial to your students as the first assignment to complete. One of the activities in this orientation assignment includes the 3D model tutorial.
For complete details on how to create an APR Connect Assignment, how-to documents, and videos for instructors and students, click here.
I hope you find the ideas in this article helpful for providing students with an engaging and explorative way to better understand spatial relationships using the APR 3D models.
Please share your favorite ideas with us: Michael.koot@mheducation.com!
Listen to the Succeed in A&P Podcast for more about our 3D models and how they were built:

Dr. Michael Koot is a Senior Director of Digital Content and Pedagogy for McGraw Hill. Before joining McGraw Hill, Michael taught human anatomy at Michigan State University where he won a campus-wide teaching with technology award. At McGraw Hill, he works at the intersection of content, pedagogy, accessibility, and technology with both internal and external stakeholders to develop effective teaching and learning tools.