
Add and Remove Students from a ConnectED Class Roster
Manage the class roster in ConnectED, including enrolling and removing students.
Tags
- Customer Support
- PreK-12
- Classroom Teacher
- Preschool
- Elementary School
- Middle School
- High School
- Direct Login & Auto-Rostering
- Direct Login & Manual-Rostering
- SSO & Auto-Rostering
- SSO & Manual-Rostering
- Core
- Literacy
- Math
- Science
- Social Studies
- Health
- Visual & Performing Arts
- World Languages
- Glencoe Algebra 1 2014
- Glencoe Algebra 1 2018
- Glencoe Algebra 2 2014
- Glenoce Algebra 2 2018
- Glencoe Math
- Glencoe Geometry 2014
- Glencoe Geometry 2018
- Glencoe Math Course 1
- Glencoe Math Course 2
- Glencoe Math Course 3
- Glencoe Math Accelerated
- McGraw Hill My Math 2013 & 2016
- McGraw Hill My Math 2018
- McGraw Hill My Math
- Glencoe Science
- Glencoe Science 2017
- Inspire Science 2017
- iScience 2017
- Networks 2014 (K-5)
- Asi se Dice 2016
- Class Management
- Getting Started & Orientation
- Back-to-School Setup


View the demo in a separate tab.
View the Spanish version of the demo.
Note: If you are associated with a managed account and you need students added or removed from classes created for you by the district, you will need to reach out to your Organization Administrator. You will only be able to add and remove students from classes you have manually created.
Article Contents
Add Students to Roster
- SSO or sign in at my.mheducation.com.
- Click on the class card.
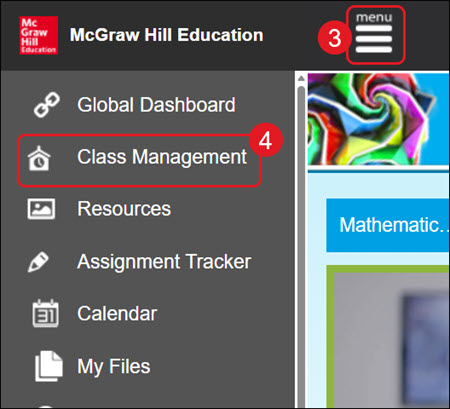
- Click on the Menu button at the top-left.
- Click on Class Management.
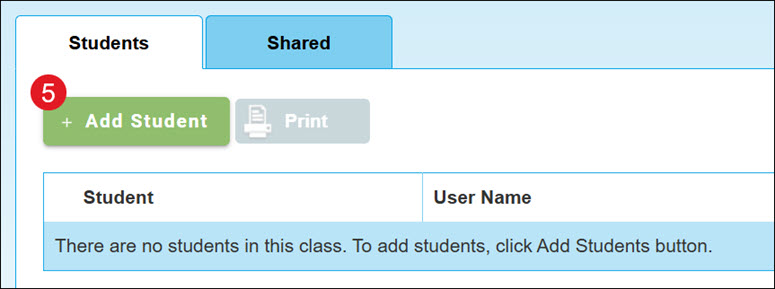
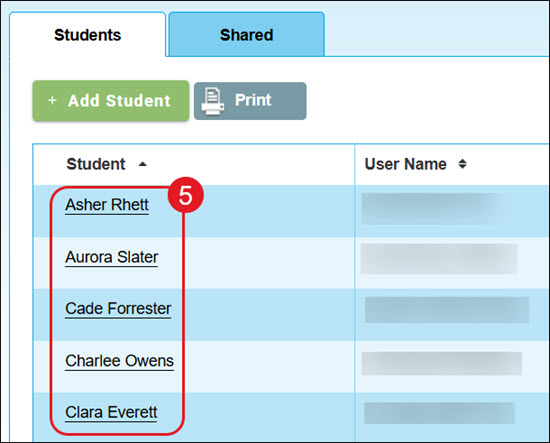
- Click the +Add Student button.
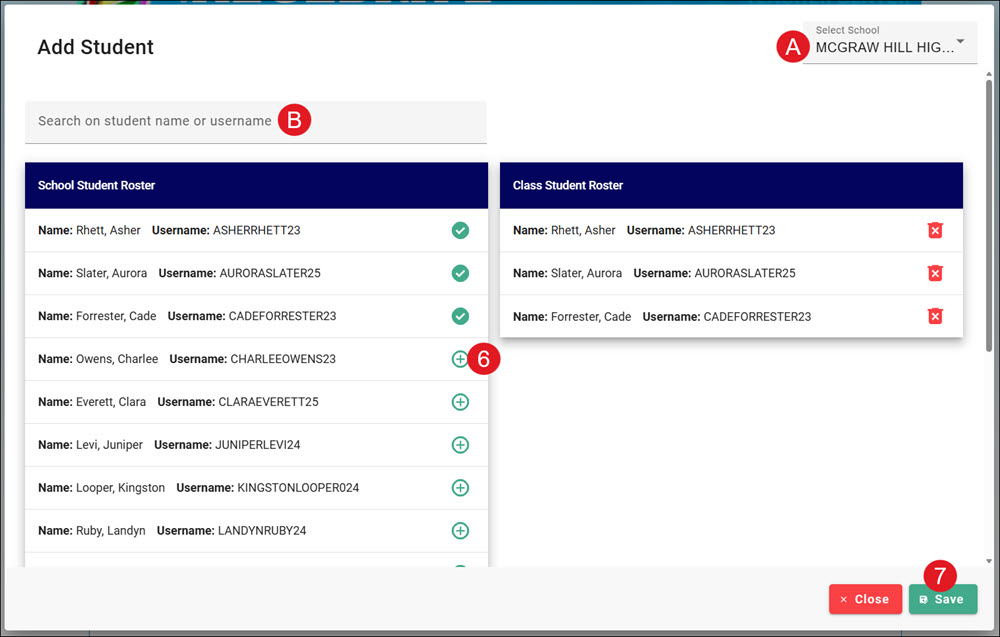
A. If assigned to multiple schools, select the School the student(s) are associated with.
- Click the + (plus) icon in the School Student Roster box next to the students you want to add to the class.
B. Use the Search field to locate a specific student.
- Click the Save button.
Edit Student Profile
- SSO or sign in at my.mheducation.com.
- Click on the class card.
- Click on the Menu button at the top-left.
- Click on Class Management.
- Click on a Student name.
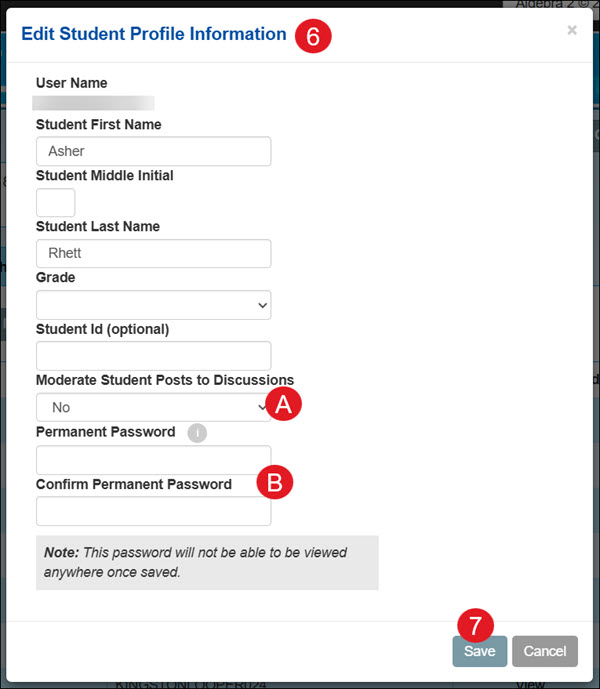
- On the Edit Student Profile Information pop-up, make preferred changes.
Note: The changes you make to the student Name, Grade, Student ID, and Password fields apply to all teachers and classes the student is assigned to.
A. For more information about the Moderate Student Posts to Discussion option, refer to the Create and Respond to Discussions as a Student article.
B. For changes to the Permanent Password, refer to the McGraw Hill Password Policy article.
- Click the Save button.
Delete Students from Roster
Keep in mind, when deleting a student from the class, it also deletes all assignments and data for the student.
- SSO or sign in at my.mheducation.com.
- Click on the class card.
- Click on the Menu button at the top-left.
- Click on Class Management.
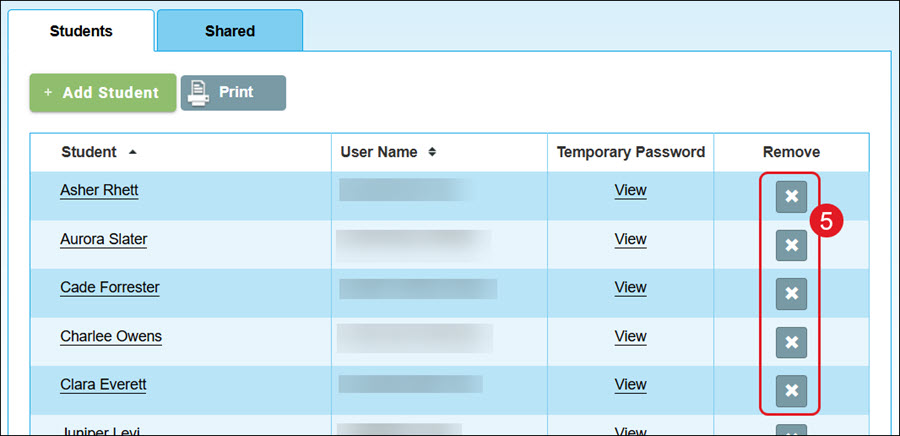
- Click the X icon in the Remove column.
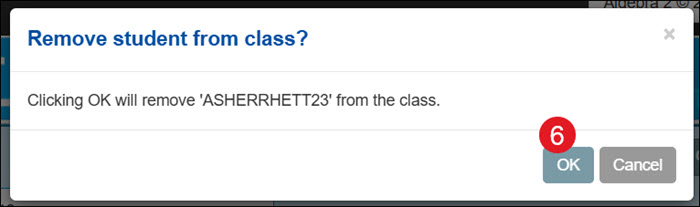
- On the Remove student from class pop-up, click the OK button to confirm.
Alternative Option:
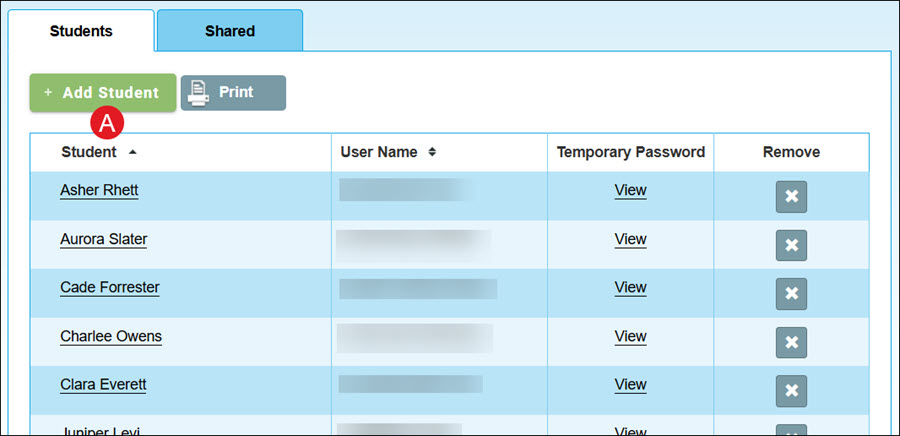
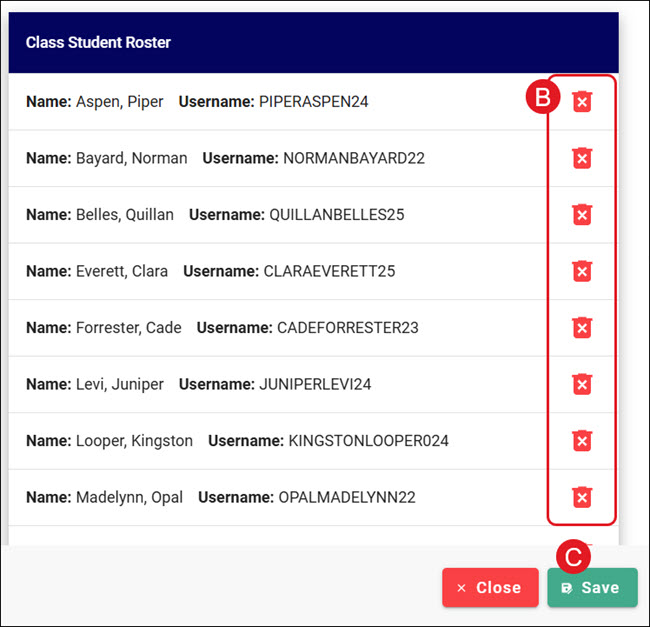
- Click the +Add Student button.
- On the Add Student pop-up, click the X (trash can) icon next to the student in the Class Student Roster box.
- Click the Save button.
Product-specific Class Management Articles
Manage Everyday Mathematics® 4 Classes
Manage Networks Course Classes
Manage Number Worlds/Building Blocks 2015 Classes
