Create and Edit a Class
Steps on how to create and customize new classes.
- Customer Support
- PreK-12
- Classroom Teacher
- Preschool
- Elementary School
- Middle School
- High School
- Direct Login & Auto-Rostering
- Direct Login & Manual-Rostering
- SSO & Auto-Rostering
- SSO & Manual-Rostering
- Core
- Intervention
- Supplemental
- AP, Honors & Electives
- Career & Technical Education
- Literacy
- Math
- Science
- Social Studies
- Health
- Visual & Performing Arts
- World Languages
- AP Biology
- AP Chemistry
- AP History & Geography
- AP Psychology
- AP Economics
- AP African American Studies
- AP Precalculus
- AP Statistics
- AP Computer Science
- AP Language and Composition
- AP Public Speaking
- AP Music Theory
- 5 Steps to a 5 - AP Test Prep
- Glencoe Health 2022
- Teen Health 2021
- Arrive Math
- Building Blocks 2024
- Building Blocks PreK 2025
- Number Worlds 2024
- SRA Reading Laboratory 2025
- SRA Reading Mastery Transformations
- Achieve3000 Literacy
- Actively Learn
- McGraw Hill Literacy Emerge!
- McGraw Hill Literacy Summit!
- McGraw Hill Literacy Soar!
- Open Court Reading 2025
- Redbird
- StudySync 2021
- ALEKS
- ALEKS Adventure
- CA Reveal Math (K-12)
- Illustrative Math
- Redbird Math
- Reveal Math (K-12)
- CA Inspire Science 2020
- FL Science 2025 (K-12)
- Inspire Science 2020
- TN Science (K-12)
- TX Science 2025 (K-12)
- CA Impact 2019
- FL Social Studies 2024 (K-12)
- Impact Social Studies
- McGraw Hill Social Studies
- All Sorts 2026 (K-5)
- Asi se Dice 2024
- CTE - Business, Marketing, and Finance
- CTE - Health Science
- CTE - Computing and Technology
- CTE - Agriculture
- CTE - Culinary Arts
- CTE - Early Childhood Education
- CTE - Criminal Justice
- Glencoe Health 2014
- McGraw Hill Health 2014
- 2Inform
- Building Blocks 2015
- Connecting Math Concepts
- Number Worlds 2015
- Corrective Reading
- Early Interventions in Reading
- Spelling Mastery
- WonderWorks 2022 & 2014
- Maravillas 2020 & 2017
- OCR Foundational Skills Kit
- OCR Word Analysis Kit
- Open Court Reading 2016, 2018, 2023
- StudySync
- StudySync 2015 & 2017
- Wonders
- Wonders 2014
- Wonders 2023 2020 2017
- Wonders Balanced Literacy 2016
- Wonders EL 2016
- World of Wonders 2017
- Core Plus Math 2015
- Everyday Mathematics 4 (K-6)
- Glencoe Algebra 1 2014
- Glencoe Algebra 1 2018
- Glencoe Algebra 2 2014
- Glenoce Algebra 2 2018
- Glencoe Math
- Glencoe Geometry 2014
- Glencoe Geometry 2018
- Glencoe Math Course 1
- Glencoe Math Course 2
- Glencoe Math Course 3
- McGraw Hill My Math
- McGraw Hill My Math 2013 & 2016
- McGraw Hill My Math 2018
- Pre-Algebra 2012
- Glencoe Science 2017
- Glencoe Science
- Inspire Science 2017
- iScience 2017
- Networks
- Networks 2014 (K-5)
- Networks 2014 & 2016
- Networks 2018
- Music! Its Role
- Spotlight on Music
- Asi se Dice 2016
- Texas Math
- Level Up K–5
- Level Up 6–8
- Level Up 9–12
- Class Management
- Getting Started & Orientation
- Back-to-School Setup


View the demo in a separate tab.
View the Spanish version of the demo.
Article Contents
Create Multiple Classes for the Same Program
Add and Remove Students from an Open Learning Class Roster
Add and Remove Students from a ConnectED Class Roster
Assign the ConnectED Student Edition
Create a New Class
- SSO or sign in at my.mheducation.com.
If you're assigned to multiple schools, you will need to toggle to the school you want the class associated with.
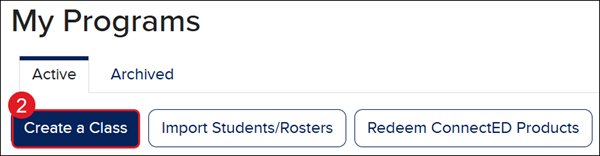
- Click the Create a Class button.
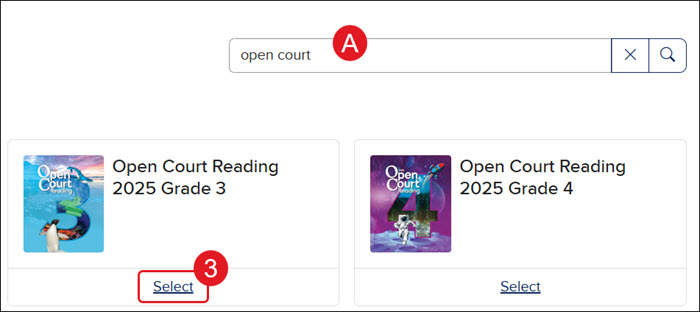
A. Use the Search by Product name field to locate a specific program.
- Click on the Select link for the program.
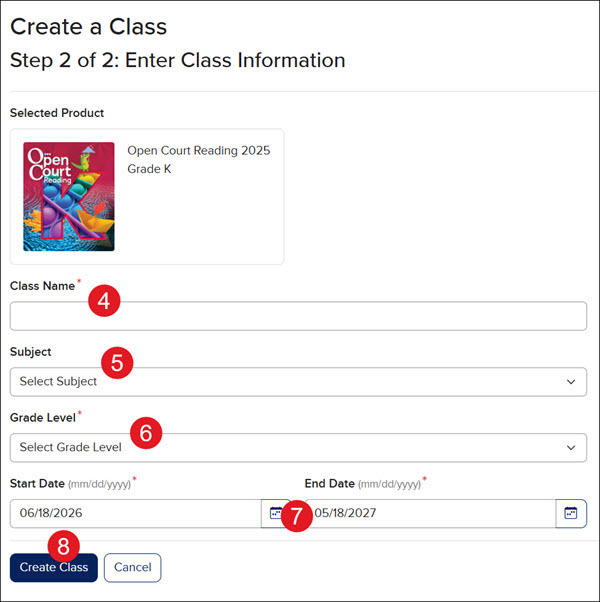
- Enter a Class Name.
- Select a Subject from the drop-down menu.
- Select a Grade Level. This can be different from the grade level the students are assigned to.
- Select a Start and End Date for the class.
Note: Students will be able to access the class three days before the selected start date. We suggest selecting an end date that is the last day of class or close to it.
- Click the Create Class or the Redeem & Create Class button.
The button depends on the program that is being redeemed to the account.
Create Multiple Classes for the Same Program
This process will vary based on whether you are using an Open Learning program or a ConnectED program.
How to identify Open Learning vs ConnectED programs:
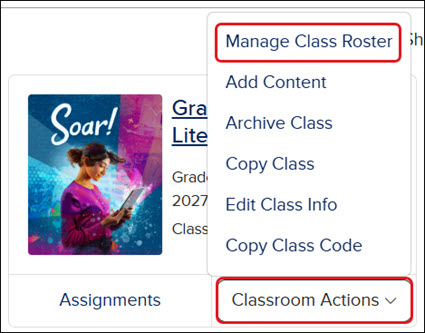
Open Learning programs will have Manage Class Roster when you click on the Classroom Actions button.
For Open Learning programs, you'll need to follow the steps in the Create a New Class section for each class you need.
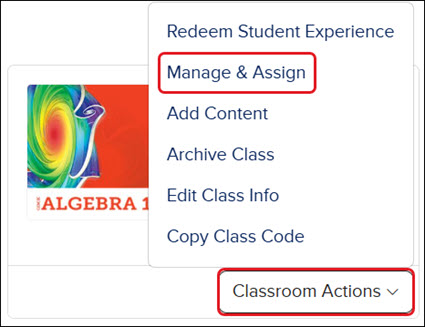
ConnectED programs will have Manage & Assign when you click on the Classroom Actions button.
For ConnectED programs, create your first class by following the Create a New Class steps. For each additional class, follow the steps below.
These steps will vary based on the ConnectED program you are using.
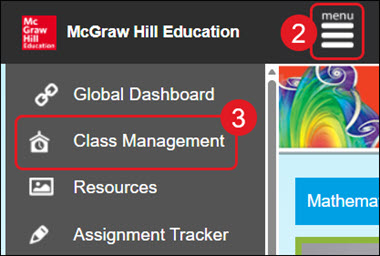
- Click on your class card to open your Teacher Edition.
- Click on Menu at the top left.
- Click on Class Management.
For Wonders, hover over Manage & Assign and click Class Details from the menu.
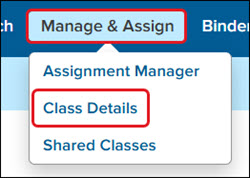
For Networks, click on Manage & Assign and then My Classes.

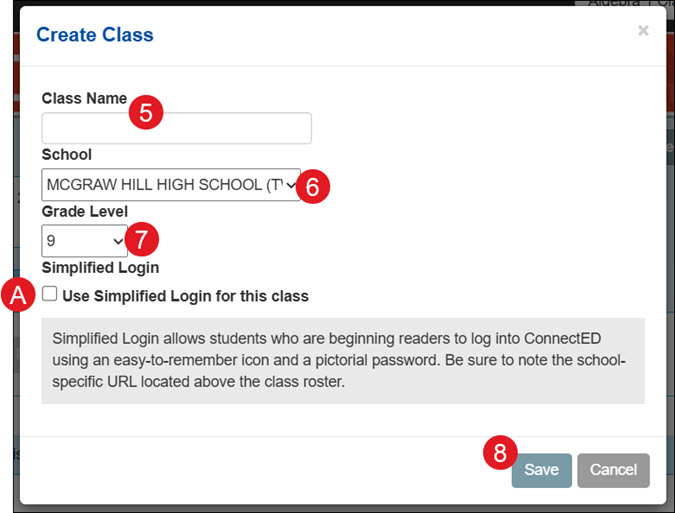
- Click the Create Class or Add Class button.

- Enter a Class Name.
- If assigned to multiple schools, select the correct School from the drop-down.
- Select the Grade Level.
A. Check the Use Simplified Login for this class if the students are to use pictorial passwords instead of a username and password.
- Click the Save button.
The new class will show within your Teacher Edition as well as on your My Programs page.
Edit an Existing Class
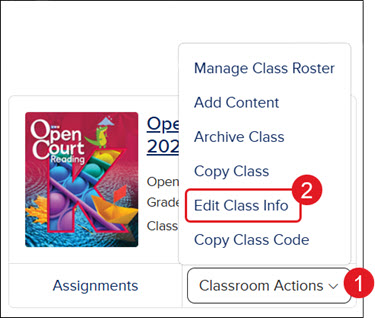
- On the My Programs page, click the Classroom Actions button for the class.
- Click on Edit Class Info from the menu.
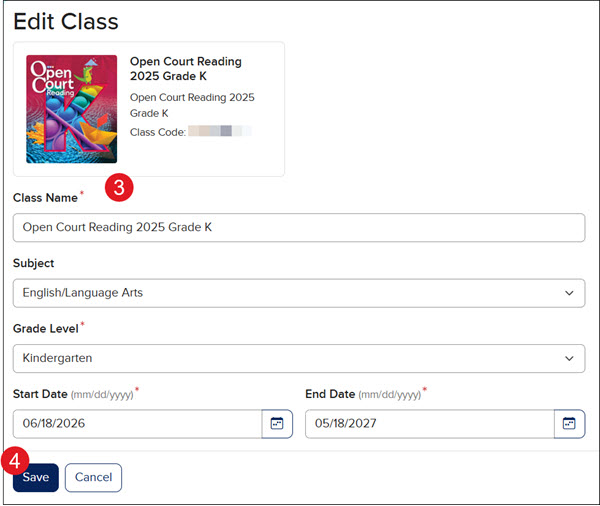
- Make any preferred changes.
Note: If the Start Date of the class has passed and you need to select a new one, you have to create a new class.
- Click the Save button.
If you're associated with a managed district, for any classes created by your district that are active, you will only be able to change the Display Name for the class.
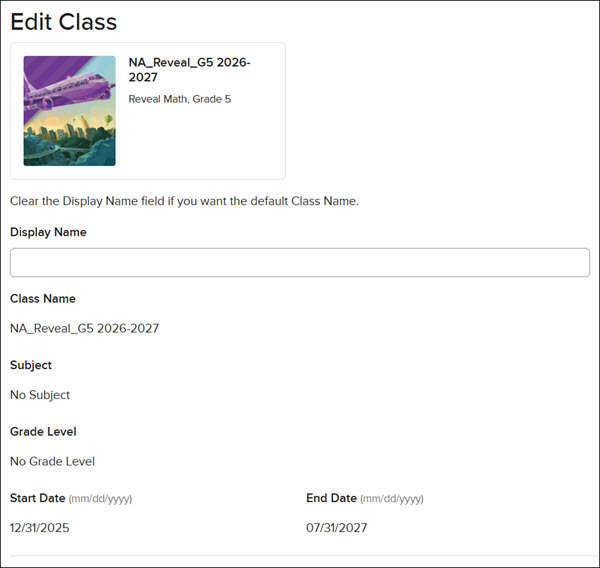
Edit Class Settings
These steps are only available for Open Learning programs. Refer to the Identifying My Learning Environment article to review the different programs available.
- On the My Programs page, click the Classroom Actions button for the class.
- Click on Manage Class Roster from the menu.
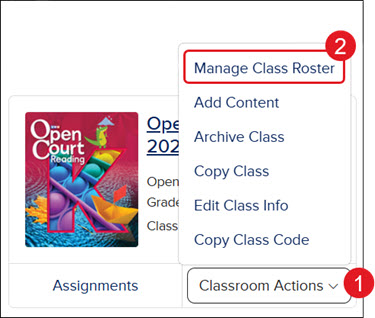
You can also click on the class and then click on Roster from the navigation menu.
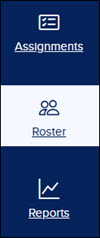
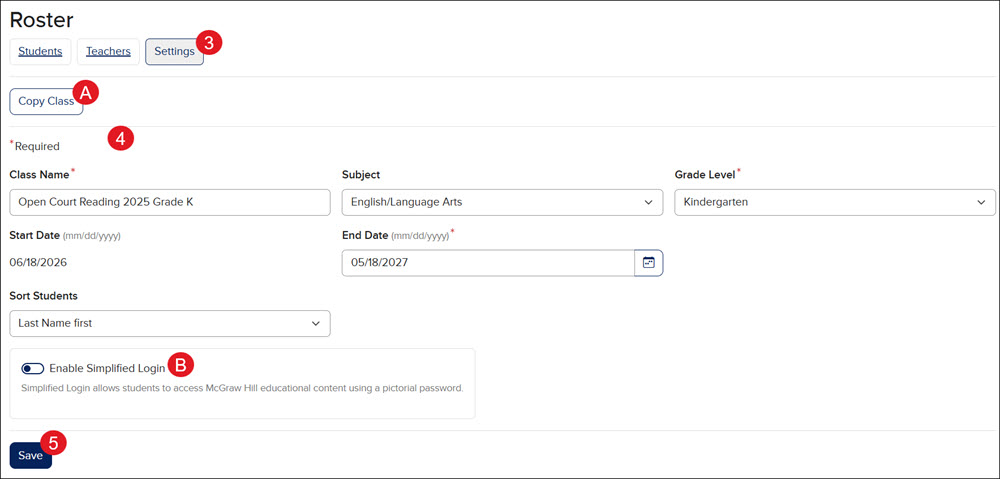
- On the Roster page, click the Settings button.
- Make preferred changes.
A. For information on the Copy Class option, refer to the Copy an Open Learning Class article.
B. For additional information on enabling Simplified Login, refer to the Enable or Disable Open Learning Simplified Login article.
- Click the Save button.