Create and Move Students to Sub-Classes in New ALEKS
Create sub-classes and move students in the new ALEKS view to support grouping and instruction.
- Customer Support
- PreK-12
- Classroom Teacher
- Elementary School
- Middle School
- High School
- Direct Login & Auto-Rostering
- Direct Login & Manual-Rostering
- SSO & Auto-Rostering
- SSO & Manual-Rostering
- Supplemental
- Math
- ALEKS
- ALEKS Adventure
- Classroom Management


View the demo in a separate tab.
View the Spanish version of the demo.
Article Contents
Create a New Sub-Class Using a Master Template
Create a New Sub-Class
1. SSO or log in at my.mheducation.com.
2. Create and roster an ALEKS class.
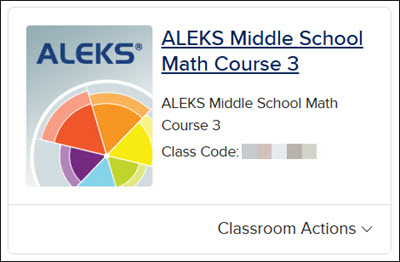
3. Click on the ALEKS class tile to launch the course.
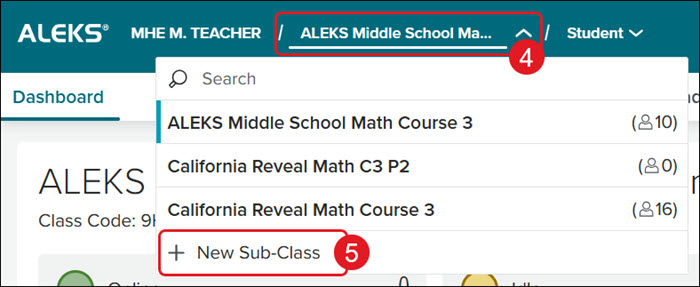
4. Click on the Class drop-down.
Note: Make sure to select the primary class from the drop-down first that you want the sub-class associated to.
5. Click on New Sub-Class from the menu.
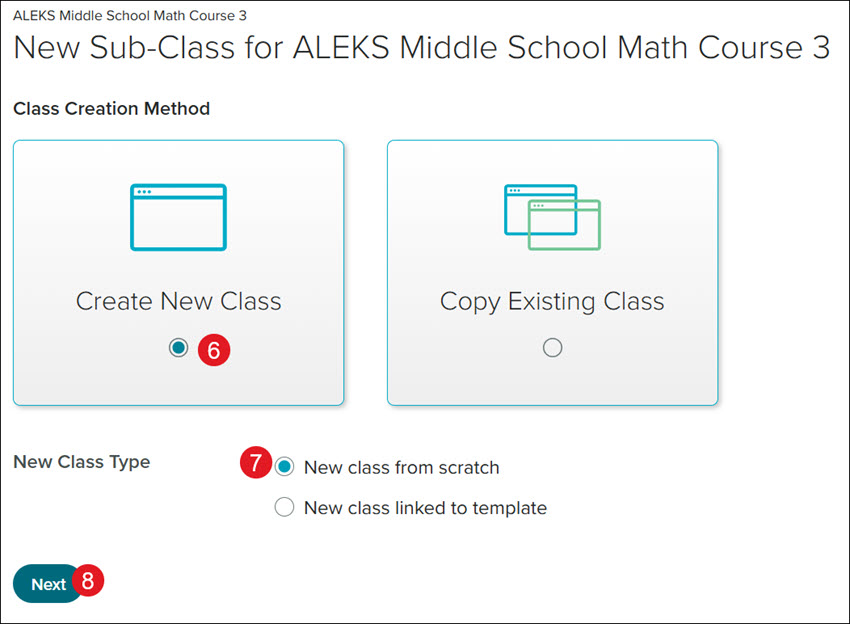
6. Click the Create New Class tile.
7. Click the New class from scratch radio button.
8. Click the Next button.
A. Enter a Period/Section name. This is optional but suggested to easily decipher between classes.
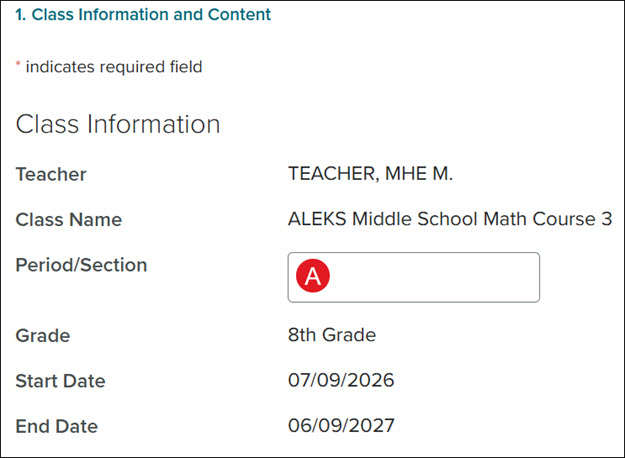
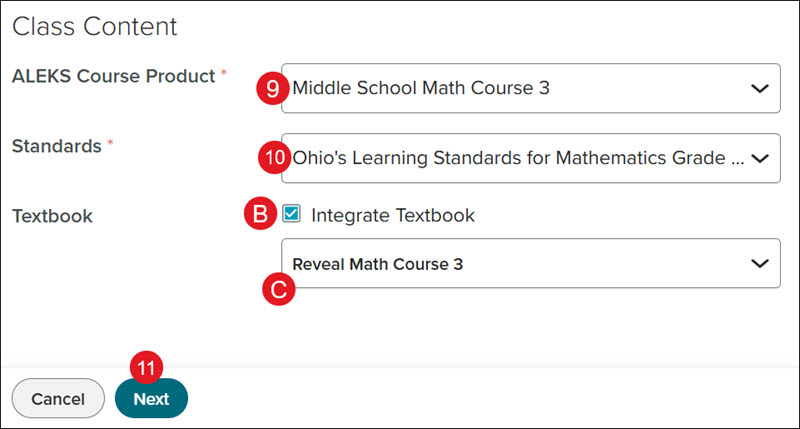
9. Select the ALEKS Course Product from the drop-down.
10. Select the Standards to associate to the class.
B. Check the Integrate Textbook box if you want students to have access to the textbook within ALEKS.
C. If the Integrate Textbook box is checked, select the Textbook from the drop-down.
11. Click the Next button.
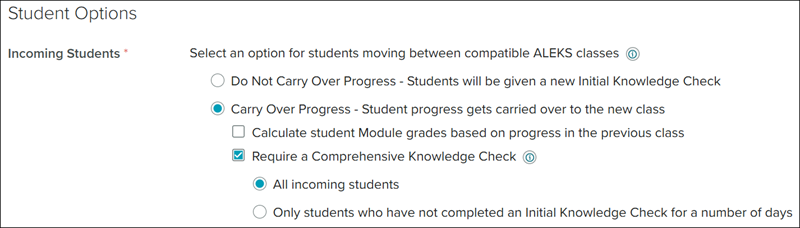
12. Select the preferred Incoming Students option.
If you select Carry Over Progress, click on the additional options you would like for how the student progress is calculated and if you want them to complete a Comprehensive Knowledge Check. This Knowledge Check consists of approximately 25 questions and will assess students on all of the material in the class.
If you select Do Not Carry Over Progress, the students will be prompted to complete a new Initial Knowledge Check.
13. For Unenrolled Students, select to Show or Hide Unenrolled Students in the class roster, dashboards, reports, and gradebook.

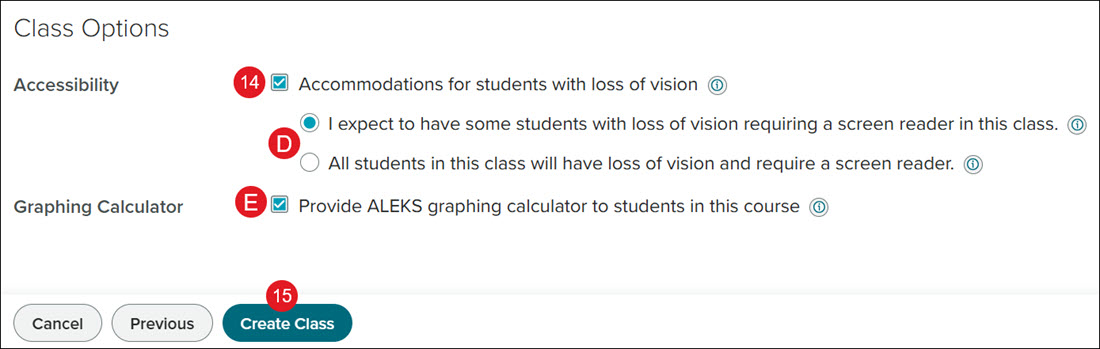
14. For Accessibility, check the box if you want to include accommodations for students with loss of vision.
Note: Changing the Accessibility options may impact the number of topics students see in their Pie.
D. If the box is checked, select the radio button to except some students or all students with loss of vision requiring a screen reader in the class.
Expect some students: Once students have registered, identify students with loss of vision under each student's Student Account Summary. These students will get a message to ask for assistance when they encounter non-accessible topics in this class.
All students: Non-accessible topics are removed from this class.
E. Check/uncheck the box to include/remove access to the Graphing Calculator.
Checking this box makes additional topics that require the use of a graphing calculator available. If this setting is unchecked, topics that require graphic calculators will be removed from the class.
Note: The Graphing Calculator will only show for certain class selections.
15. Click the Create Class button.
Create a New Sub-Class Using a Master Template
1. SSO or log in at my.mheducation.com.
2. Create and roster an ALEKS class.
3. Click on the ALEKS class tile to launch the course.
4. Click on the Class drop-down.
Note: Make sure to select the primary class from the drop-down first that you want the sub-class associated to.
5. Click on New Sub-Class from the menu.
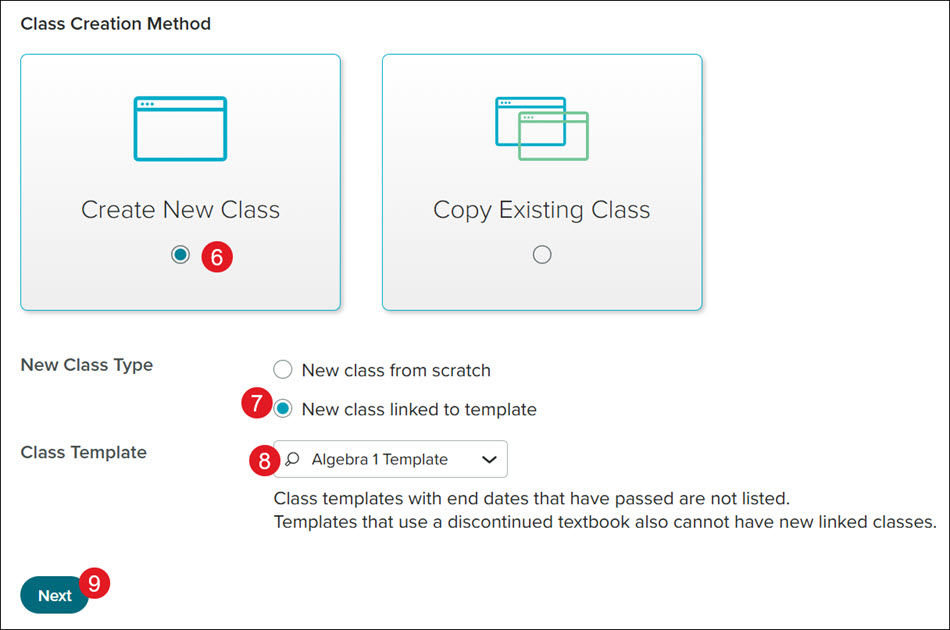
6. Click the Create New Class tile.
7. Click the New class linked to template radio button.
8. Select the Class Template from the drop-down.
If you do not have any options available in the drop-down, this means that a Master Template has not yet been created by your school or district administrator or the created templates have expired.
Note: Class templates can be linked to only one sub-class per primary class.
9. Click the Next button.
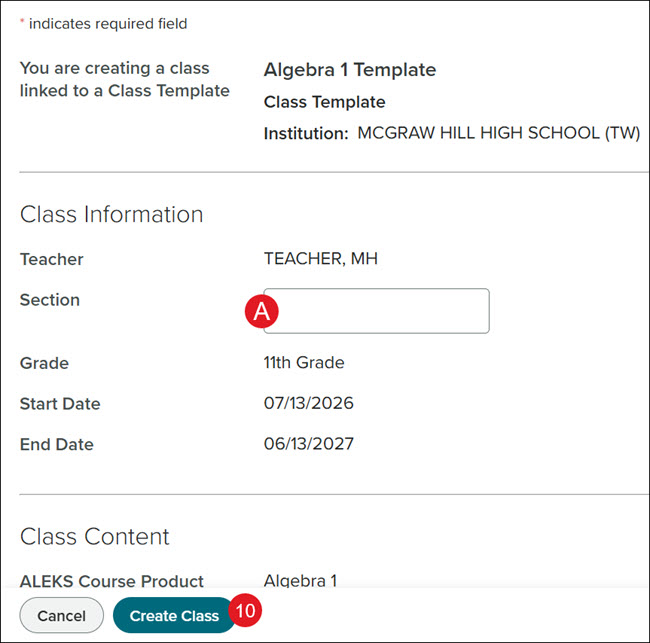
A. Enter a Section name. This is optional but suggested to easily decipher between classes.
Everything else is selected by the settings on the Master Template that was created by your administrator.
10. Click the Create Class button.
Copy an Existing Class
1. SSO or log in at my.mheducation.com.
2. Create and roster an ALEKS class.
3. Click on the ALEKS class tile to launch the course.
4. Click on the Class drop-down.
Note: Make sure to select the primary class from the drop-down first that you want the sub-class associated to.
5. Click on New Sub-Class from the menu.
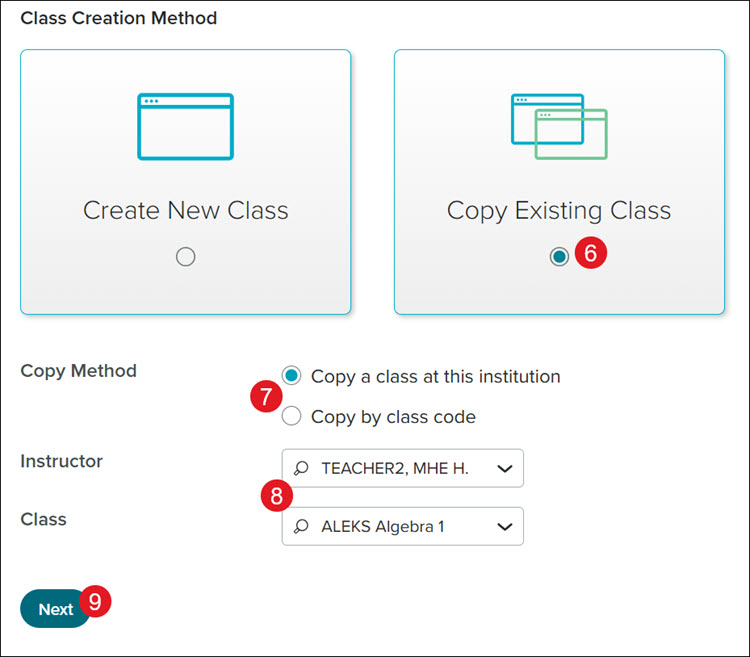
6. Click the Copy Existing Class tile.
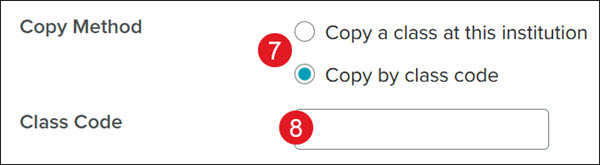
7. Select the Copy Method to Copy a class at this institution or Copy by class code.
If you are copying a class from another teacher in the same school, you will want to use the Copy a class at this institution option.
8. Select the Instructor from the drop-down.
If Copy a class at this institution was selected, you will also need to select the Class from the drop-down.
If you are copying a class from another teacher in a different school than the one you are associated with, use the Copy by class code option and enter the Class Code.
9. Click the Next button.
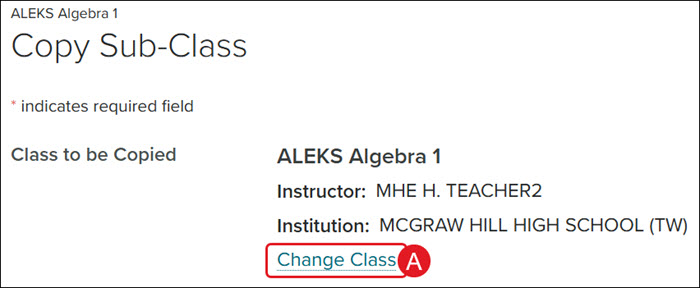
A. Click the Change Class link to associate a different class.
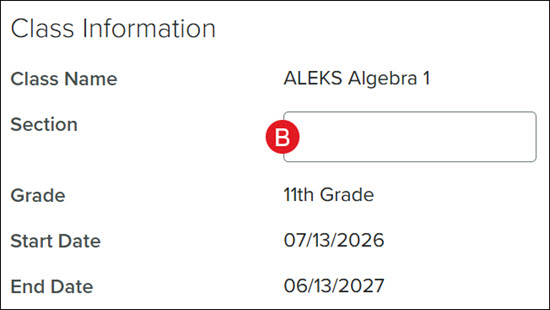
B. Enter a Section name. This is optional but suggested to easily decipher between classes.
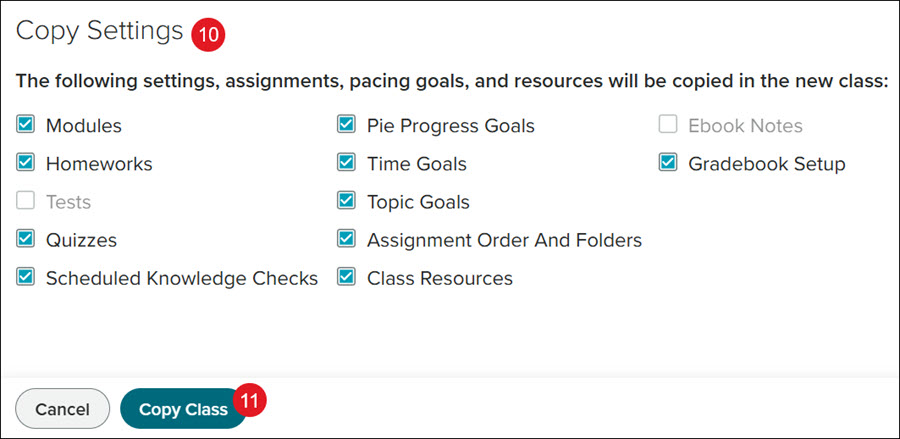
10. In the Copy Settings section, uncheck any settings, assignments, pacing goals, and resources you do not want copied over to the new class.
All available options are checked by default. If an option is grayed out, this means there is nothing to copy over for those sections.
11. Click the Copy Class button.
The page will automatically navigate to the class settings page.
Move Students to Sub-Class
1. SSO or log in at my.mheducation.com.
2. Create and roster an ALEKS class.
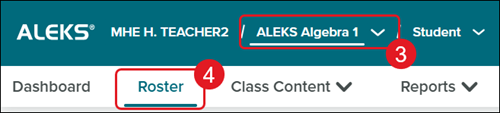
3. Select the Class from the drop-down that the students are currently associated with.
4. Click Roster from the navigation menu.
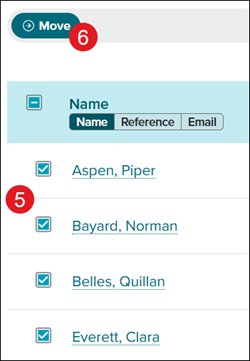
5. Checkmark the students you want to move.
6. Click the Move button.
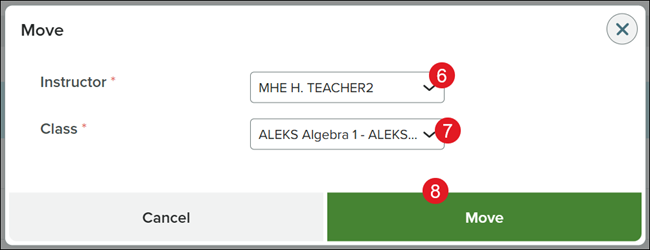
6. Select the Instructor for the sub-class.
7. Select the Class from the drop-down.
8. Click the Move button.