Manage User Accounts
Manage users on my.mheducation.com, including adding, editing, and assigning roles.
- Direct Login & Manual-Rostering
- High School
- SSO & Auto-Rostering
- SSO & Manual-Rostering
- PreK-12
- Customer Support
- School Administrator
- Direct Login & Auto-Rostering
- Preschool
- Middle School
- Elementary School
- Core
- Intervention
- Supplemental
- AP, Honors & Electives
- Literacy
- Math
- Science
- Social Studies
- Health
- Visual & Performing Arts
- World Languages
- AP Biology
- AP Chemistry
- AP History & Geography
- AP Psychology
- AP Economics
- AP African American Studies
- AP Precalculus
- AP Statistics
- AP Computer Science
- AP Language and Composition
- AP Public Speaking
- AP Music Theory
- 5 Steps to a 5 - AP Test Prep
- Glencoe Health 2022
- Teen Health 2021
- Arrive Math
- Building Blocks 2024
- Building Blocks PreK 2025
- Number Worlds 2024
- SRA Reading Laboratory 2025
- SRA Reading Mastery Transformations
- Achieve3000 Literacy
- Actively Learn
- McGraw Hill Literacy Emerge!
- McGraw Hill Literacy Summit!
- McGraw Hill Literacy Soar!
- Open Court Reading 2025
- Redbird
- StudySync 2021
- ALEKS
- ALEKS Adventure
- CA Reveal Math (K-12)
- Illustrative Math
- Redbird Math
- Texas Math
- CA Inspire Science 2020
- FL Science 2025 (K-12)
- Inspire Science 2020
- TN Science (K-12)
- TX Science 2025 (K-12)
- CA Impact 2019
- FL Social Studies 2024 (K-12)
- Impact Social Studies
- McGraw Hill Social Studies
- All Sorts 2026 (K-5)
- Asi se Dice 2024
- CTE - Health Science
- CTE - Agriculture
- CTE - Computing and Technology
- CTE - Culinary Arts
- CTE - Early Childhood Education
- CTE - Business, Marketing, and Finance
- CTE - Criminal Justice
- Glencoe Health 2014
- McGraw Hill Health 2014
- 2Inform
- Building Blocks 2015
- Connecting Math Concepts
- Number Worlds 2015
- Corrective Reading
- Early Interventions in Reading
- Spelling Mastery
- WonderWorks 2022 & 2014
- Maravillas 2020 & 2017
- OCR Foundational Skills Kit
- OCR Word Analysis Kit
- Open Court Reading 2016, 2018, 2023
- StudySync 2015 & 2017
- Wonders
- Wonders 2014
- Wonders 2023 2020 2017
- Wonders Balanced Literacy 2016
- Wonders EL 2016
- World of Wonders 2017
- Core Plus Math 2015
- Everyday Mathematics 4 (K-6)
- Glencoe Algebra 1 2014
- Glencoe Algebra 2 2014
- Glencoe Algebra 1 2018
- Glenoce Algebra 2 2018
- Glencoe Math
- Glencoe Geometry 2014
- Glencoe Geometry 2018
- Glencoe Math Course 1
- Glencoe Math Course 2
- Glencoe Math Course 3
- Glencoe Math Accelerated
- McGraw Hill My Math
- McGraw Hill My Math 2013 & 2016
- McGraw Hill My Math 2018
- Pre-Algebra 2012
- Glencoe Science
- Glencoe Science 2017
- Inspire Science 2017
- iScience 2017
- Networks
- Networks 2014 (K-5)
- Networks 2018
- Networks 2014 & 2016
- Music! Its Role
- Spotlight on Music
- Asi se Dice 2016
- User Management
- Account Management


For a full page view of the demo, click here.
For a Spanish version of the demo, click here.
Article Contents
For Manual Rostering districts, Administrators can use the Import Users/Rosters resources to create and manage user accounts for the exception of dropping staff from the account.
If you would like to set up auto-rostering services, complete our McGraw Hill Integrations Intake Form to speak with our Integration Services team.
Create a Student Account
1. SSO or log in through my.mheducation.com.
If you have both a Teacher role and an Administrator role, you will need to toggle to your Administrator role to access the Admin Tools.
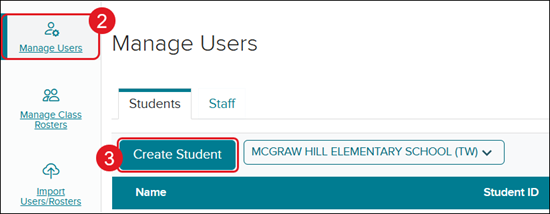
2. Click on Manage Users.
3. On the Students tab, click the Create Student button.
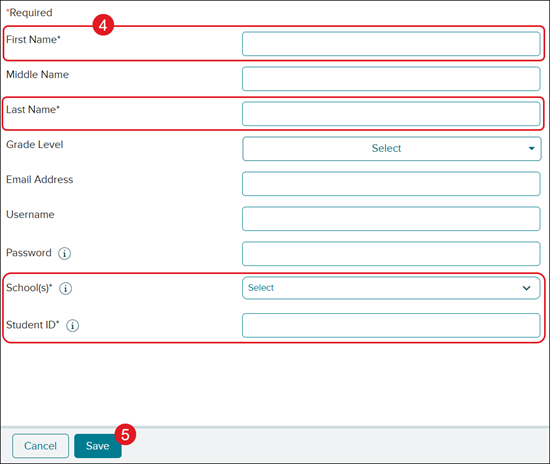
4. Input the following required fields (denoted by a red asterisk):
- First Name
- Last Name
- Schools - Identify at which school(s) the student should be enrolled.
- Student ID - Must be unique to your school or district.
All other fields can be completed if preferred.
If you want the system to autogenerate a Username and Password, you can leave those fields blank. If you want the student to have a specific Username and permanent Password, you will want to enter these fields.
5. Click the Save button.
Create a Staff Account
1. SSO or log in through my.mheducation.com.
If you have both a Teacher role and an Administrator role, you will need to toggle to your Administrator role to access the Admin Tools.
2. Click on Manage Users.
3. Click the Staff tab.
4. Click the Create Staff button.

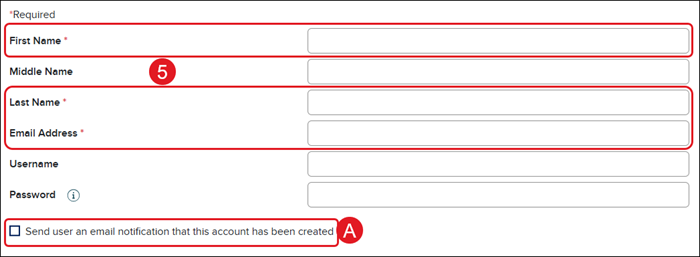
5. Input the following required fields (denoted by a red asterisk):
- First Name
- Last Name
- Email Address
All other fields in this section can be completed if preferred.
If you do not input a Username and Password for the account, one will be automatically generated for them.
A. It is recommended to checkmark the Send user an email notification that this account has been created box to email their user information to them.
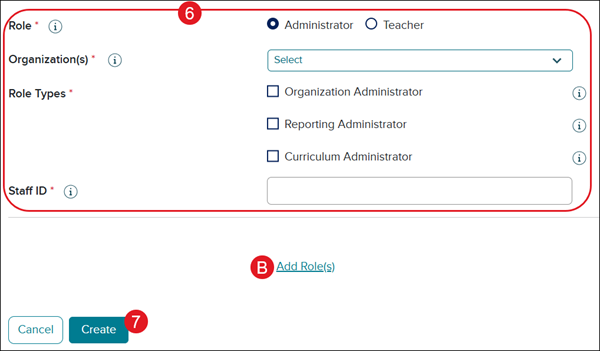
6. Add Role fields:
- Role: Administrator* or Teacher
- Organizations: Select the school(s) or district (for admins only) that the user should be affiliated with.
- Staff ID: This alphanumeric ID must be unique to your organization.
*Note: If you are creating an administrator account, you will be required to select at least one Role Type for the user.
Check the box next to the preferred Role Types.
- Organization Administrator: The District/Purchasing Account Organization Administrator can manage users, class rosters, and products for all schools/organizations assigned to the district/purchasing account. They also have access to the Admin Dashboard reports for all schools/organizations.
- (School) Organization Administrator: The Organization Administrator role would be selected for this option, but only at the school level. The (School) Organization Administrator can manage users and class rosters for the school(s) they are assigned to, as well as access to usage data and the Admin Dashboard reports for the assigned school(s).
- Reporting Administrator: The Reporting Administrator can create and view reports on student performance and product usage for student and teacher users affiliated with the organizations assigned to the administrator. They also have access to the McGraw Hill Plus reports (if applicable).
- Curriculum Administrator: The Curriculum Administrator can create and share curricular assessments for select programs for the organizations assigned to the administrator as well as create Wonders District Planners.
B. Click the Add Role(s) link to add additional roles to the user.
7. Click the Create button.
Edit Existing Accounts
As an Organization Administrator, you can edit account information for any student, teacher, and or administrator within your organization.
Edit Student Accounts
1. SSO or log in through my.mheducation.com.
If you have both a Teacher role and an Administrator role, you will need to toggle to your Administrator role to access the Admin Tools.
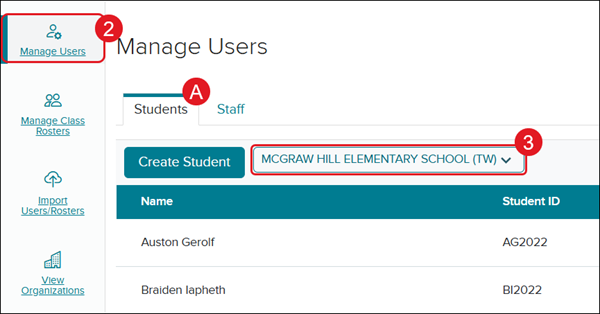
2. Click on Manage Users.
A. The page should default to the Students tab.
3. Select the school the student is associated with.

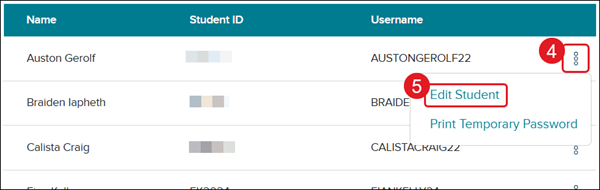
4. Click the kebob icon to the right of the student name.
5. Click Edit Student from the menu.
4. Make the preferred changes and click Save.
Note: For Auto-Rostering districts, you will only be able to edit certain fields for users that have been created through the automated rostering process.
Edit Staff Accounts
1. SSO or log in through my.mheducation.com.
If you have both a Teacher role and an Administrator role, you will need to toggle to your Administrator role to access the Admin Tools.
2. Click on Manage Users.
3. Click the Staff tab.
4. Select the district or school the user is associated with.

5. Click the kebob icon to the right of the user's name.
6. Click on Edit Staff from the menu.

7. Make your preferred changes and click Save.
Note: For Auto-Rostering districts, you will only be able to edit certain fields for users that have been created through the automated rostering process.
Password Management
As an Organization Administrator, you can reset passwords for teachers, students, or other administrators as needed. As an alternative, teachers and administrators can use the Forgot your password? link on the my.mheducation.com login page to reset their own password.
Note: If the user has been created through the automated rostering process, the password needs to be managed through the district rostering data.
Reset Staff Passwords
1. SSO or log in through my.mheducation.com.
If you have both a Teacher role and an Administrator role, you will need to toggle to your Administrator role to access the Admin Tools.
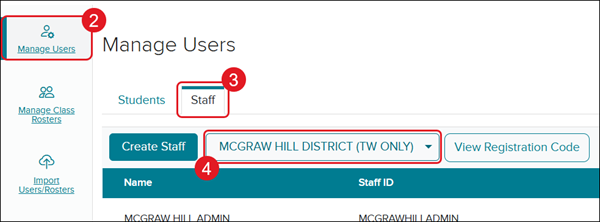
2. Click on Manage Users.
3. Click the Staff tab.
4. Select the district or school the user is associated with.

5. Click the kebob icon to the right of the user's name.
6. Click on Edit Staff from the menu.

7. Enter a Password.
Refer to the Password Policy article for the list of requirements when creating passwords for users.
8. Click the Save button.
Reset Student Passwords
You have two options for resetting student passwords: set a permanent password or a temporary password.
Temporary passwords expire when they are used, after 30 days, or if a new temporary password is generated.
Print a Temporary Password
1. SSO or log in through my.mheducation.com.
If you have both a Teacher role and an Administrator role, you will need to toggle to your Administrator role to access the Admin Tools.
2. Click on Manage Users.
A. The page should default to the Students tab.
3. Select the school the student is associated with.
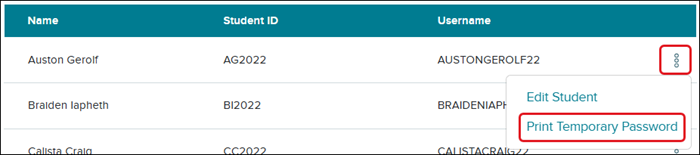
4. Click the kebob icon to the right of the student name.
5. Click on Print Temporary Password from the menu.
6. On the pop-up, click the Confirm button.
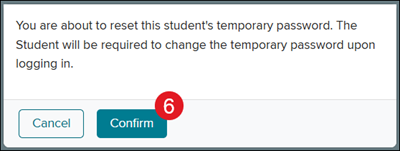
Once a student logs into their account using the temporary password, they will be prompted to set a permanent password.
Set a Permanent Password
Once a permanent password has been created, you will not be able to see or print the password due to security protocols.
1. SSO or log in through my.mheducation.com.
If you have both a Teacher role and an Administrator role, you will need to toggle to your Administrator role to access the Admin Tools.
2. Click on Manage Users.
A. The page should default to the Students tab.
3. Select the school the student is associated with.

4. Click the kebob icon to the right of the student name.
5. Click Edit Student from the menu.

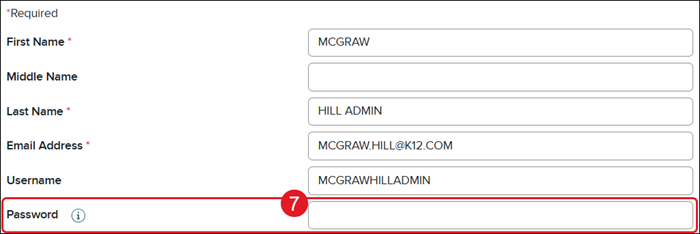
6. Enter a Password.
Refer to the Password Policy article for the list of requirements when creating passwords for users.
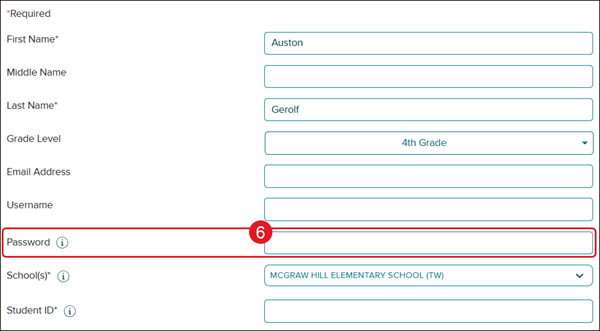
7. Click the Save button.
Drop Staff
Note: Before you drop any teacher from the district/school, you will first need to remove any redeemed content from the teacher's account. If you drop the teacher from the account first, this will cause the license for the redeemed content to be 'stuck' to that teacher's account.
If you removed a teacher from the account before removing the content, please contact our K-12 Technical Support for further assistance with getting the license back.
1. SSO or log in through my.mheducation.com.
If you have both a Teacher role and an Administrator role, you will need to toggle to your Administrator role to access the Admin Tools.
2. Click on Manage Users.
3. Click the Staff tab.
4. Select the district or school the user is associated with.
5. Click the kebob icon to the right of the user's name.
6. Click Drop from the menu.

Once they are dropped, the teacher can still log in to their account; however, they will not be able to view any classes or data affiliated with the school(s) from which they were removed. Instead, they will see a screen prompting them to enter a registration code to join a school.