Create or delete district banks to organize assessments at the district level.
Tags
Direct Login & Manual-Rostering
High School
SSO & Auto-Rostering
SSO & Manual-Rostering
PreK-12
Customer Support
Online Assessments
School Administrator
Direct Login & Auto-Rostering
Preschool
Middle School
Elementary School
Core
Intervention
Supplemental
AP, Honors & Electives
Career & Technical Education
Literacy
Math
Science
Social Studies
Health
Visual & Performing Arts
World Languages
AP Biology
AP Chemistry
AP History & Geography
AP Psychology
AP Economics
AP African American Studies
AP Precalculus
AP Statistics
AP Computer Science
AP Language and Composition
AP Public Speaking
AP Music Theory
5 Steps to a 5 - AP Test Prep
Glencoe Health 2022
Teen Health 2021
Arrive Math
Building Blocks 2024
Building Blocks PreK 2025
Number Worlds 2024
SRA Reading Laboratory 2025
SRA Reading Mastery Transformations
Achieve3000 Literacy
Actively Learn
McGraw Hill Literacy Emerge!
McGraw Hill Literacy Summit!
McGraw Hill Literacy Soar!
Open Court Reading
Redbird
StudySync 2021
ALEKS
ALEKS Adventure
CA Reveal Math (K-12)
Illustrative Math
Redbird Math
Reveal Math (K-12)
CA Inspire Science 2020
FL Science 2025 (K-12)
Inspire Science 2020
TN Science (K-12)
TX Science 2025 (K-12)
CA Impact 2019
FL Social Studies 2024 (K-12)
Impact Social Studies
McGraw Hill Social Studies
All Sorts 2026 (K-5)
Asi se Dice 2024
Wonders Balanced Literacy 2016
Maravillas 2020 & 2017
Music! Its Role
McGraw Hill My Math 2018
Networks 2018
OCR Foundational Skills Kit
OCR Word Analysis Kit
Spotlight on Music
Wonders 2023 2020 2017
Share:
This article walks Curriculum Administrators through creating new District Banks, renaming them, and deleting District Banks that are no longer needed.
You will need to assigned the Curriculum Administrator role to have access to the assessment banks. If you do not yet have an existing account, or if you have an account but not the proper role, reach out to an Organization Administrator in your district. District Organization Administrators can create new accounts and add roles to existing accounts at the district and school levels. School Organization Administrators can only create accounts and add roles for teachers and administrators for the school(s) they are associated with.
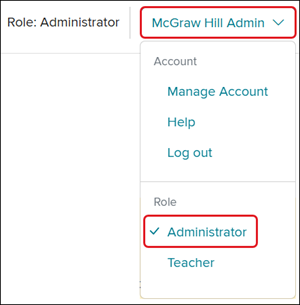
For users that have a Teacher and Administrator role, you will land on your Teacher profile.
To access the Admin Tools, click on the Profile button and select Administrator from the menu.
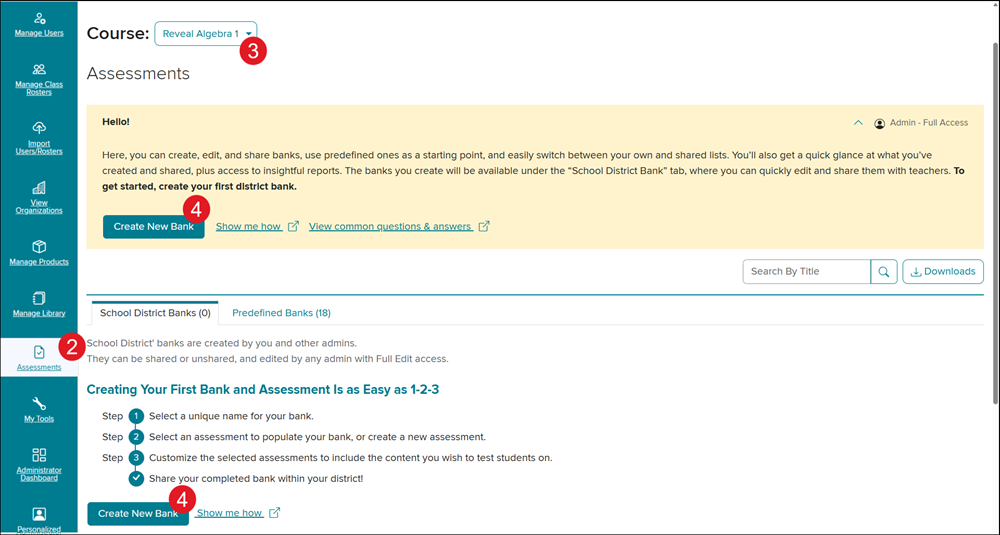
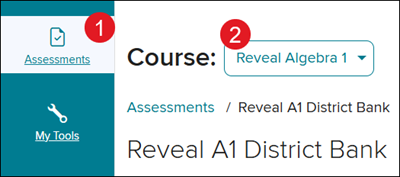
2. Click on Assessments from the navigation menu.
3. Select the program from the Course drop-down.
4. Click the Create New Bank button.
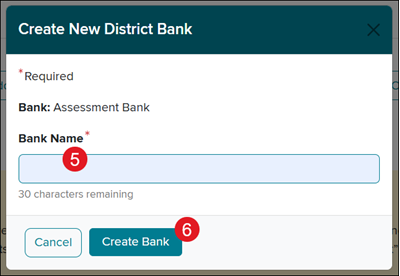
5. On the Create New District Bank pop-up, enter a Bank Name.
6. Click the Create Bank button.
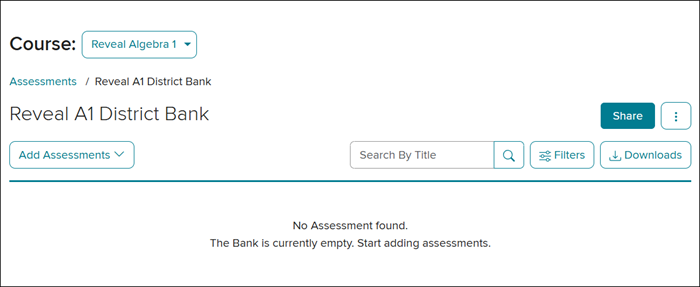
The page will automatically load to the new bank page.
Rename a District Bank
1. Click on Assessments from the navigation menu.
2. Select the program from the drop-down.
3. Click on the Rename (pencil) icon in the Action column.
4. Enter the new Title in the provided field.
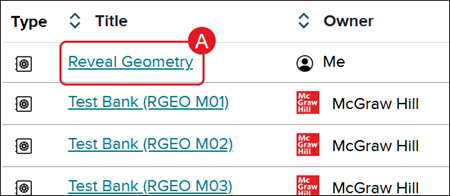
A. You can also click on the Title of the custom bank,
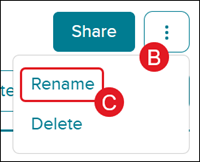
B. click on the Options button to the right,
C. and click Rename from the menu.
Delete a District Bank
Note: When deleting a District Bank, it also removes all custom assessments you have created within that bank. If you would like to keep the custom created assessments, you will first want to move the assessments to another bank. For steps on moving assessments, refer to the Curriculum Administrator - Move Assessments Between District Banks article.
1. Click on Assessments from the navigation menu.
2. Select the program from the Course drop-down.
3. Click the Delete (trash can) icon to the right.
A. You can also click on the Title of the custom bank,
B. click on the Options menu icon to the right,
C. and click Delete from the menu.
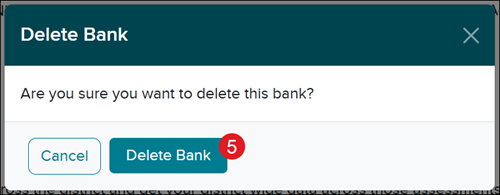
5. On the Delete Bank pop-up, click the Delete Bank button to confirm.
ap-edition
5-steps-to-a-5-test-prep
glencoe-health
teen-health
arrive-math
building-blocks
number-worlds
reading-laboratory
reading-mastery
achieve3000-literacy
actively-learn
mcgraw-hill-literacy
open-court-reading
redbird
studysync
aleks
aleks-adventure
reveal-math
illustrative-math
redbird-math
inspire-science
mcgraw-hill-science
impact
mh-social-studies
all-sorts
asi-se-dice
wonders
maravillas
music-its-role
my-math
networks
ocr-foundational-skills-kit
spotlight-on-music
instructor
prek-12
Direct Login & Manual-Rostering, High School, SSO & Auto-Rostering, SSO & Manual-Rostering, PreK-12, Customer Support, Online Assessments, School Administrator, Direct Login & Auto-Rostering, Preschool, Middle School, Elementary School, Core, Intervention, Supplemental, AP, Honors & Electives, Career & Technical Education, Literacy, Math, Science, Social Studies, Health, Visual & Performing Arts, World Languages, AP Biology, AP Chemistry, AP History & Geography, AP Psychology, AP Economics, AP African American Studies, AP Precalculus, AP Statistics, AP Computer Science, AP Language and Composition, AP Public Speaking, AP Music Theory, 5 Steps to a 5 - AP Test Prep, Glencoe Health 2022, Teen Health 2021, Arrive Math, Building Blocks 2024, Building Blocks PreK 2025, Number Worlds 2024, SRA Reading Laboratory 2025, SRA Reading Mastery Transformations, Achieve3000 Literacy, Actively Learn, McGraw Hill Literacy Emerge!, McGraw Hill Literacy Summit!, McGraw Hill Literacy Soar!, Open Court Reading, Redbird, StudySync 2021, ALEKS, ALEKS Adventure, CA Reveal Math (K-12), Illustrative Math, Redbird Math, Reveal Math (K-12), CA Inspire Science 2020, FL Science 2025 (K-12), Inspire Science 2020, TN Science (K-12), TX Science 2025 (K-12), CA Impact 2019, FL Social Studies 2024 (K-12), Impact Social Studies, McGraw Hill Social Studies, All Sorts 2026 (K-5), Asi se Dice 2024, Wonders Balanced Literacy 2016, Maravillas 2020 & 2017, Music! Its Role, McGraw Hill My Math 2018, Networks 2018, OCR Foundational Skills Kit, OCR Word Analysis Kit, Spotlight on Music, Wonders 2023 2020 2017
dts
2026-03-24T19:11:33.569-03:00
View the demo in a separate tab. View the Spanish version of the demo. You will need to assigned the Curriculum Administrator role to have access to the assessment banks. If you do not yet have an existing account, or if you have an account but not the proper role, reach out to an Organization Administrator in your district. District Organization Administrators can create new accounts and add roles to existing accounts at the district and school levels. School Organization Administrators can only create accounts and add roles for teachers and administrators for the school(s) they are associated with. Article Contents Create a District Bank Rename a District Bank Delete a District Bank Create a District Bank 1. SSO or sign into your Administrator account at my.mheducation.com. For users that have a teacher and administrator role, you will land on your teacher profile. To access the administrator tools, click on the Profile button (A) and select Administrator (B) from the menu. 2. Click on Assessments from the navigation menu. 3. Select the program from the Course drop-down. 4. Click the Create New Bank button. 5. On the Create New District Bank pop-up, enter a Bank Name. 6. Click the Create Bank button. The page will automatically load to the new bank page. Rename a District Bank 1. Click on Assessments from the navigation menu. 2. Select the program from the Course drop-down. 3. Click on the Rename (pencil) icon in the Action column. 4. Enter the new Title in the provided field. A. You can also click on the Title of the custom bank, B. click on the Options button to the right, C. and click Rename from the menu. Delete a District Bank Note: When deleting a District Bank, it also removes all custom assessments you have created within that bank. If you would like to keep the custom created assessments, you will first want to move the assessments to another bank. For steps on moving assessments, refer to the Move Assessments Between District Banks article. 1. Click on Assessments from the navigation menu. 2. Select the program from the Course drop-down. 3. Click the Delete (trash can) icon to the right. A. You can also click on the Title of the custom bank, B. click on the Options menu icon to the right, C. and click Delete from the menu. 5. On the Delete Bank pop-up, click the Delete Bank button to confirm.
Top
Regional Page Available
It looks like you're outside the United States. Do you want to see your regional version of this page?