Manage Content on Access Manager
Assign content using Access Manager to control which products and materials are available to classes.
- PreK-12
- Customer Support
- School Administrator
- Preschool
- Elementary School
- Middle School
- High School
- Direct Login & Auto-Rostering
- SSO & Auto-Rostering
- Core
- Intervention
- Supplemental
- AP, Honors & Electives
- Career & Technical Education
- Literacy
- Math
- Science
- Social Studies
- Health
- Visual & Performing Arts
- World Languages
- AP Biology
- AP Chemistry
- AP History & Geography
- AP Psychology
- AP Economics
- AP African American Studies
- AP Precalculus
- AP Statistics
- AP Computer Science
- AP Language and Composition
- AP Public Speaking
- AP Music Theory
- 5 Steps to a 5 - AP Test Prep
- Glencoe Health 2022
- Teen Health 2021
- Arrive Math
- Building Blocks 2024
- Building Blocks PreK 2025
- Number Worlds 2024
- SRA Reading Laboratory 2025
- SRA Reading Mastery Transformations
- Achieve3000 Literacy
- Actively Learn
- McGraw Hill Literacy Emerge!
- McGraw Hill Literacy Summit!
- McGraw Hill Literacy Soar!
- Open Court Reading 2025
- Redbird
- StudySync 2021
- ALEKS
- ALEKS Adventure
- CA Reveal Math (K-12)
- Illustrative Math
- Redbird Math
- Reveal Math (K-12)
- Texas Math
- CA Inspire Science 2020
- FL Science 2025 (K-12)
- Inspire Science 2020
- TN Science (K-12)
- TX Science 2025 (K-12)
- CA Impact 2019
- FL Social Studies 2024 (K-12)
- Impact Social Studies
- McGraw Hill Social Studies
- All Sorts 2026 (K-5)
- Asi se Dice 2024
- CTE - Health Science
- CTE - Computing and Technology
- CTE - Agriculture
- CTE - Culinary Arts
- CTE - Early Childhood Education
- CTE - Criminal Justice
- Glencoe Health 2014
- McGraw Hill Health 2014
- 2Inform
- Building Blocks 2015
- Connecting Math Concepts
- Number Worlds 2015
- Corrective Reading
- Early Interventions in Reading
- Spelling Mastery
- WonderWorks 2022 & 2014
- Maravillas 2020 & 2017
- OCR Foundational Skills Kit
- OCR Word Analysis Kit
- Open Court Reading 2016, 2018, 2023
- StudySync 2015 & 2017
- Wonders
- Wonders 2014
- Wonders 2023 2020 2017
- Wonders Balanced Literacy 2016
- Wonders EL 2016
- World of Wonders 2017
- Core Plus Math 2015
- Everyday Mathematics 4 (K-6)
- Glencoe Algebra 1 2014
- Glencoe Algebra 1 2018
- Glencoe Algebra 2 2014
- Glenoce Algebra 2 2018
- Glencoe Math
- Glencoe Geometry 2014
- Glencoe Geometry 2018
- Glencoe Math Course 1
- Glencoe Math Course 2
- Glencoe Math Course 3
- Glencoe Math Accelerated
- McGraw Hill My Math
- McGraw Hill My Math 2013 & 2016
- McGraw Hill My Math 2018
- Pre-Algebra 2012
- Glencoe Science
- Glencoe Science 2017
- Inspire Science 2017
- iScience 2017
- Networks
- Networks 2014 (K-5)
- Networks 2014 & 2016
- Networks 2018
- Music! Its Role
- Spotlight on Music
- Asi se Dice 2016
- Class Management
- Access Manager
- Products & Licenses


Direct Login and Auto-Rostering
Single Sign-On (SSO) and Auto-Rostering
This article applies to districts that use the SSO and Auto-Rostering Access and Direct Login and Auto-Rostering Services.
SSO applies to districts that use an SSO portal, district website, or Learning Management System (LMS) to access McGraw Hill digital programs, and Direct Login means that teachers, students, and administrators log in at my.mheducation.com. Auto-Rostering means that account creation, class setup, and roster management are automated through a process handled by your district.
Not sure which Access Service your district uses? Click here to learn more about the four Access Services that we support.
View the demo in a separate tab.
View the Spanish version of the demo.
Article Contents
Helpful Tips
- You can assign products from multiple purchasing accounts. Most purchasing accounts are at the district level, but in some cases, a school may have their own purchasing account for their school's licenses. Click the Accounts dropdown on the Assign tab to switch to the account you wish to manage.
- When more than one product is assigned to a class, separate classes are created such that each product is assigned to its own class. For example, if an elementary class has both Science and Social Studies products assigned to it, teachers and students will see two classes with the same class name—one class for Science and the other for Social Studies.
- When adding an add-on product, assign the core product first and then assign the add-on product. The reverse process should be followed when you unassign products as well—remove the add-on product first and then remove the core product. When assigning content with OneRoster® 1.1 files, the products do not need to be listed on the files in any special order.
- When new users are added to a course via the OneRoster® files, each user is assigned content as the file is processed by Access Manager. If mapping by course, course mapping is maintained as long as the course 'sourcedId' does not change. You only need to map content when you create new courses or when you change the ‘sourcedId’ for a course.
- Content should not be managed via Access Manager if you use the OneRoster® 1.1 resources.csv to assign content. Only use one source for content assignments—assign content via your OneRoster® 1.1 files or assign content on Access Manager.
- If no master schedule is set in the SIS (Student Information System), or if the SIS does not create courses for elementary students, content may need to be assigned for individual classes, as courses will not apply to more than one class.
- To successfully create and roster all ALEKS classes, assign all ALEKS content the same way across the district—either by class or course, but not both.
Assign Content
ConnectED products can be assigned to courses, classes, and individual users. Open Learning Platform products can be assigned to courses and classes, but not individual users.
Tip! The most efficient way to assign content on Access Manager is to assign content by course, as courses can apply to all classes across the district that use a specific product.
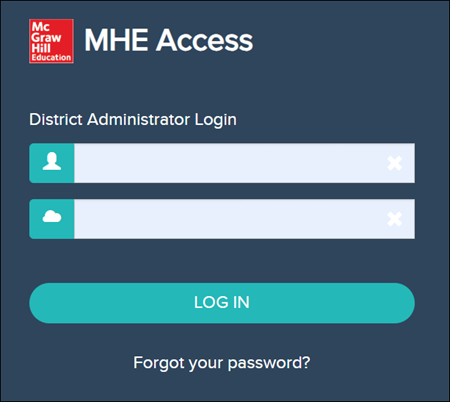
1. SSO or log in at my.mheducation.com.
2. Access your administrator account and click on Access Manager from the navigation menu. Access Manager will open in a new browser window.
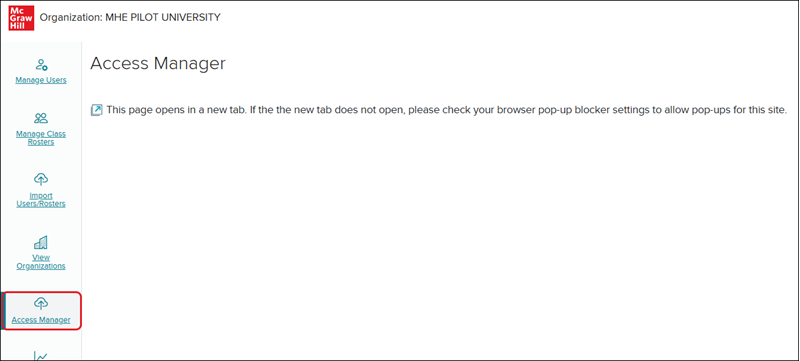
Some customers may need to sign into Access Manager directly.

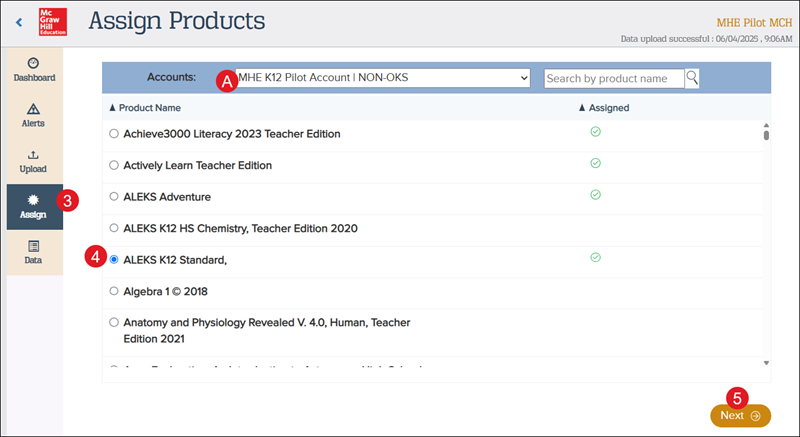
3. Click Assign on the navigation menu.
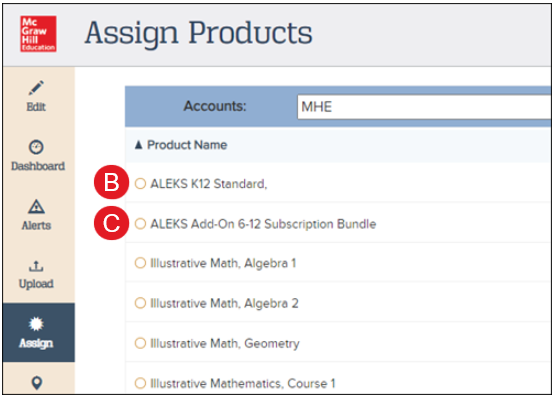
A. If you have multiple purchasing accounts, select the account you would like to manage.
4. Click the radio button next to the product you need to assign.
5. Click the Next button.

Note: When assigning ALEKS content, be sure to select the “ALEKS K12 Standard” product (B) and not the “ALEKS Add-On 6-12 Subscription Bundle...” product (C). To successfully create and roster all ALEKS classes, be sure to assign the content the same way across the district—either by class or course, but not both.
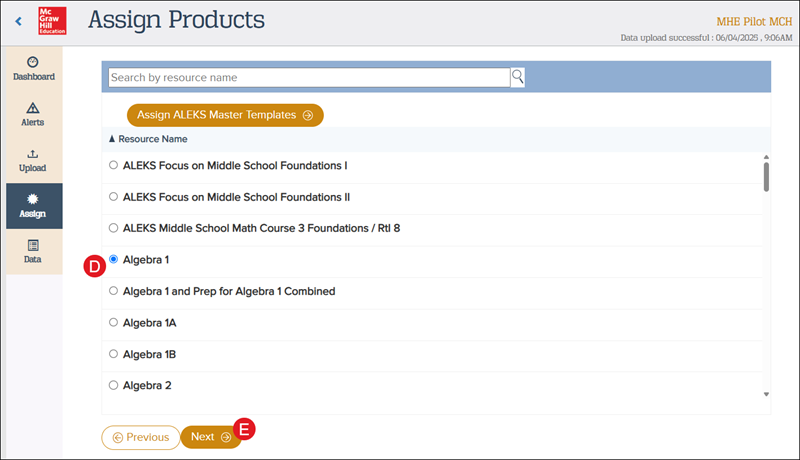
D. If assigning an ALEKS program, select the Resource Name.
For steps on assigning ALEKS using ALEKS Master Templates, see the Assign ALEKS Master Templates in Access Manager article.
E. Click the Next button.

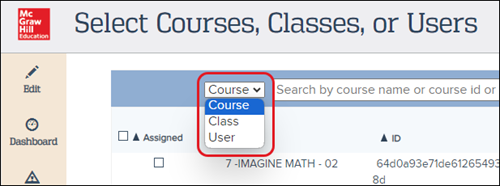
6. Select Course or Class from the drop-down menu. Only ConnectED content can be assigned to individual Users.

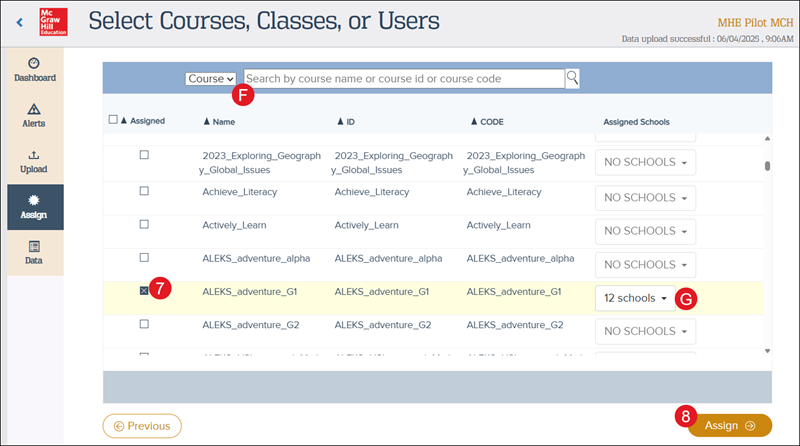
7. Check the box to the left of the Course, Class, or User.
F. Use the search for courses or classes by name, ID, or code. The course and class lists should contain all courses and classes sent to us via the OneRoster® file or the roster sync.
G. The system automatically selects all schools for the content assignment. To limit the content assignment to specific schools, click the Assign Schools drop-down and uncheck any schools you do not want to assign the program to.
We recommend leaving all schools selected unless you are trying to filter schools out that have the course but do not need the content. Keep in mind, the content will only be assigned to the selected course(s) regardless of the schools selected.
Note: Make sure to double-check the school selections if a specific subset of schools are selected. The selections automatically get cached in the system, so all subsequent mappings will also automatically be only for that subset of schools selected.
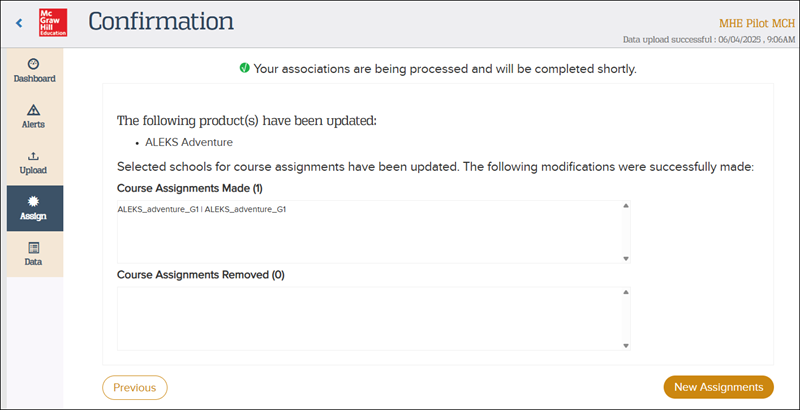
8. Click the Assign button.

A summary page displays the product assigned to your selected courses and schools. Both Teacher and Student Editions will be assigned once a product is mapped.
Remove Content Assignments
1. SSO or log in at my.mheducation.com.
2. Access your administrator account and click on Access Manager from the navigation menu. Access Manager will open in a new browser window.

Some customers may need to sign into Access Manager directly.
3. Click Assign on the navigation menu.
A. If you have multiple purchasing accounts, select the account you would like to manage.
4. Click the radio button next to the product you need to assign.
5. Click the Next button.
D. If unassigning an ALEKS program, select the Resource Name.
E. Click the Next button.
6. Select Course or Class from the drop-down menu.
7. Uncheck the box to the left of the Course, Class, or User.
F. Use the search for courses or classes by name, ID, or code. The course and class lists should contain all courses and classes sent to us via the OneRoster® file or the roster sync.
G. To only unassign certain schools from the program, click on the schools drop-down and uncheck any schools you no longer want assigned to the program.
8. Click the Assign button.
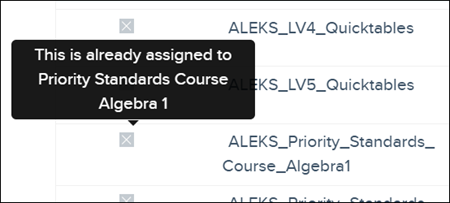
If you're unsure what program is assigned to a course, class, or user, hover over the checked box to view a pop-up with the program name.
A summary page displays the product assigned to your selected courses and schools. Both Teacher and Student Editions will be assigned once a product is mapped.
