Customize Actively Learn Text Assignments
Customize Actively Learn text assignments by adding directions, questions, notes, links and accessibility tools to support student learning.
- PreK-12
- Customer Support
- Classroom Teacher
- Elementary School
- Middle School
- High School
- Direct Login & Auto-Rostering
- Direct Login & Manual-Rostering
- SSO & Auto-Rostering
- SSO & Manual-Rostering
- Supplemental
- Literacy
- Science
- Social Studies
- Actively Learn
- Grades & Assignments
- Online Assessments


Actively Learn allows teachers to upload their own content, modify pre-created instruction, or add their own questions and notes to an assignment.
For steps on assigning texts to students, refer to the Create, Duplicate, Merge, and Import Actively Learn Assignments article.
For steps on customizing video assignments, refer to the Customize Actively Learn Video Assignments article.
Article Contents
Customize Text Assignments
1. Click on Menu.
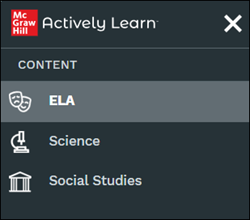
2. In the Content section, on ELA, Science, or Social Studies.
Note: Options will vary based on what the school has purchased.
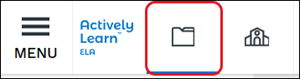
If the resource was uploaded, click the My Workspace & Imports (folder) icon.
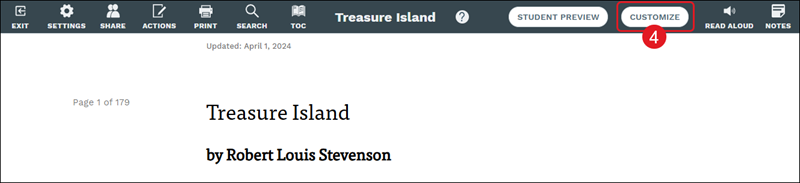
3. Click on a text tile.
4. Click the Customize button.
Add Directions for Students
Teachers can include learning objectives and instructions that will add context to what students are about to read and give them direction on what to look for while they read. These objectives allow students to more easily connect what they are doing in class and what they are supposed to learn.
Tips for adding directions for students:
- Context to fill knowledge gaps - If you are assigning a text about sports history, it would be important to go over the basic rules of the sport with your students.
- Key ideas or core concepts to look for while reading - If you are assigning text on motivational interviewing, you can list key skills for them to look for while reading. You might highlight such skills as: expressing and showing empathy, supporting and developing discrepancy, dealing with resistance, etc.
- Connect students’ prior knowledge - If you are about to teach photosynthesis, it would be helpful to go back over the parts of plants with your students.
1. Click the Add Directions for Students button.
Note: Not all text, videos, etc. will have this option.
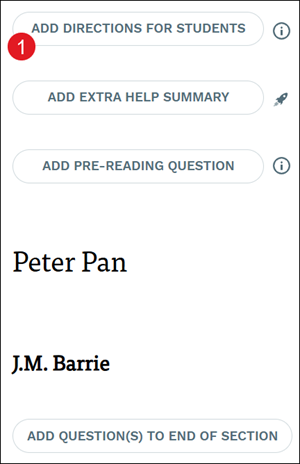
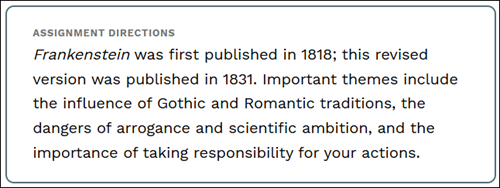
If there are already directions for students added, click in the Assignment Directions box to make changes.
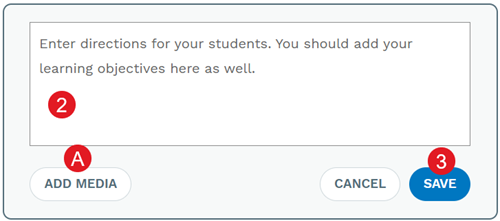
2. Enter directions and learning objectives in the provided field.
A. Click the Add Media button to include images and/or a URL.
3. Click the Save button.
Add Extra Help Summary
Extra Help allows teachers to differentiate and provide additional scaffolds for their students. Since students need different levels of support, you can easily offer assistance to those who need more help.
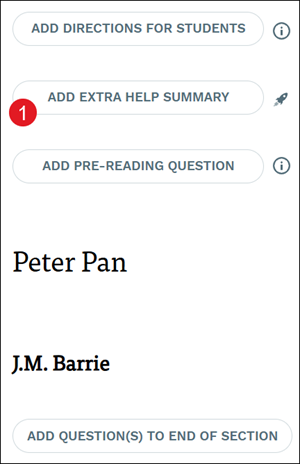
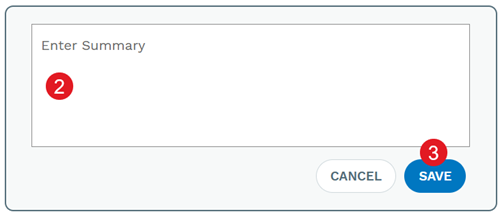
1. Click the Add Extra Help Summary button.
2. Enter a summary in the provided field.
3. Click the Save button.
Add and/or Edit Questions
Add questions before the reading to jump-start student learning.
Question creation tips:
- Tie your questions to a clear objective. As you create them, refer to the objective in the directions to ensure your questions support the learning target.
- Ask one question at a time. Only add one question to the text box. Adding more than one question to the text box can be confusing to students as they'll not be able to understand what question you're wanting them to answer.
- To scaffold questions, use the Extra Help feature to add question stems or provide additional support.
- Select the appropriate Depth of Knowledge (DoK) level to easily track the complexity of the questions being asked. This will help you understand if your questions are building toward higher levels of complexity.
- Align questions to standards to ensure you're varying the types of questions being asked throughout the assignment.
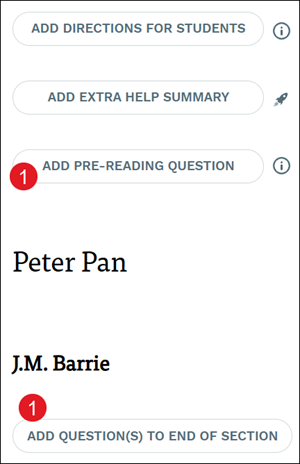
1. Click the Add Pre-Reading Questions or Add Questions to End of Section button.
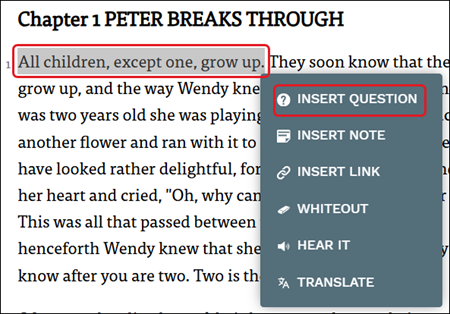
To include questions throughout the text, navigate within the text where you would like to insert a question and highlight the section. Select Insert Question from the menu that pops up.
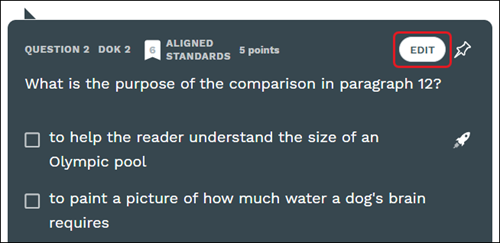
To edit an existing question, click the Edit button on the question.
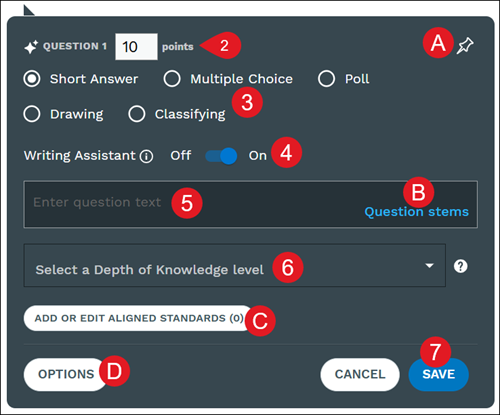
A. Click the pin icon to pin the question within the text.
2. Enter the points value.
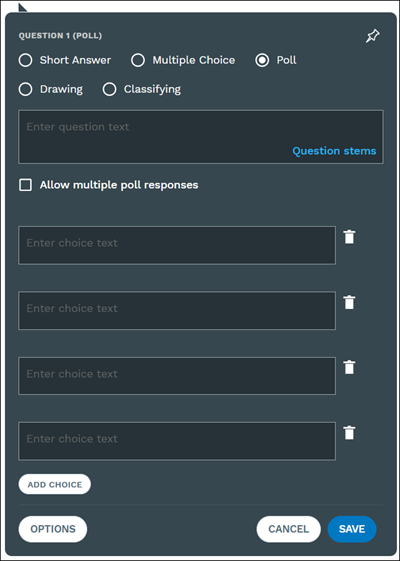
Poll questions are an unscored question type so it will not show a points value field.
3. Select the radio button for the question type.
4. Toggle Off/On the Writing Assistant.
This will allow students access to the AI-powered tool for short answer/essay type questions. For more information on the Writing Assistant, refer to the Activate the Actively Learn Writing Assistant article.
Note: If you do not have this option it may be turned off for the district. You will need to reach out to your Organization Administrator about this access.
5. Enter the question text.
If Multiple Choice, Poll, or Classifying was selected as the question type, choice text will also need to be added.
B. Click the Question stems links for question text suggestions.
6. Select a Depth of Knowledge level from the drop-down.
DOK levels reflect the complexity of a question, ranging from recall to extended thinking.
C. Click the Add or Edit Aligned Standards button to associate standards to the question.
On the pop-up, Select Standard Set (i) from the drop-down and click the Choose Standard (ii) button. Check the box next to the standards you would like to add and click the Done button at the bottom-right. Click the Save button to confirm associations.
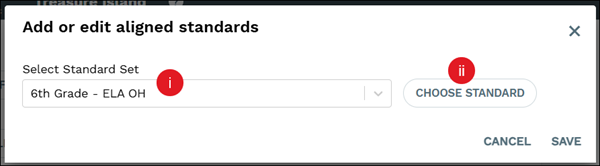
Note: Depth of Knowledge and Add or Edit Aligned Standards is not an option for Poll questions due to those question types not being a graded question.
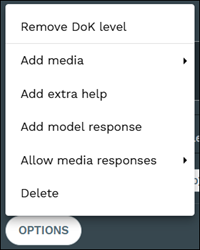
D. Click the Options button to Add media, Add extra help, Add explanation, Add model response, select to Allow media responses or not, or Delete the question.
The options available vary based on the question type selected.
7. Click the Save button.
Add Notes
Notes act as that digital 'tap on the shoulder' for students as they are reading through the text. Teachers can add notes into text where they'll be most helpful for their students.
Tips on maximizing notes:
- Ask open-ended questions - This will generate conversation and debate among students. Who can reply to the notes.
- Fill knowledge gaps - There may be complex ideas that require some background knowledge or further explanation to help students understand the reading.
- Highlight important dates or facts - Pause students reading to point out important facts that will be important later or recall/connect important facts from prior readings.
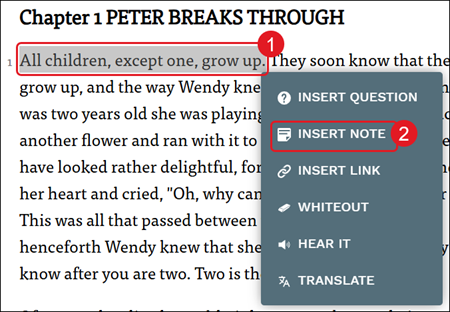
1. Highlight the section where you want the note added.
2. Click Insert Note from the menu that pops up.
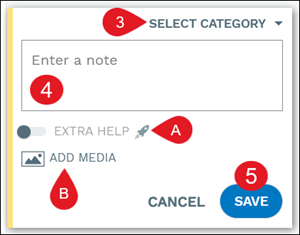
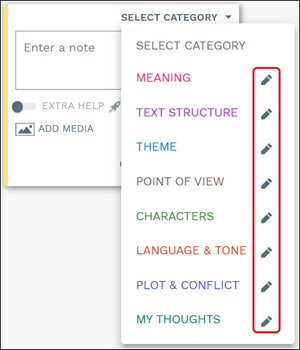
3. Click Select Category and select an option from the menu.
Click the pencil icon to the right of a category to edit the name or delete the category.
4. Enter a note in the provided field.
A. Toggle on to add Extra Help.
Extra Help allows teachers to differentiate and provide additional scaffolds for their students. Since students need different levels of support, you can easily offer assistance to those who need more help.
B. Click the Add Media button to include an image or URL.
5. Click the Save button.
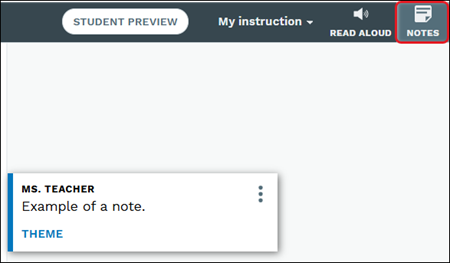
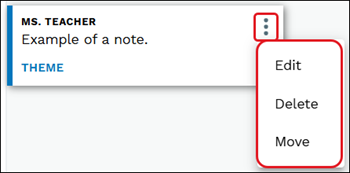
The note will show on the side of the text in the Notes panel. This panel can be opened/closed by clicking on the Notes button at the top-right.
Click on the highlighted text and click the kebob menu on the note to Edit, Delete, or Move the note.
Insert Links
1. Highlight the section where you want the link added.
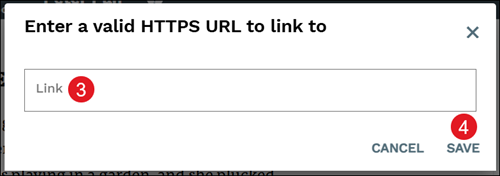
2. Click Insert Link from the menu that pops up.

3. On the pop-up, enter the link you want attached.
4. Click the Save button.
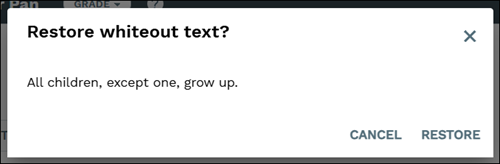
Whiteout Text
Selecting to whiteout text makes the selection of text invisible for students.
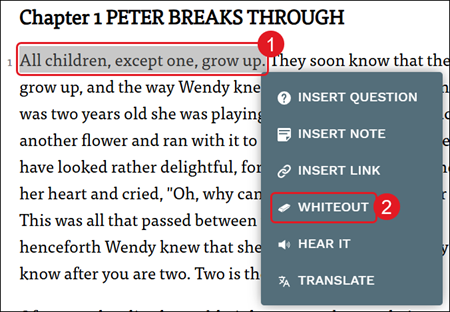
1. Highlight the section where you want the text removed.
2. Click Whiteout from the menu that pops up.
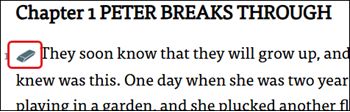
When a selection of text has been removed, it will show with an eraser icon where the text once was. Click on the icon to Restore the text.
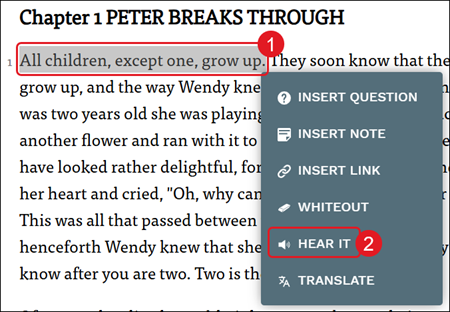
Hear It
The Hear It option only reads aloud the selected text while the Read Aloud option (at the top-right) reads all of the text.
1. Highlight the section that you want read aloud.
2. Click Hear It from the menu that pops up.
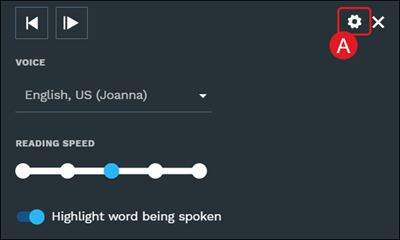
A panel with controls will pop-up to the right. Click the Settings (A) button to change the Voice, Reading Speed, and turn on/off Highlight word being spoken.
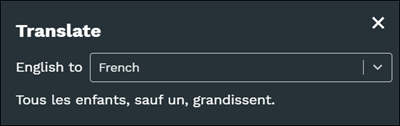
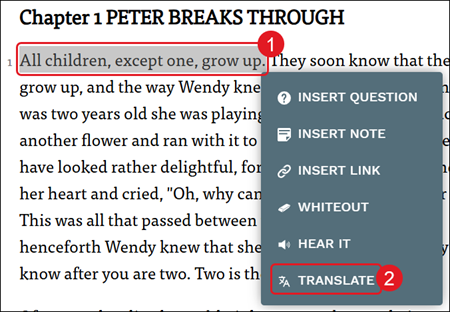
Translate Text
Use the translate option to view the selected text in another language.
1. Highlight the section where you want to translate.
2. Click Translate from the menu that pops up.
6. On the Translate panel, select a language from the English to drop-down.