Create a New K-12 Connect® Course
Learn how teachers create a new course in Connect® and set up sections.
- Customer Support
- PreK-12
- Classroom Teacher
- High School
- Direct Login & Auto-Rostering
- Direct Login & Manual-Rostering
- SSO & Auto-Rostering
- SSO & Manual-Rostering
- AP, Honors & Electives
- AP Connect
- Class Management
- Getting Started & Orientation
- Back-to-School Setup


This article walks teachers through creating a new course on their Connect account. If teacher does not yet have a Connect account, they should fill out Connect AP*/Honors, Electives and Custom Publications Teacher Resource Activation form.
Keep in mind, if you already have a course created for the material you're using for your class, but have multiple classes using the same content, you can create additional sections under the same course instead of creating a new course for each class. Refer to the Add, Delete, or Archive a K-12 Connect® Section article for more information.
View the demo in a separate tab.
View the Spanish version of the demo.
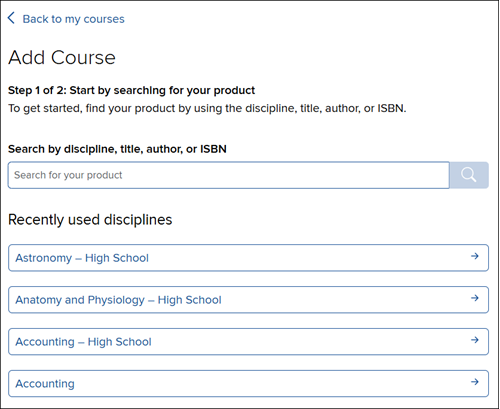
1. On your My Courses page, click the Add course button.

2. Search by discipline, title, author, or ISBN for the course you need.
You can also select an option from the Recently used disciplines list.
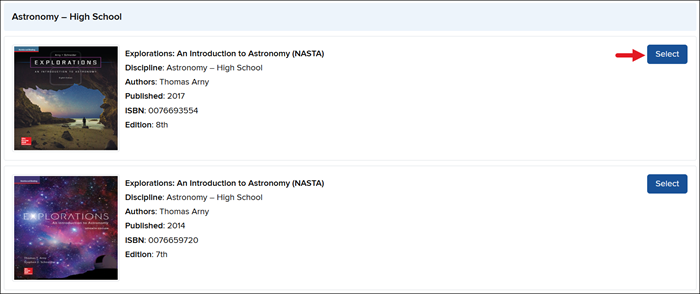
3. Click the Select button to the right of the content.
Books in Connect come in two versions: Advanced Placement (AP)/High School and Higher Education. Almost all AP titles have a corresponding Higher Education title. For student codes bought for AP products, the teacher must make sure to sign up for the correct AP course, or the codes will not function.
If your students are receiving a message that their code for (content x) does not match what you have on your teacher account, this most often means that you have the Higher Education title redeemed on your teacher account instead of the AP version, or you have the wrong AP version redeemed to your account.
If this is the case, you will want to search for the correct course on your teacher account that the students will need access to.
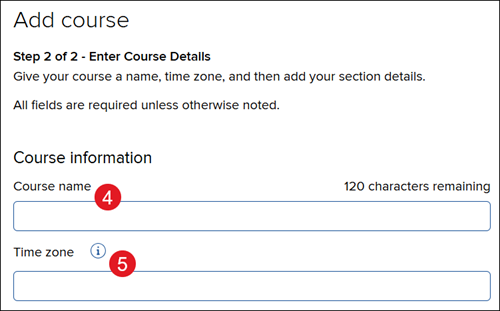
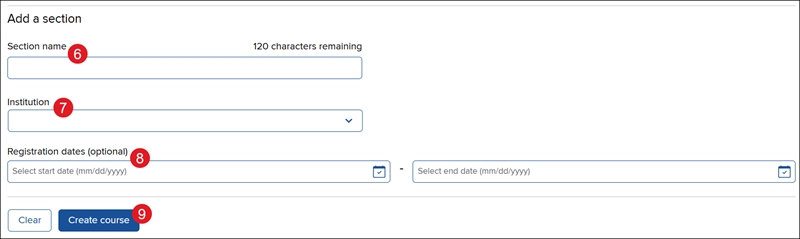
4. Enter a Course name.
5. Select your Time zone from the list.
6. Enter a Section name. This is the name the students will see.
7. Select your Institution.
8. Select Registration dates. This is an optional field. If you only want your students to register for the section during a specific date range, you will want to enter it here. You can enter these at a later time as well by editing the course details.
9. Click the Create course button.
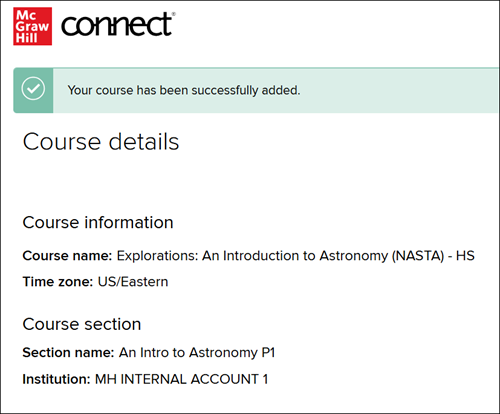
You will then receive a message that the course was successfully created with the Course details you entered.
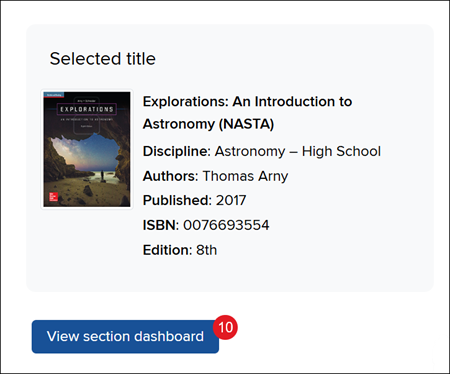
10. Click the View section dashboard button.
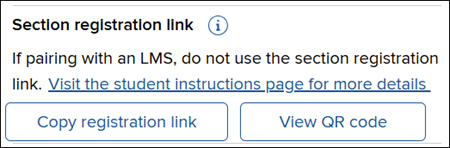
11. From your section Dashboard, provide the students the registration link or QR code for them to be able to register for the course. Each section will have its own registration information.
They will want to follow the steps on the How to Register for a K-12 Connect® Class article.