Add, Delete, or Archive a K-12 Connect® Section
Add or delete a course or section in Connect® to keep your course list organized.
- AP Connect
- Getting Started & Orientation
- SSO & Manual-Rostering
- Customer Support
- Direct Login & Auto-Rostering
- Class Management
- Direct Login & Manual-Rostering
- High School
- AP, Honors & Electives
- Classroom Teacher
- SSO & Auto-Rostering
- PreK-12
- Back-to-School Setup
- End-of-Year Tasks
- Literacy
- Math
- Science
- Social Studies
- Health
- Visual & Performing Arts
- World Languages


This article walks teachers through creating and deleting sections within their Connect Instructor account.
For a full page view of the demo, click here.
For a Spanish version of the demo, click here.
Article Contents
Add a New Section
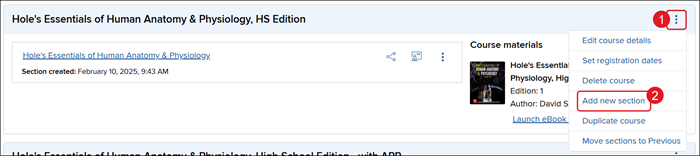
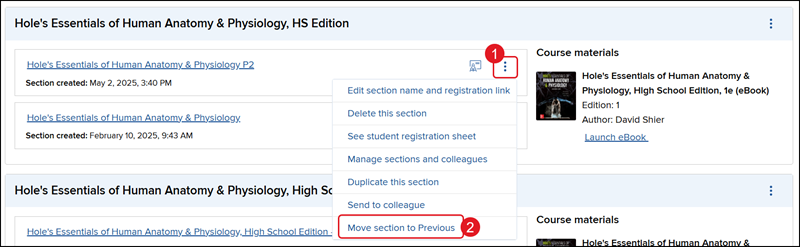
1. Click on the Course options menu icon to the right of the course.
2. Click on Add new section from the menu.
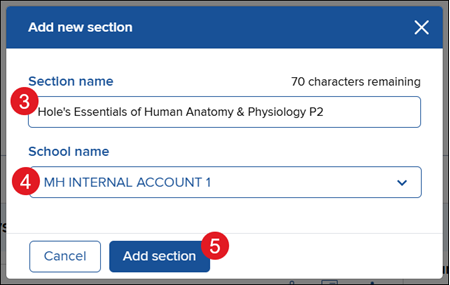
3. On the Add new section pop-up, enter a Section name.
4. Select a School name from the drop-down.
5. Click the Add section button.
Once the section has been created, it will automatically send to you the Dashboard of the new section.
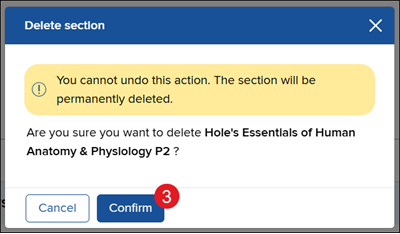
Delete Section
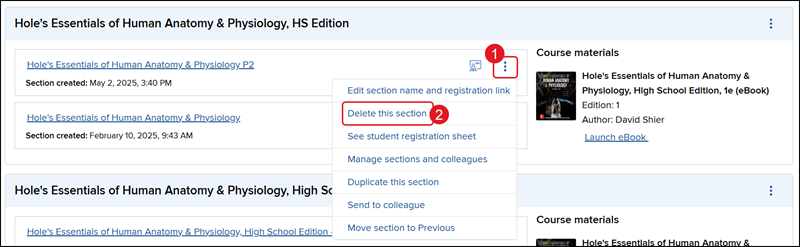
1. Click on the Section options menu icon to the right.
2. Click on Delete this section from the menu.
3. On the Delete section pop-up, click the Confirm button. Keep in mind, you cannot undo this action.
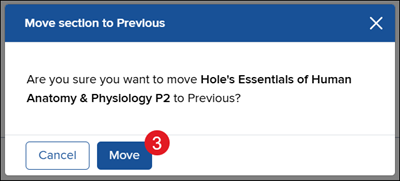
Archive Section (Move to Previous)
1. Click on the Section options menu icon to the right.
2. Click on Move section to Previous from the menu.
3. On the Move section to Previous pop-up, click the Move button to confirm.
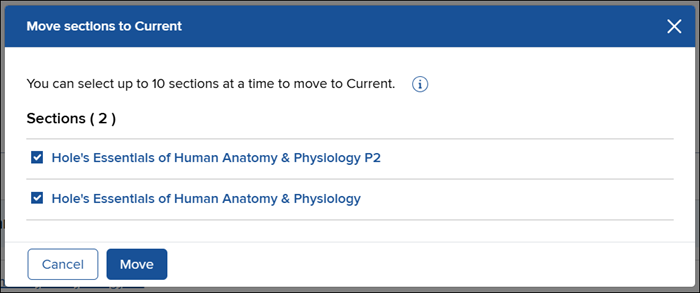
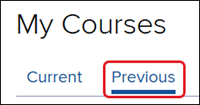
Unarchive Section
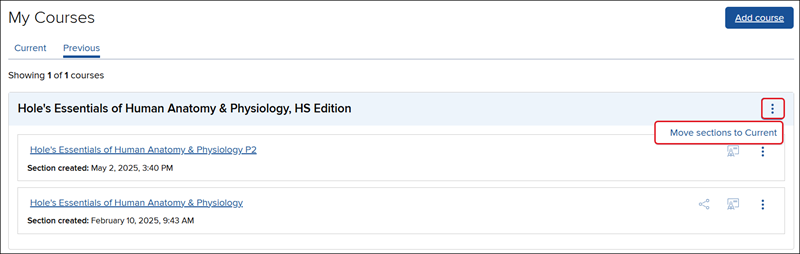
Click on the Previous tab at the top of the My Courses page.
To move all sections for a course, click the Course options menu icon and click Move sections to Current from the menu.
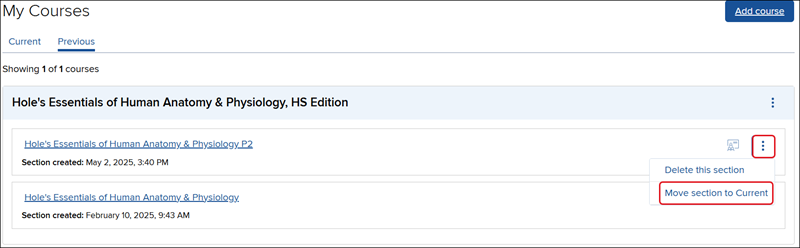
To move a specific section, click the Section options menu icon and click Move section to Current from the menu.
On the Move sections pop-up, select the sections you want to make Current and click the Move button.