Build Your Own Classic ALEKS View Modules
Build custom instructional modules in the classic ALEKS view to tailor course content..
- Supplemental
- SSO & Manual-Rostering
- Customer Support
- Direct Login & Auto-Rostering
- Middle School
- ALEKS
- Plan & Present
- Direct Login & Manual-Rostering
- High School
- Classroom Teacher
- SSO & Auto-Rostering
- PreK-12
- Math
- Grades & Assignments


This article walks teachers through building and assigning their own custom Modules within ALEKS.
For a full page view of the demo, click here.
For a Spanish version of the demo, click here.
The Modules feature allows you to direct student learning in the adaptive path. With this feature, you can create custom Modules based on specific curriculum plans, such as textbooks, pacing guides, and syllabi. Completion dates or mastery levels may be assigned to custom Modules.
About Selecting Topics
When creating Modules, you'll be able to select topics from the entire ALEKS course. However, ALEKS will automatically include the prerequisite material required to learn each topic in an Module. Therefore, students who have not mastered prerequisite material required to learn a topic successfully will be required to learn this material before being able to complete the assigned Module.
Similarly, students who are ready to learn topics that are not part of the current Module will not see those topics until they reach the Module in which those topics have been placed.
1. SSO or log in at my.mheducation.com.
2. Launch ALEKS.
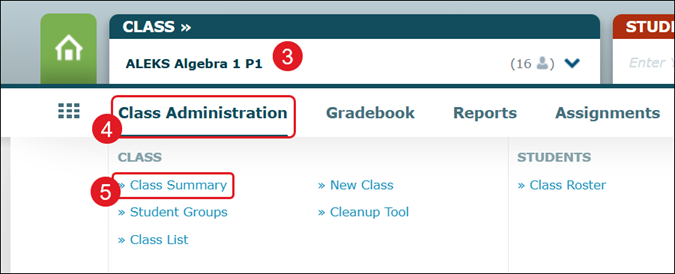
3. Select the Class from the drop-down.
4. Hover over Class Administration.
5. Click on Class Summary from the menu.
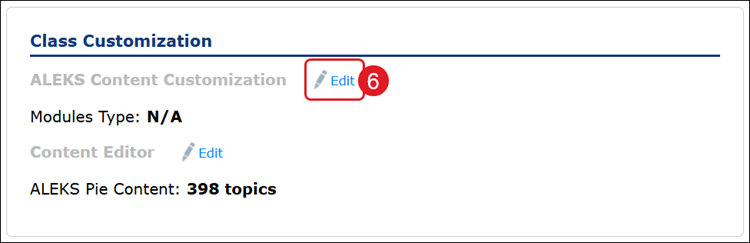
6. Under Class Customization, click the Edit link next to ALEKS Content Customization.
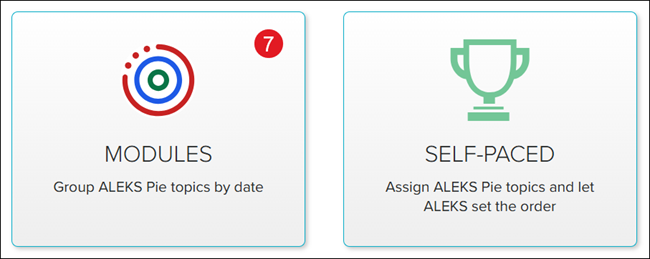
7. Click the Modules button.
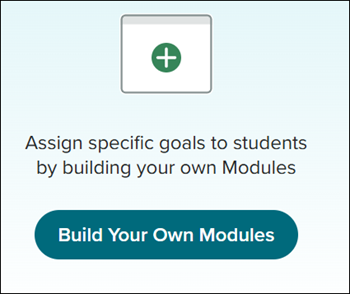
8. Click the Build Your Own Modules button.
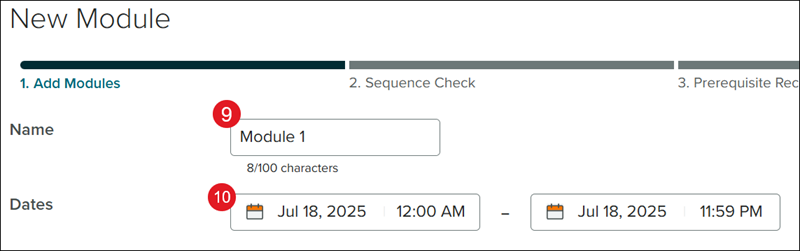
9. Enter a Module Name.
10. Enter the Dates for the Module to be available for completion.
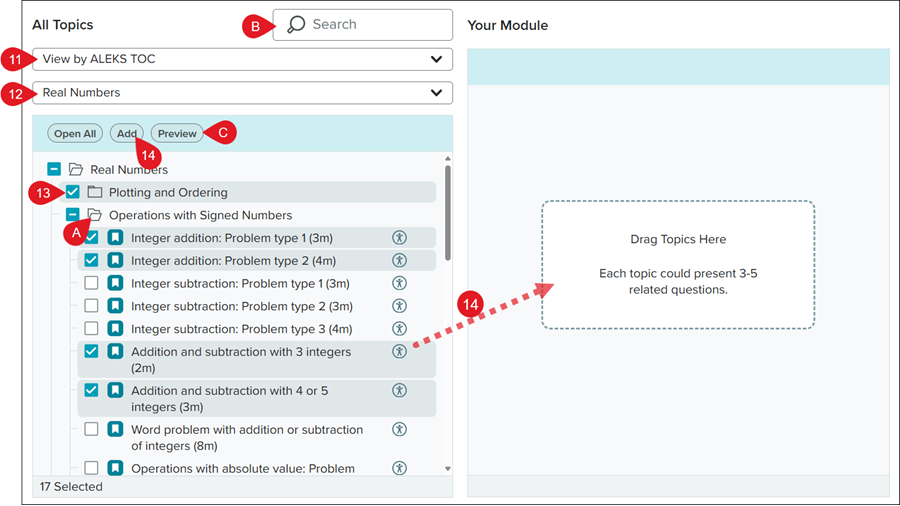
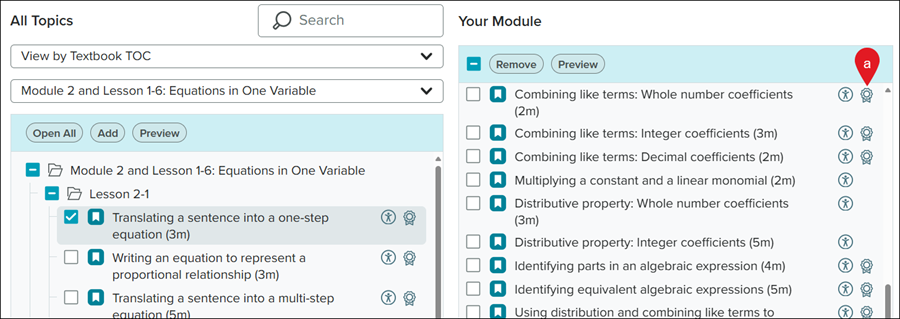
11. Select Topics from by clicking on the drop-down and selecting Textbook TOC or ALEKS TOC.
Note: To see the Textbook TOC option, you will first need to integration a textbook for the class. Refer to the ALEKS - Class Summary article for steps on adding a textbook.
12. Click the Select (second drop-down) and select the topic you want covered in the module.
A. Click the Topic to expand the folder.
B. Use the Search field to locate a specific Topic.
C. Click the Preview button to view example questions from the selected Topics.
13. Check the box next to the Topic(s) you want included.
14. Click the Add button.
You can also drag and drop the options into the Your Module field on the right.
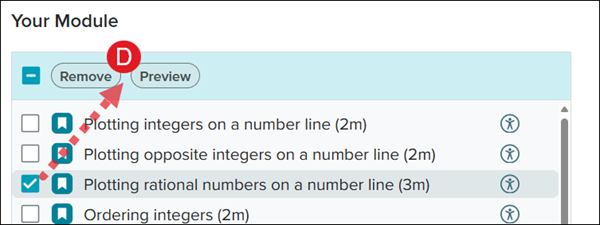
D. In the Your Module field, check the box next to the Module(s) to Remove or Preview them.
15. Click the Continue button at the bottom.
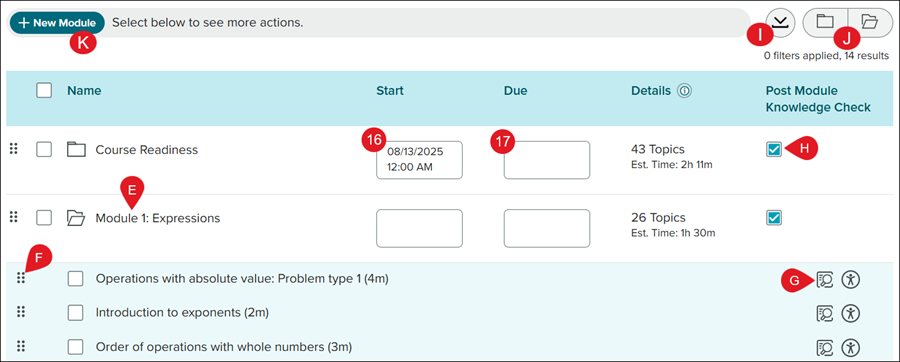
16. Enter a Start date and time for each Module.
17. Enter a Due date and time for each Module.
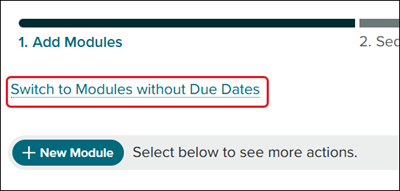
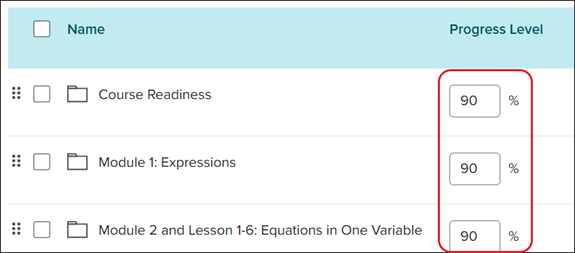
If you would rather set each Module by Progress Level instead of a Due date, click the Switch to Modules without Due Dates link.
The Progress Level automatically is set to 90%. Click in the field to enter a different percentage.
E. Click on the Module Name to expand the folder.
F. Click the dots to the left of the Module or topic to move it to a new location in the list.
G. Click the Preview button to view an example question for the topic.
H. Uncheck the Post Module Knowledge Check button if you do not want students to complete a Knowledge Check after completing that assigned module.
I. Click the Download button to print/save a copy of the Module list.
J. Click the Collapse/Expand (folder) icons to open and close all Module folders.
K. Click the +New Module to create and add a custom Module.
Check the box next to Module(s) to do the following:
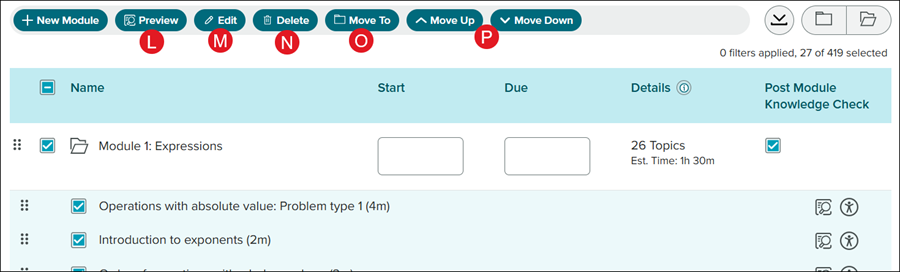
L. Click the Preview button to view example questions for all selected topics.
M. Click the Edit button to Add, Preview, and Remove Module selections.
Note: Only one Module can be selected at a time for the Preview and Edit buttons to be available.
a. Click the Standards (ribbon) icon to view the associated standards for that topic.
N. Click the Delete button to remove the Module selection.
Note: Deleting Modules/Topics removes them from student access.
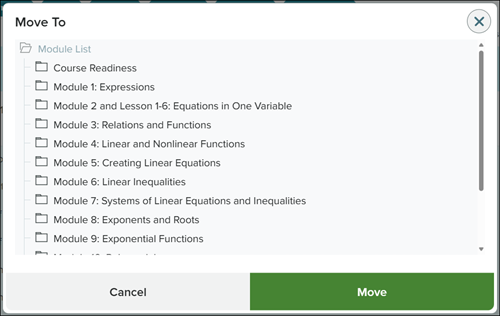
O. Click the Move To button to move the selections to a different Module folder.
P. Click the Move Up or Move Down buttons to move the Module selection to a different location in the list. This is the same as clicking and dragging on the dots to the left of the Modules/Topics.
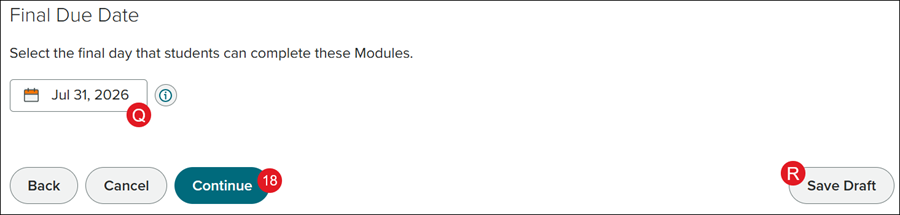
Q. If you selected to have no due date, you will need to select a Final Due Date.
18. Click the Continue button at the bottom.
R. You also have the option to Save Draft and continue with making edits at a later time, if needed.
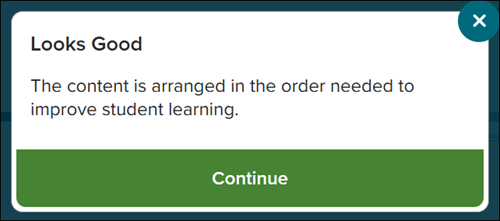
19. Click the Continue button on the pop-up.
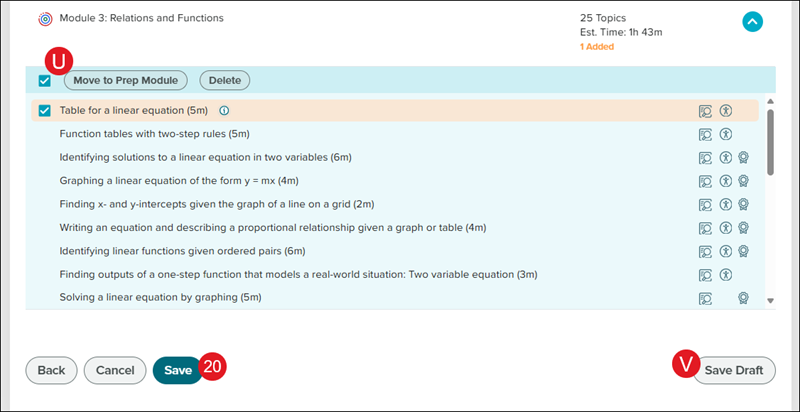
Depending on the selections made, topic recommendations may be made by the ALEKS program and automatically added. The recommended topic addition(s) will be highlighted in orange.
S. Click the Delete All Recommended Topics button to remove any topics that were suggested.
T. Click the Download button to save/print the Module syllabus.
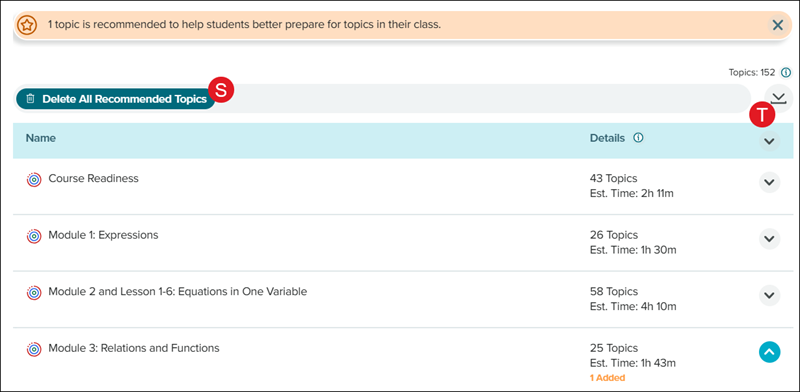
U. Check the box next to the recommended topic(s) to be able to Move to Prep Module or Delete them.
20. Click the Save button.
V. Click the Save Draft button to continue making edits at a later time.
The page will automatically guide you to the Assignment List.