Create Classic ALEKS View Sub-Classes
Learn how to create sub-classes in the classic ALEKS view to organize students and instruction.
- Supplemental
- ALEKS Adventure
- Math
- Getting Started & Orientation
- SSO & Manual-Rostering
- Customer Support
- Direct Login & Auto-Rostering
- Middle School
- Class Management
- ALEKS
- Direct Login & Manual-Rostering
- High School
- Classroom Teacher
- SSO & Auto-Rostering
- PreK-12
- Back-to-School Setup


This article walks teachers through creating sub-classes using the Classic ALEKS view. These steps can be followed if the user is using ALEKS 3-12 or ALEKS Adventure.
For a full page view of the demo, click here.
For a Spanish version of the demo, click here.
For a video walkthrough, click here.
Sub-classes give teachers the option to assign a new course product without having to move students to a new primary class and a district or school-level Master Template. By default, progress will carry over if the course product assigned is in the same course family as the original class. Otherwise, students will need to retake the Initial Knowledge Check, as they would when moving from one primary class to another.
Note: Unlike primary classes, sub-classes can only be created or modified within the ALEKS program. They are not managed through the auto-rostering process or from the My Programs page.
Also, at this time the Copy an Existing Class option is only available when using the Classic ALEKS view.
Article Contents
Create a New Class
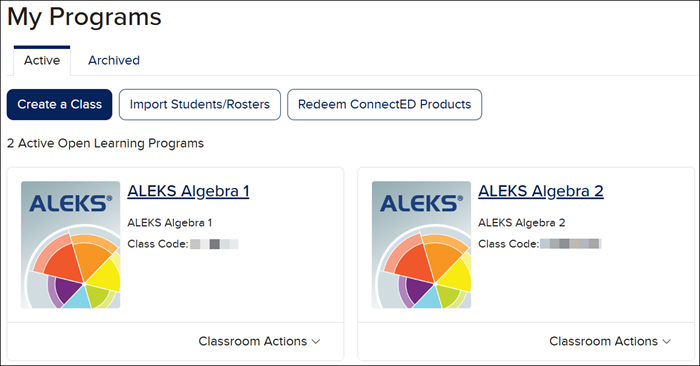
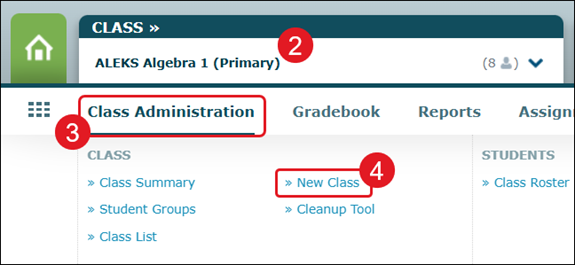
1. From My Programs, click on your ALEKS class.

2. Select a Primary class from the Class menu at the top of the page.
3. Hover over Class Administration.
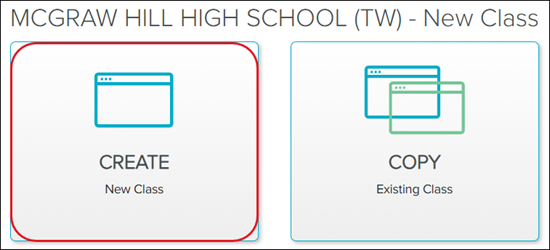
4. Click on New Class from the menu.

5. Click the CREATE New Class button.
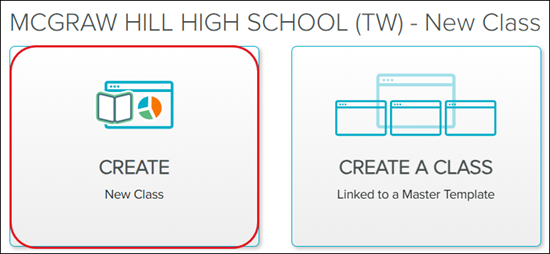
6. Click the CREATE New Class (again).
If you would like to create a sub-class linked to a Master Template, refer to the Classic ALEKS - Create a Sub-Class Using a Master Template article.
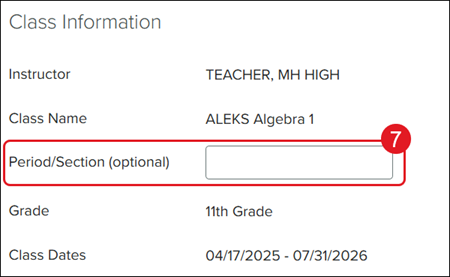
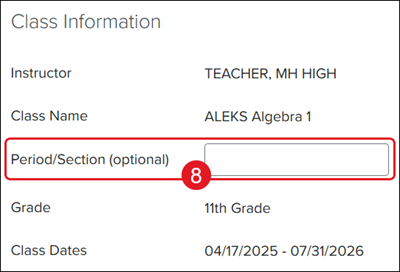
7. Enter a Period/Section name. This is optional.
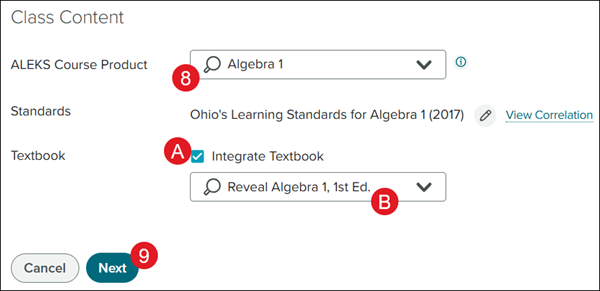
8. Select the ALEKS Course Product from the drop-down.
A. Check the Integrate Textbook box if you want to include a corresponding textbook.
B. Select the preferred textbook from the drop-down.
9. Click the Next button.
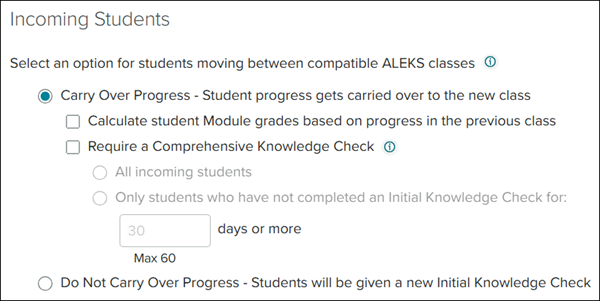
10. Select the radio button next to the Incoming Students option you want for the class.
If you select Carry Over Progress, click on the additional options you would like for how the student progress is calculated and if you want them to complete a Comprehensive Knowledge Check. This Knowledge Check consists of approximately 25 questions and will assess students on all of the material in the class.
If you select Do Not Carry Over Progress, the students will be prompted to complete a new Initial Knowledge Check.
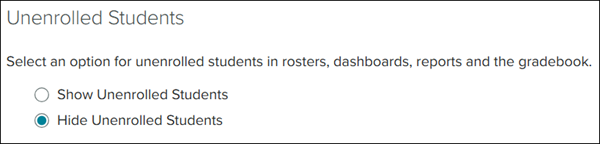
11. Under the Unenrolled Students section, select if you want to Show or Hide Unenrolled Students in the Class Roster.
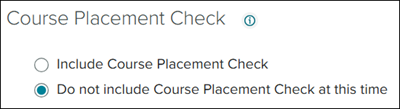
12. Under the Course Placement Check section, select if you want the students to complete a Course Placement Check or Do not include one at this time.
The Course Placement Check helps instructors determine the appropriate course product for each student.
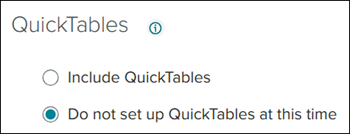
13. Under the QuickTables section, select if you want to include QuickTables or not to set them up at this time.
ALEKS QuickTables is a research-based, math fact mastery program for multiplication, division, addition, and subtraction for grades 3 and up.
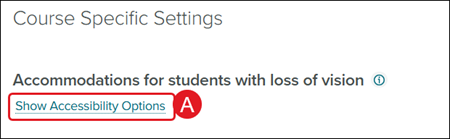
A. In the Course Specific Settings, click the Show Accessibility Options link to select specific options for any students who are visually impaired.
Note: Changing the Accessibility options may impact the number of topics students see in their Pie.
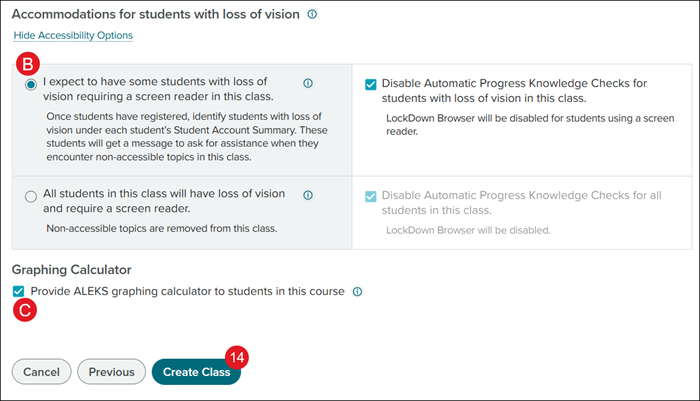
B. Select the radio button next to the preferred Accessibility Options.
C. Uncheck the Graphing Calculator option if you do not want students to have access to the Graphing Calculator while completing their ALEKS work.
Unchecking this box will result in questions needing the Graphing Calculator to be removed from their available topics.
14. Click the Create Class button.
Copy an Existing Class
1. From My Programs, click on your ALEKS class.
2. Select a Primary class from the Class menu at the top of the page.
3. Hover over Class Administration.
4. Click the New Class option from the menu.
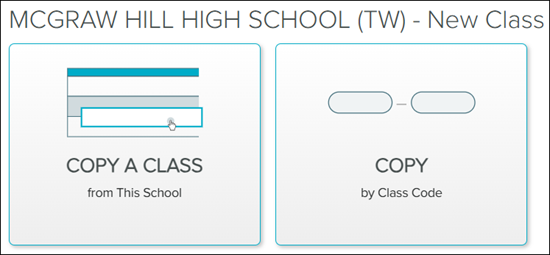
5. Click the COPY Existing Class button.

6. Click to COPY A CLASS from This School or COPY by Class Code.
Note: If you are copying a class from another teacher in the same school, you will want to use the COPY A CLASS from This School option.
If you are copying a class from another teacher in a different school than the one you are associated with, use the Copy by Class Code option.
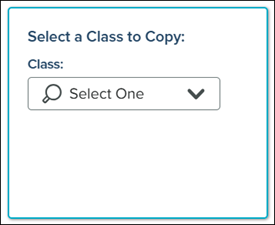
For the COPY A CLASS from This School option, use the Class drop-down to select the class you want to copy.
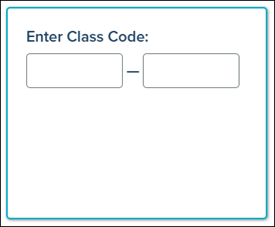
For the COPY by Class Code option, enter the 10-digit code for the class you wish to copy.
7. Click the Continue button.
8. Enter a Period/Section name. This is optional.
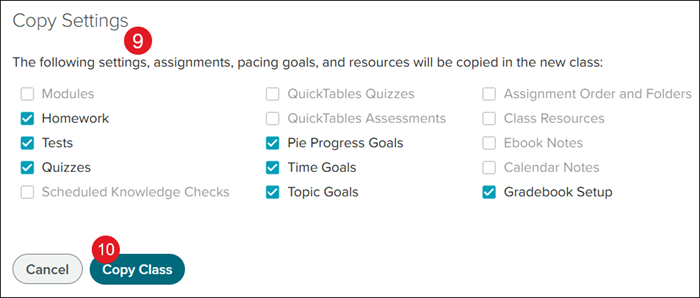
9. In the Copy Settings section, uncheck any settings, assignments, pacing goals, and resources you do not want copied over to the new class.
All available options are checked by default.
If an option is grayed out, this means there is nothing to copy over for those sections.
10. Click the Copy Class button.