Proctorio - Getting Started - Instructor
Get started with Proctorio as an instructor, including setup steps, system checks, and exam configuration.
Tags
- Resources
- Higher Education
- Proctorio
- Customer Support
- Connect
- Instructor


What is Proctorio? Proctorio is McGraw Hill’s remote proctoring tool that incorporates assessment integrity tools within McGraw Hill Connect®.
Overview of Features:
INITIAL SETUP
Enabling Proctorio During Assignment Creation:
3. Once you have chosen the content you want to include in your assignment hit Continue.
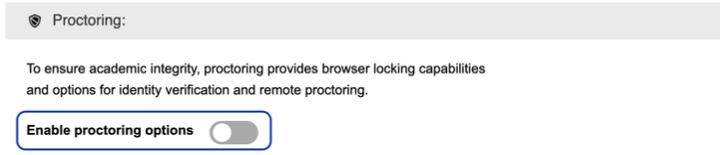
4. You’re now on the policy-setting page and will see a new proctoring option above your regular Connect assignment setting options. Note: By default, all proctoring options are turned off. To enable proctoring options, click on the toggle.
5. Proctorio settings can now be applied to your assignment. Enable a setting by clicking on that tile, and the tile will turn black and include a green checkmark in the upper right corner, indicating the setting has been turned on. Click on the tile again to de-select that setting.
6. Settings that are part of the Plus level are indicated by the word “Plus” in the upper right corner. For more details on Basic and Plus click here. Please note that using Plus level features will incur a fee for students.
7. Some titles include a link that says Customize. This means that they have additional options tied to the settings that you can choose. For instance, within the browser-locking section, functionalities are grouped by behaviors you might want to prevent.
8. Be sure to scroll down the page to see all recording, browser-locking, and verification options. At the bottom of the page, you’ll see a Summary section that shows the options you’ve chosen, as well as an indication of any cost to test takers. If you are satisfied with your selected settings, click Save to lock in the settings for this assignment.
9. If you decide you do not want to add any proctoring settings to this assignment, click Cancel to return to the regular policy settings page.
10. You now have proctoring enabled for this assignment and will be returned to the Connect policy settings page. If you have selected Plus level settings that will incur a fee for students, you will see this fee indicated. You can always edit your proctoring settings by clicking edit.
Overview of Features:
- Browser-Locking Capabilities allow the instructor to control the assessment environment to increase security during the assessment.
- Remote Proctoring recording options control the information that is recorded during the exam, allowing the instructor to control the assessment environment.
- Verification Options include settings that help ensure students are who they say they are, their hardware is working, and they are reminded of academic integrity policies. Learn More .
INITIAL SETUP
Enabling Proctorio During Assignment Creation:
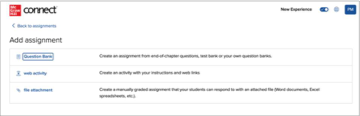
- Proctoring, browser-locking, and verification functions can be added to assignments created from the Question Bank. To get started, click on Add Assignment and choose Question Bank.
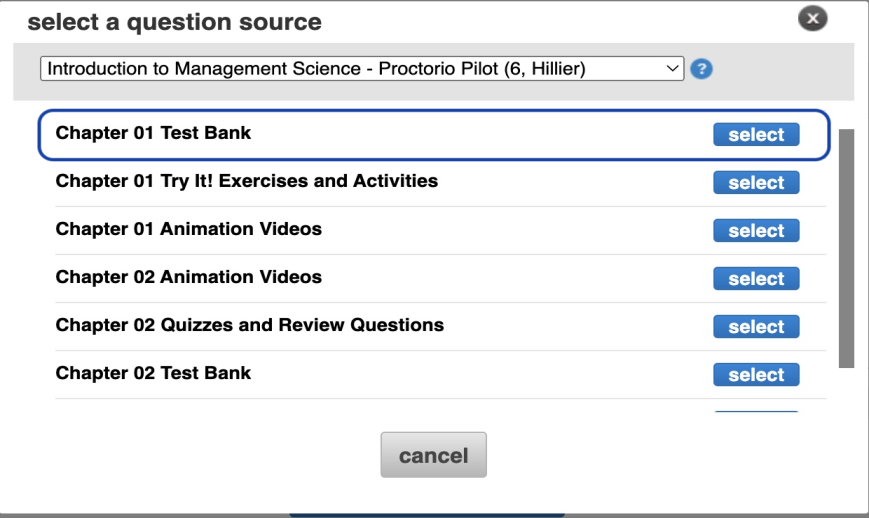
- Click on the resource link to view and select your content.
3. Once you have chosen the content you want to include in your assignment hit Continue.
4. You’re now on the policy-setting page and will see a new proctoring option above your regular Connect assignment setting options. Note: By default, all proctoring options are turned off. To enable proctoring options, click on the toggle.
5. Proctorio settings can now be applied to your assignment. Enable a setting by clicking on that tile, and the tile will turn black and include a green checkmark in the upper right corner, indicating the setting has been turned on. Click on the tile again to de-select that setting.
6. Settings that are part of the Plus level are indicated by the word “Plus” in the upper right corner. For more details on Basic and Plus click here. Please note that using Plus level features will incur a fee for students.
7. Some titles include a link that says Customize. This means that they have additional options tied to the settings that you can choose. For instance, within the browser-locking section, functionalities are grouped by behaviors you might want to prevent.
8. Be sure to scroll down the page to see all recording, browser-locking, and verification options. At the bottom of the page, you’ll see a Summary section that shows the options you’ve chosen, as well as an indication of any cost to test takers. If you are satisfied with your selected settings, click Save to lock in the settings for this assignment.
9. If you decide you do not want to add any proctoring settings to this assignment, click Cancel to return to the regular policy settings page.
10. You now have proctoring enabled for this assignment and will be returned to the Connect policy settings page. If you have selected Plus level settings that will incur a fee for students, you will see this fee indicated. You can always edit your proctoring settings by clicking edit.
• Cost: If you see a cost, that cost is in addition to any partnership your institution might have on its own with Proctorio. Be aware that your students will be required to pay this one-time fee when they start the first proctored assignment. We strongly encourage you to talk with your students about all fees and proctoring use in advance. If you worked with your McGraw Hill rep to bundle in the Plus fee, you will see a $0 cost even if selecting Plus functions. If you do see a $17.50 notice despite having bundled, please stop, and contact your McGraw Hill rep.
11. At this point, you can make any policy changes you want to make to the regular Connect policy settings, then click review & assign.
12. On the Review & Assign page, give your assignment a final view. You’ll once again see an indication that proctoring is enabled, and you’ll also see one last fee notification if a fee will be charged to your students. If you are happy with your assignment, click assign.
13. You’ll now be taken back to your course homepage – and the new assignment you created will show in your assignment listing. You’ll notice that the phrase “Proctoring enabled” will appear in the assignment title. This is automatically applied to any assignment where you have enabled proctoring functions to indicate to you and to your students, which assignments have proctoring.
• Student View: while you can click on Student View on this page, Student View will NOT allow you to preview the proctoring experience. To see the proctoring experience from the student perspective, you can watch the Proctorio Student Orientation Video, or ask your McGraw Hill sales rep for a student access code.