Create a Note in Wonders/Maravillas
Learn how students and families use Wonders 2020 School to Home to view weekly family letters, spelling lists, and teacher messages.
- Literacy
- SSO & Manual-Rostering
- Customer Support
- Direct Login & Auto-Rostering
- Wonders 2014
- Maravillas 2020 & 2017
- School Student
- Core
- Direct Login & Manual-Rostering
- Wonders Balanced Literacy 2016
- Wonders 2023 2020 2017
- School Parent
- SSO & Auto-Rostering
- PreK-12
- Elementary School
- Kindergarten
- 1st Grade
- 2nd Grade
- 3rd Grade
- 4th Grade
- 5th Grade
- 6th Grade
- Middle School
- Student Resources


Students have the ability within Wonders to create a note that will then save to their My Work tab under My Binder. Keep in mind, your teacher also can see any notes you create within their Teacher Edition.
Create a Note
1. Click the Create Note icon located in the Wonders banner.

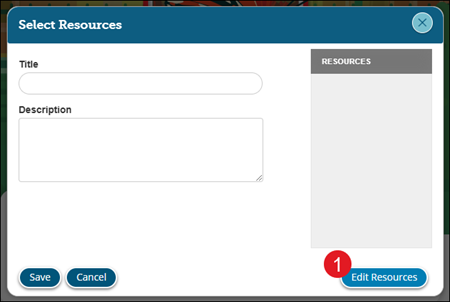
2. On the Create Note pop-up, enter a Title.
3. Enter the note into the Description field.
4. To attach resources, click the Edit Resources button.
5. Click the Save button.

Add Resources
You can add resources to your note to be able to access them easily and quickly.
1. Click on the Edit Resources button on the Create Note pop-up.
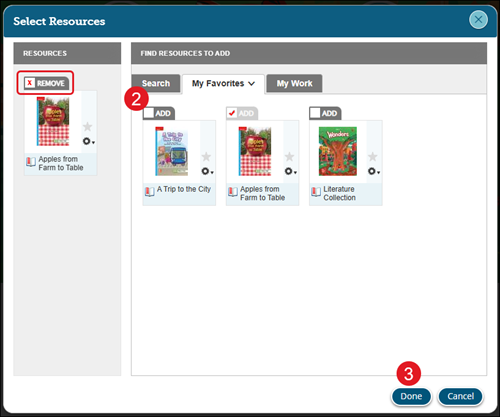
2. Check the box next to Add for the resource(s) you want to attach.
Click the Remove check box to detach the resource from the note.
3. Click the Done button.
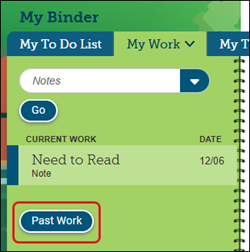
View Notes
1. Click on My Binder in the Wonders navigation bar.
2. Click on the My Work tab.
3. Select Notes from the drop-down and click the Go button.
4. Click on the note you want to view.
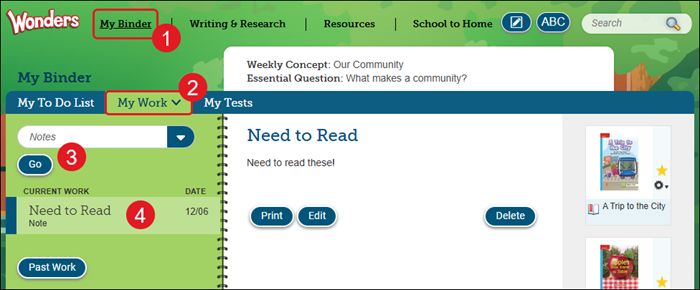
If the was created in a previous week, click the Past Work button.
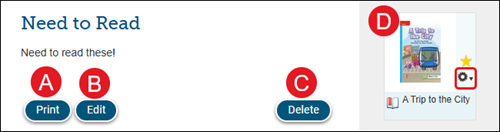
A. To print the note, click the Print button.
B. To make changes to the note and to add or remove resources, click the Edit button.
C. To remove the note, click the Delete button. Keep in mind, once a note has been deleted, we cannot get it back.
D. Click on any attached resources to open them or click on the Tools (gear) icon on the resource and select the option to open.