StudySync - Communities
Engage with StudySync communities to share resources, ideas, and best practices.
Tags
- Getting Started & Orientation
- StudySync 2021
- Literacy
- SSO & Manual-Rostering
- Customer Support
- Direct Login & Auto-Rostering
- StudySync 2015 & 2017
- Middle School
- Core
- Class Management
- Direct Login & Manual-Rostering
- High School
- StudySync
- Classroom Teacher
- SSO & Auto-Rostering
- PreK-12


A Community is a group that a teacher can create and other teachers can join in order to share work amongst themselves and their students. Communities can be Public or Private, depending on the need, and teachers can allow their classes to receive Community assignments either directly or after the teacher reviews each one.
Create a Community
Remove Groups from a Community
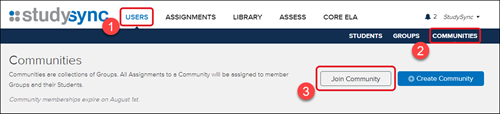
2. Click Communities from the submenu.
3. Click the Join Community button.
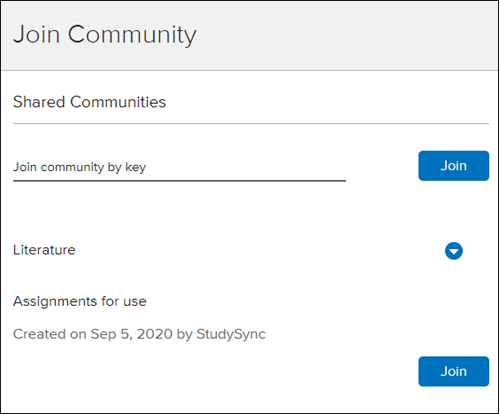
4. Enter the Community Key provided to you by the teacher that created the Community OR click on the Community name to expand the public community option. Click the Join button.
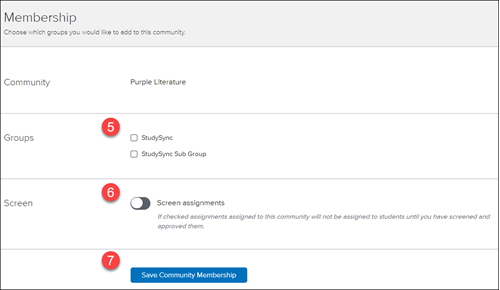
5. Select the Groups you would like to attach to the Community.
6. Toggle on/off the Screen assignments option based on desired actions for assignments attached to the Community.
Note: If checked assignments assigned to this community will not be assigned to students until you have screened and approved them.
7. Click Save Community Membership.
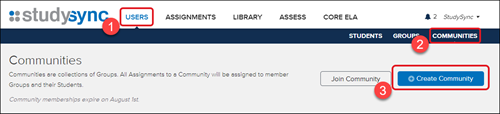
2. Click Communities from the submenu.
3. Click the Create Community button.
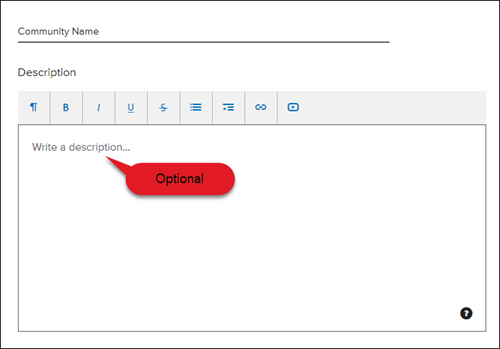
4. Enter the Community Name and Description, if desired,
5. Select the desired Community Type.
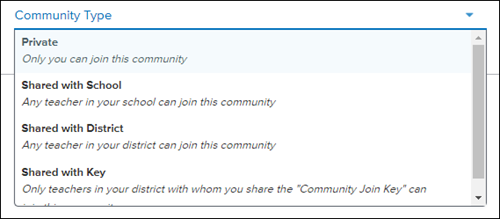
Private - Only you can join this community.
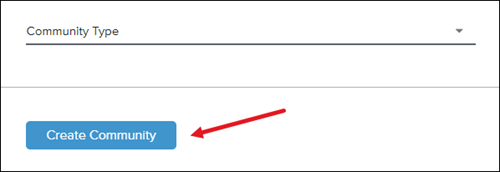
6. Click Create Community.
2. Click Communities from the submenu.

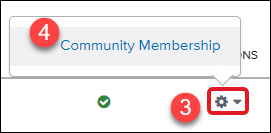
3. Click the Actions wheel to the right of the Community name.
4. Click Community Membership from the pop-up menu.
5. Uncheck the Group(s) box next to the group you wish to remove.
6. Click Save Community Membership.

You can also toggle on/off the Screen Assignments option from here as well.
Topics covered in this article:
Join a CommunityCreate a Community
Remove Groups from a Community
How to join a Community:
1. After launching StudySync, click on Users from the top menu.2. Click Communities from the submenu.
3. Click the Join Community button.
4. Enter the Community Key provided to you by the teacher that created the Community OR click on the Community name to expand the public community option. Click the Join button.
5. Select the Groups you would like to attach to the Community.
6. Toggle on/off the Screen assignments option based on desired actions for assignments attached to the Community.
Note: If checked assignments assigned to this community will not be assigned to students until you have screened and approved them.
7. Click Save Community Membership.
How to create a Community:
1. After launching StudySync, click on Users from the top menu.2. Click Communities from the submenu.
3. Click the Create Community button.
4. Enter the Community Name and Description, if desired,
5. Select the desired Community Type.
Private - Only you can join this community.
Shared with School - Any teacher in your school can join this community.
Shared with District - Any teacher in your district can join this community.
Shared with Key - Only teachers in your district with whom you share the 'Community Join Key' can join this community.
6. Click Create Community.
How to remove Groups from a Community:
1. After launching StudySync, click on Users from the top menu.2. Click Communities from the submenu.
3. Click the Actions wheel to the right of the Community name.
4. Click Community Membership from the pop-up menu.
5. Uncheck the Group(s) box next to the group you wish to remove.
6. Click Save Community Membership.
You can also toggle on/off the Screen Assignments option from here as well.