Create and Manage Open Learning Student Groups
Create and manage student groups for differentiated instruction.
Tags
- Customer Support
- PreK-12
- Classroom Teacher
- Preschool
- Elementary School
- Middle School
- High School
- Direct Login & Auto-Rostering
- Direct Login & Manual-Rostering
- SSO & Auto-Rostering
- SSO & Manual-Rostering
- Core
- Intervention
- Supplemental
- AP, Honors & Electives
- Career & Technical Education
- Literacy
- Math
- Science
- Social Studies
- Health
- Visual & Performing Arts
- World Languages
- AP Biology
- AP Chemistry
- AP History & Geography
- AP Psychology
- AP Economics
- AP African American Studies
- AP Precalculus
- AP Statistics
- AP Computer Science
- AP Language and Composition
- AP Public Speaking
- AP Music Theory
- 5 Steps to a 5 - AP Test Prep
- Glencoe Health 2022
- Teen Health 2021
- Arrive Math
- Building Blocks 2024
- Building Blocks PreK 2025
- Number Worlds 2024
- SRA Reading Laboratory 2025
- SRA Reading Mastery Transformations
- McGraw Hill Literacy Emerge!
- McGraw Hill Literacy Summit!
- McGraw Hill Literacy Soar!
- Open Court Reading 2025
- CA Reveal Math (K-12)
- Illustrative Math
- Reveal Math (K-12)
- Texas Math
- CA Inspire Science 2020
- FL Science 2025 (K-12)
- Inspire Science 2020
- TN Science (K-12)
- TX Science 2025 (K-12)
- CA Impact 2019
- FL Social Studies 2024 (K-12)
- Impact Social Studies
- McGraw Hill Social Studies
- All Sorts 2026 (K-5)
- Asi se Dice 2024
- CTE - Health Science
- CTE - Computing and Technology
- CTE - Agriculture
- CTE - Culinary Arts
- CTE - Early Childhood Education
- CTE - Criminal Justice
- CTE - Business, Marketing, and Finance
- Level Up K–5
- Level Up 6–8
- Level Up 9–12
- Class Management


View the demo in a separate tab.
View the Spanish version of the demo.
Article Content
Create a Group
- SSO or sign in at my.mheducation.com.
- Click on Classroom Actions.
- Click on Manage Class Roster from the menu.
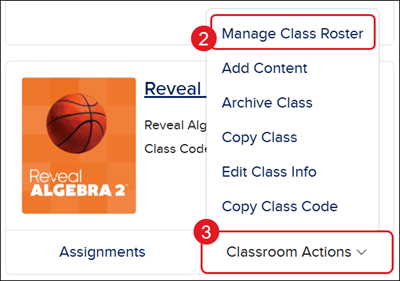
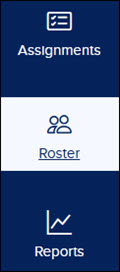
You can also click on the class and then click on Roster from the navigation menu.
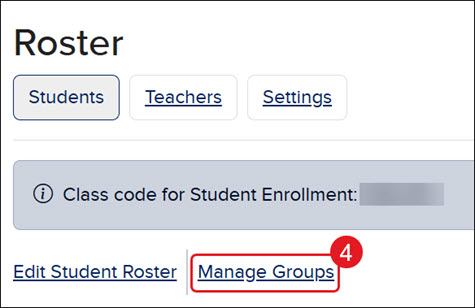
- Click the Manage Groups link.
Note: This link will not show until the class has been rostered.
- Click the Create Group button.
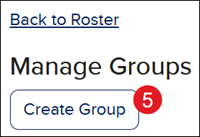
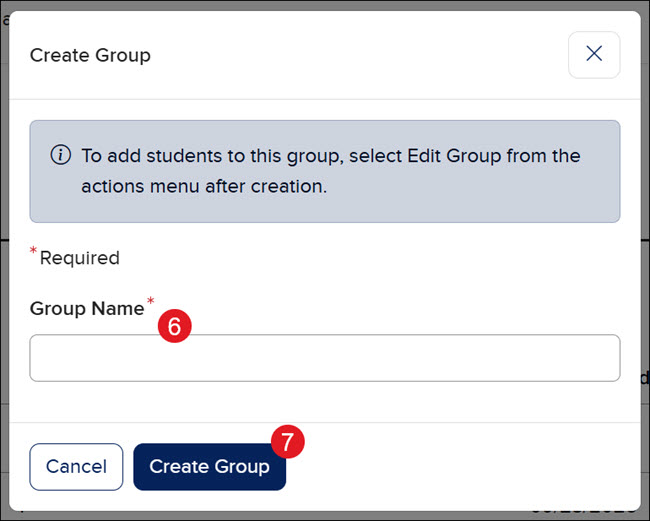
- On the Create Group pop-up, enter a Group Name.
- Click the Create Group button.
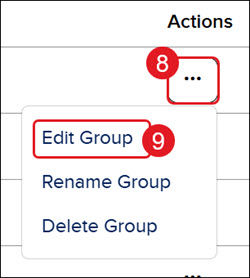
- Click the Options icon in the Actions column.
- Click Edit Group from the menu.
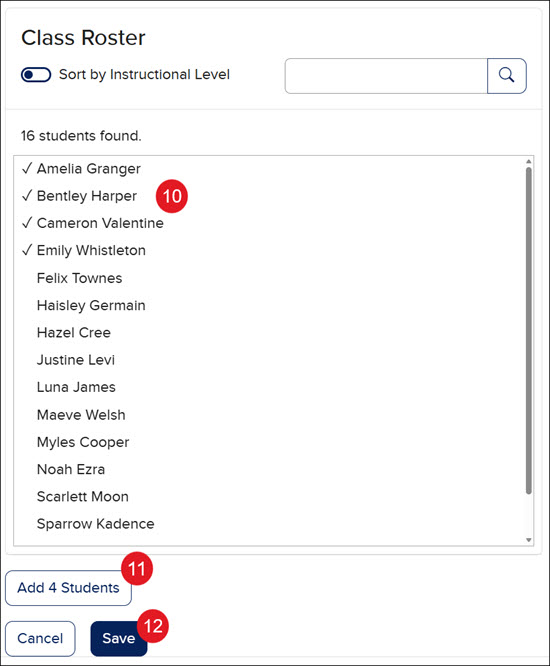
- Click on the student(s) you want to add to the group.
- Click the Add Students button.
- Click the Save button.
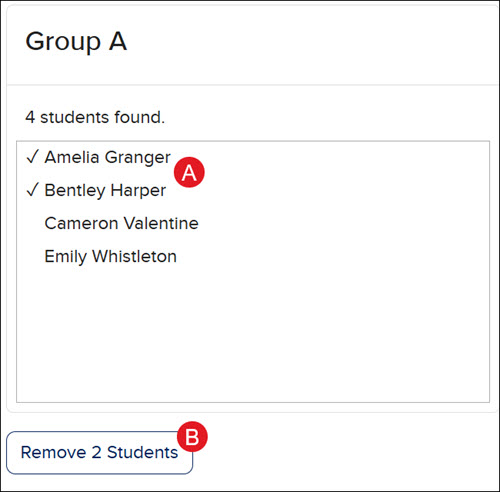
To remove students from the group, click on the student(s) in the right-hand panel (A) and click the Remove Students button (B). Then click the Save button.
Rename Group
- From the Roster page, click the Manage Groups link.
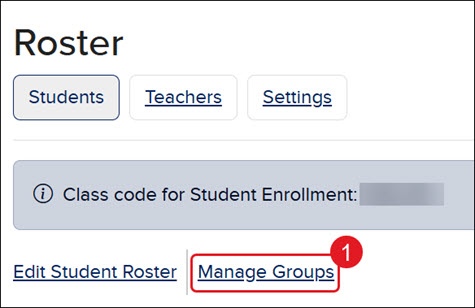
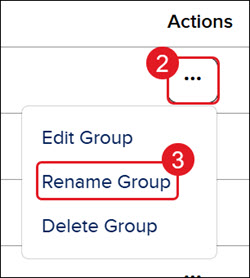
- Click the Options icon in the Actions column.
- Click Rename Group from the menu.
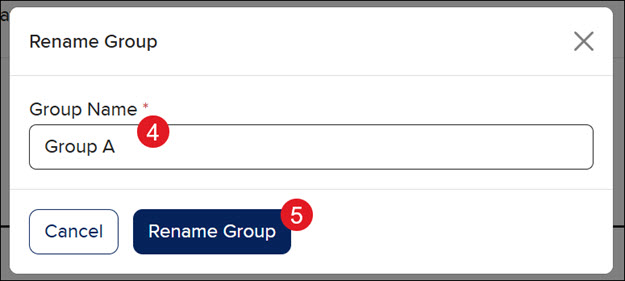
- On the Rename Group pop-up, enter the preferred Group Name.
- Click the Rename Group button.
Delete Group
Note: Deleting a group does not remove the students from the class roster.
- From the Roster page, click the Manage Groups link.
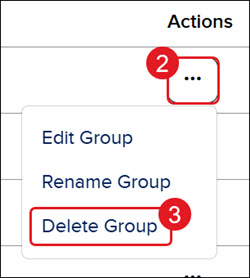
- Click the Options icon in the Actions column.
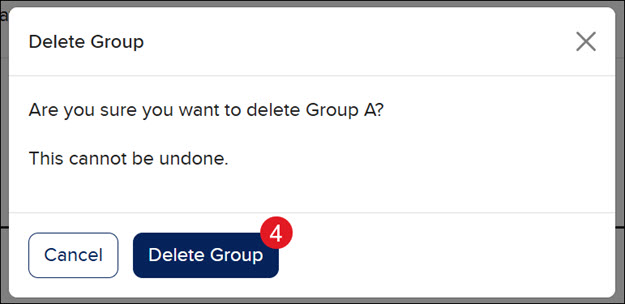
- Click Delete Group from the menu.
- On the pop-up, click the Delete Group button.