New ALEKS Adventure Custom Reports
Create custom reports in the new ALEKS Adventure interface to track student progress.
- Supplemental
- ALEKS Adventure
- Math
- SSO & Manual-Rostering
- Customer Support
- Direct Login & Auto-Rostering
- Reports & Analytics
- Direct Login & Manual-Rostering
- Classroom Teacher
- SSO & Auto-Rostering
- PreK-12
- Elementary School


This article walks teachers through viewing the Custom Report for ALEKS Adventure in the new ALEKS view.
For a full page view of the demo, click here.
For a Spanish version of the demo, click here.
Article Contents
Access Custom Reports
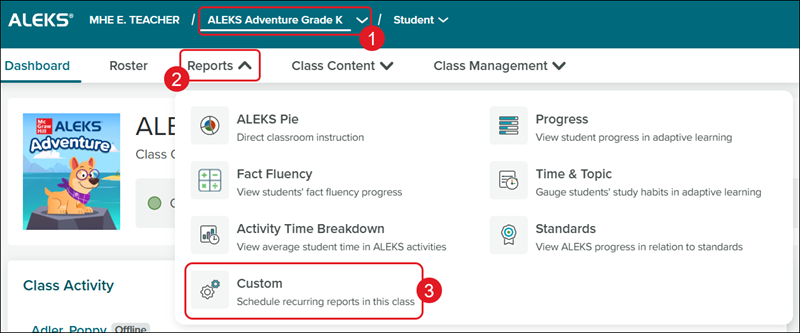
1. SSO or log in at my.mheducation.com.
2. Launch ALEKS Adventure.
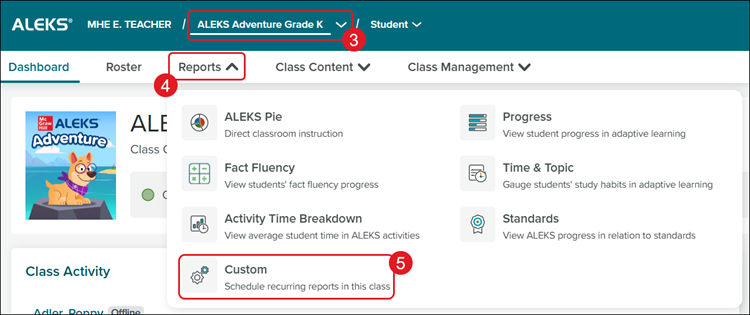
3. Select a Class from the drop-down.
4. Click on Reports.
5. Click on Custom from the menu.
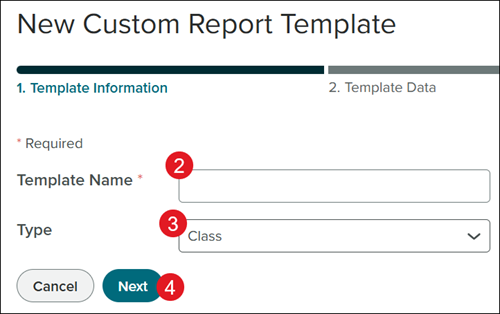
Create Report Template
1. Click the Create a Template or +New Template buttons.
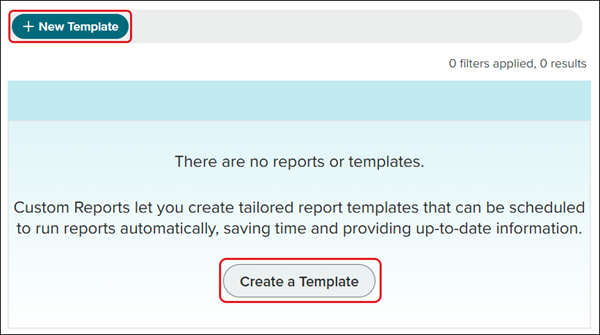
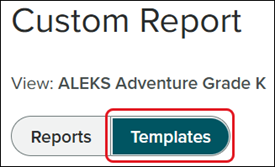
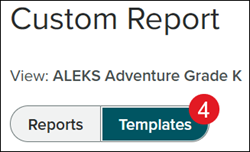
If reports have been generated already, to create a new template you will need to click on the Templates button first.
2. Enter a Template Name.
3. Select a Type from the drop-down.
4. Click the Next button.
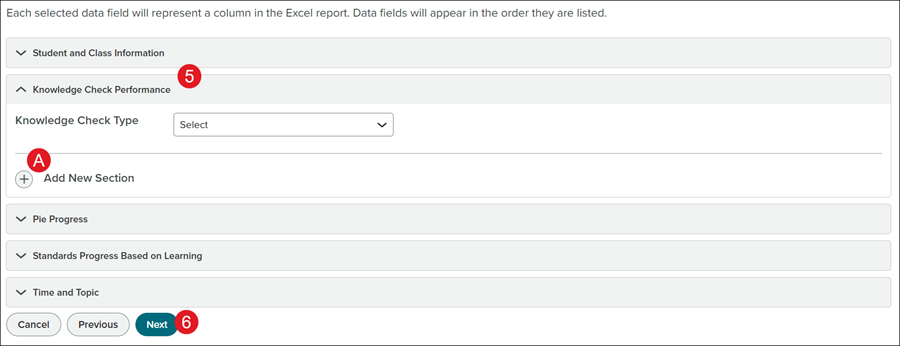
5. Click on each blade and select what items to include in the report.
A. Click the + Add New Section to add additional options to the report.
6. Click the Next button.
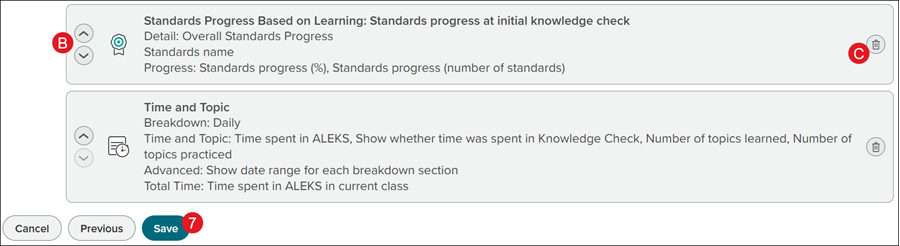
B. Click the arrows up/down to rearrange the order of the data on the report.
C. Click the trash can icon to the right of the data option to delete it from the report.
7. Click the Save button.
Schedule Report
Note: You can only have 15 custom reports made at a time.
Scheduling a report happens during the process of creating a new template, or when scheduling a report for an existing template.
To schedule a report for an existing template, click on the Template button, click on the kebob icon to the right of the template, and click on Schedule New Report from the menu.

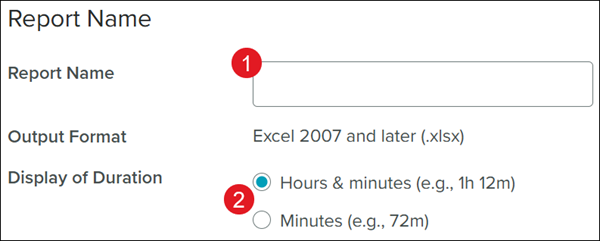
1. Enter a Report Name.
2. Select the preferred radio button next to Display of Duration.
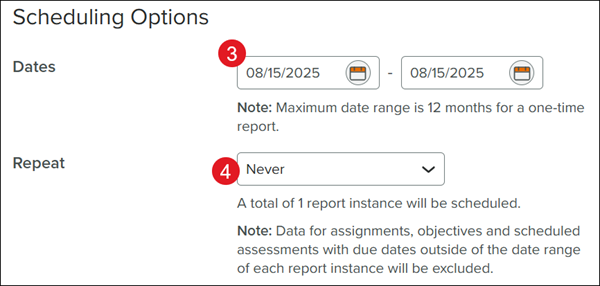
3. Select the Dates for the report.
4. Select how often to Repeat the report from the drop-down.
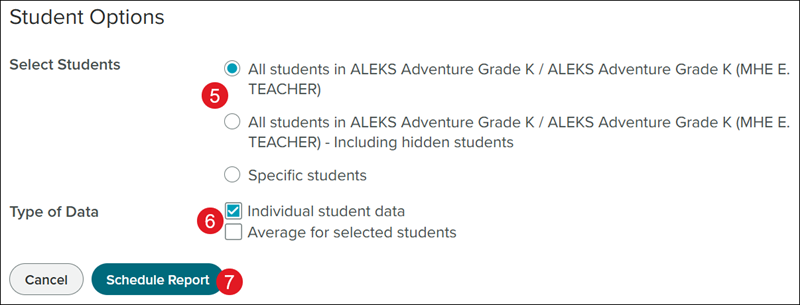
5. Select the preferred radio button next to Select Students.
6. Check the box(es) next to the preferred Type of Data.
Individual student data is checked by default.
7. Click the Schedule Report button.
Download Report
1. Select a Class from the drop-down.
2. Click on Reports.
3. Click on Custom from the menu.
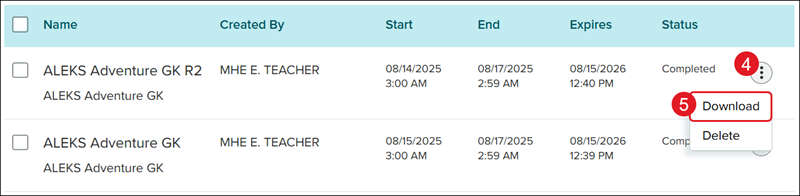
4. On the Reports page, click the kebob icon to the right of the report.
5. Click Download from the menu. An .xlsx file will download to your device.
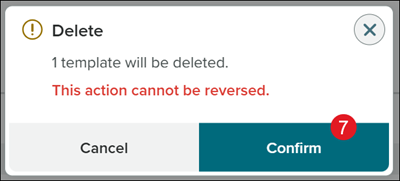
Delete Report
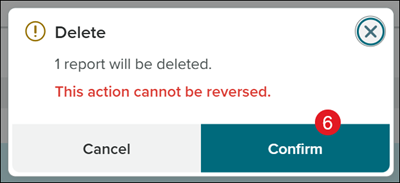
Keep in mind, once a report is deleted, there is not a way to get it back.
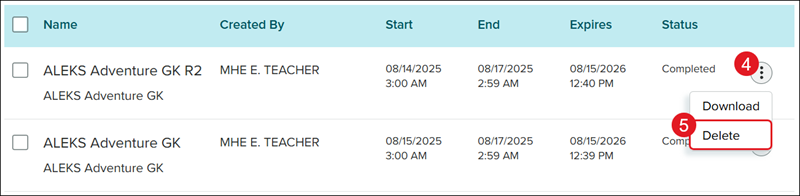
1. Select a Class from the drop-down.
2. Click on Reports.
3. Click on Custom from the menu.

4. On the Reports page, click the kebob icon to the right of the report.
5. Click Delete from the menu.
6. On the Delete pop-up, click the Confirm button.
Delete Template
Keep in mind, once a template is deleted, there is not a way to get it back.
1. Select a Class from the drop-down.
2. Click on Reports.
3. Click on Custom from the menu.

4. Click the Templates button.
5. Click on the kebob to the right of the template.
6. Click Delete from the menu.
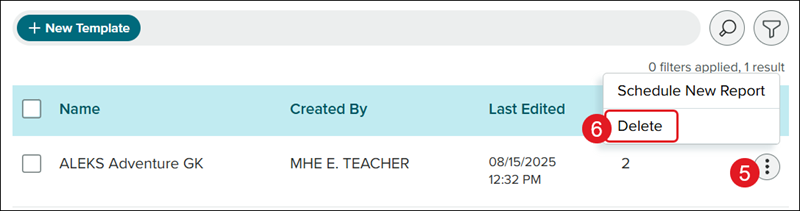
7. On the Delete pop-up, click the Confirm button.