New ALEKS - Quiz/Test/Homework
Create quizzes, tests, and homework in New ALEKS.
- Supplemental
- SSO & Manual-Rostering
- Customer Support
- Grades & Assignments
- Direct Login & Auto-Rostering
- Middle School
- ALEKS
- Direct Login & Manual-Rostering
- High School
- Classroom Teacher
- SSO & Auto-Rostering
- PreK-12
- Preschool
- Elementary School


This article walks teachers through creating quiz, test, and homework assignments in the new ALEKS view.
For a full page view of the demo, click here.
For a Spanish version of the demo, click here.
Best practices and tips for using Quiz, Test, and Homework:
- Quiz, Test, and Homework are optional, auto-graded assignments that are separate from the adaptive path. Students’ work in Quiz, Test, and Homework does not fill in their ALEKS Pie/Pie Progress nor does it inform their adaptive path.
- These assignments are best used as brief warm-ups, quick check-ins, or extra practice to reinforce, pinpoint, or extend standards. Some teachers also use them to replace paper/pencil quizzes or tests.
- Use these assignments sparingly or keep them brief to ensure students still have ample time to work in their adaptive path/ALEKS Pie.
Article Contents
Access Assignments
1. SSO or log in at my.mheducation.com.
2. Launch your ALEKS course.
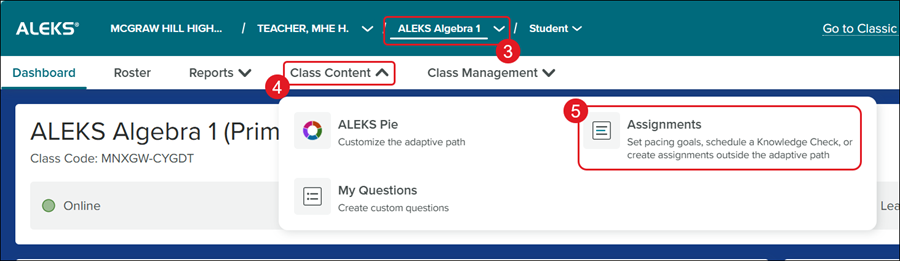
3. Select the Class from the drop-down.
4. Click on Class Content.
5. Click Assignments from the menu.
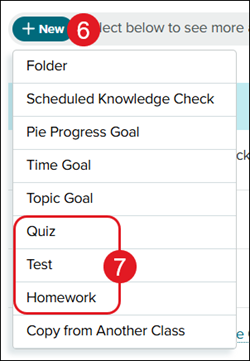
6. Click the +New button.
7. Click Quiz, Test, or Homework from the menu.
Question Selection
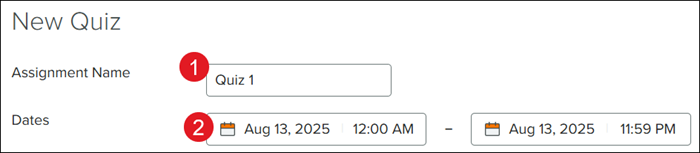
1. Enter an Assignment Name.
2. Select the Dates for the assignment to be open for students to complete.
3. Select where to pull the questions from by selecting an option from the Add Questions From drop-down.
4. Select the Questions to add to the assignment based on one of the following options:
Randomly Add Questions
A. Enter the preferred number of questions in the number field.
B. Select where to pull the questions from by clicking on the drop-down.
C. Click the Add button.

Pick-and-Choose Questions
D. Select to pull from a specific TOC or Standards.
E. Select the preferred section/module to pull questions by selecting an option from the drop-down.
F. Select the topics from the drop-down for question options.
G. Click on a folder to expand the question options.
H. Check the box next to the questions to add to the assignment.
I. Click the Add button.
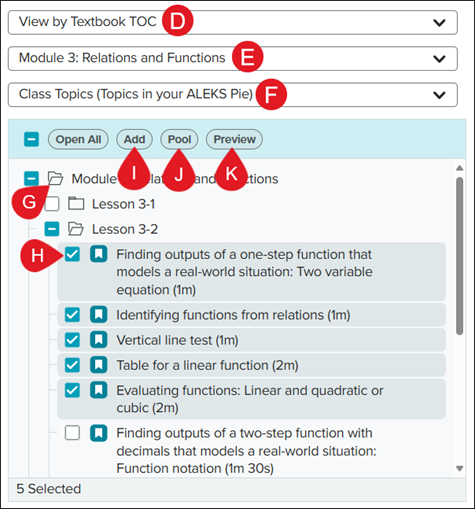
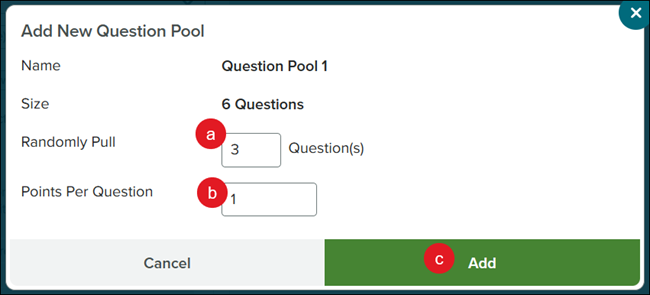
J. Click the Pool button to group questions together.
When the students complete the assignment, it will randomly generate the selected number of questions from that pool for them to complete.
Ex: You select six questions to pool together and have it randomly pull three of them for the students to complete.
a. Enter the preferred number of questions to Randomly Pull from the selected questions.
b. Enter the Points Per Question.
c. Click the Add button.
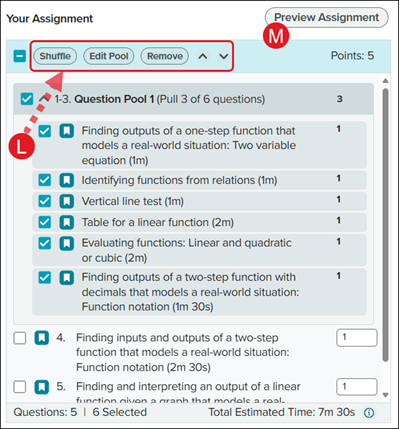
K. Click the Preview button to view the selected question(s).
L. Select questions to Shuffle, Edit Pool (if applicable), or Remove questions from the assignment. Use the arrows to move questions/pools up and down.
M. Click Preview Assignment to see what students see.
5. Click the Continue button at the bottom.
Assignment Settings
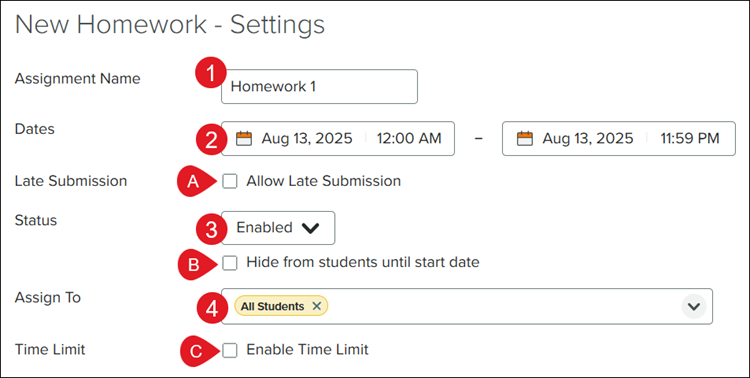
1. Enter an Assignment Name.
2. Select the Dates for the assignment to be accessible to students.
A. Check the box next to Late Submission to allow students to submit the assignment past the selected end date.
3. Select the preferred Status.
Note: If Disabled is selected, students will not be able to access the assignment.
B. Select Hide from students until start date if you do not want the students to see the assignment until the selected start date.
4. Select who to Assign To for the assignment. It defaults to assign to all students on the roster.
C. Check the box next to Time Limit if you want students to complete the assignment in selected time frame.
If enabled, enter the hr and min they have to complete the assignment.
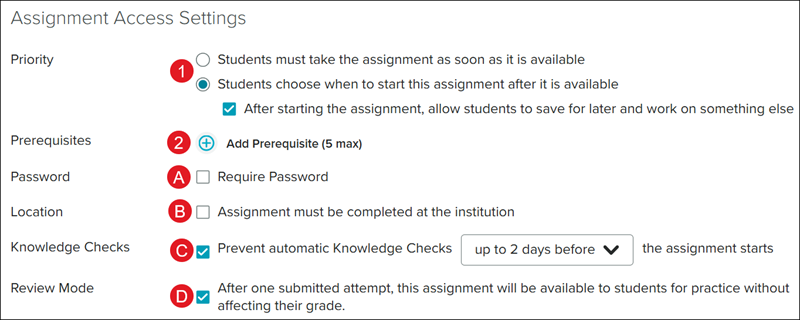
Assignment Access Settings
1. Select the radio button for the preferred Priority.
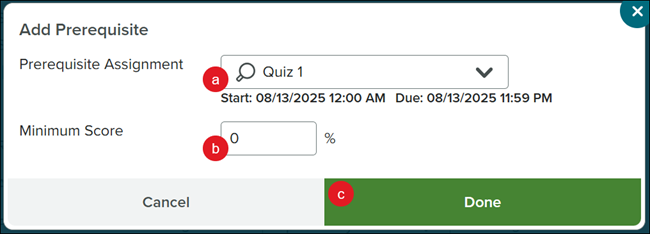
2. Select a Prerequisite for the assignment, if applicable, by clicking the +Add Prerequisite button.
a. On the Add Prerequisite pop-up, select the Prerequisite Assignment from the drop-down.
b. Enter a Minimum Score percentage.
c. Click the Done button.
A. Click the checkbox next to Password if you want students to enter a password to access the assignment.
B. Click the checkbox next to Location if you want students to only complete the assignment at a specific location.
C. Uncheck the box next to Knowledge Checks if you want to stop automated knowledge checks for a few days before the scheduled knowledge check.
This is checked by default and is selected for up to 2 days before the assignment starts.
D. Uncheck the box next to Review Mode if you do not want students to be able to use the assignment as practice after completion.
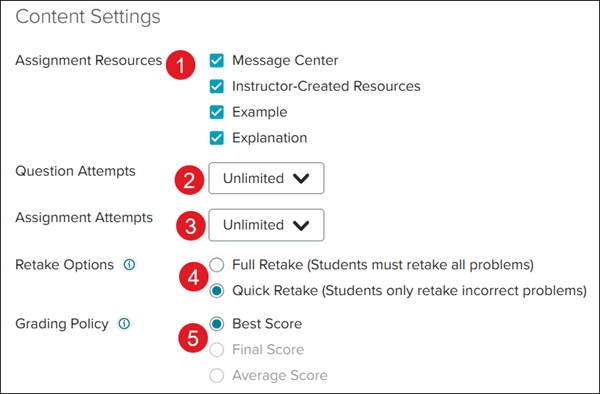
Content Settings
1. Select the preferred Assignment Resources for students to have access to during the assignment.
2. Select the Question Attempts.
3. Select the Assignment Attempts.
4. Select the radio button next to the Retake Options.
Note: These are applied anytime a student is given more than 1 assignment attempt.
5. Select the radio button next to the Grading Policy.
Note: These are applied anytime a student is given more than 1 assignment attempt.
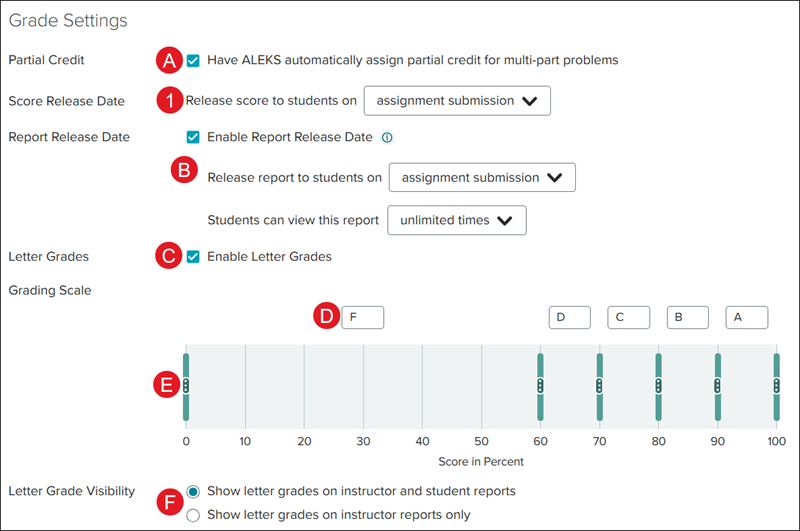
Grade Settings
A. Uncheck the box next to Partial Credit if you only want full or no credit for multi-part questions.
1. Select a Score Release Date.
B. Uncheck the Report Release Date if you do not want students to have access to the report after assignment completion.
If selected, select an option for Release report to students on from the drop-down and an option for Students can view this report from the drop-down.
C. The checkbox next to Letter Grades is automatically selected. Uncheck the box if you do not want letter grades associated to the assignment.
D. If the box is checked, you can adjust the letter grades by clicking in the letter box.
E. To add additional letter grades, click the kebob icon on the grade bar and select the + (plus) icon. To remove a letter grade, click the - (minus) icon.
F. If Letter Grades is checked, select the radio button next to Letter Grade Visibility to allow for viewing on instructor and student reports, or only instructor reports.
G. Click the checkbox next to Save Settings if you want to save these same settings for any future "Quiz", "Test", or "Homework" assignments.
2. Click the Create Assignment button.
