New ALEKS Custom Reports
Create custom reports in the new ALEKS interface to analyze specific metrics.
- Customer Support
- PreK-12
- Classroom Teacher
- Elementary School
- Middle School
- High School
- Direct Login & Auto-Rostering
- Direct Login & Manual-Rostering
- SSO & Auto-Rostering
- SSO & Manual-Rostering
- Supplemental
- Math
- Reports & Analytics


View the demo in a separate tab.
View the Spanish version of the demo.
Custom reports allow you to tailor a report specific to your progress monitoring needs by creating a template and choosing the data to include in your report. You can schedule a one-time report or automate a report to run daily, weekly, or monthly to ensure that you save time and receive the most up-to-date information.
Article Contents
Access Custom Reports
1. SSO or log in at my.mheducation.com.
2. Launch your ALEKS course.
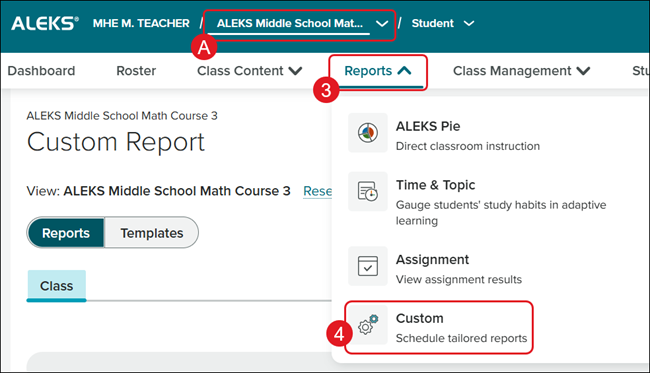
3. With or without a Class selected (A), click on Reports.
Note: If a class is not selected, the template will be at the teacher level. If a class is selected, the template will be created at the class level.
4. Click on Custom from the menu.
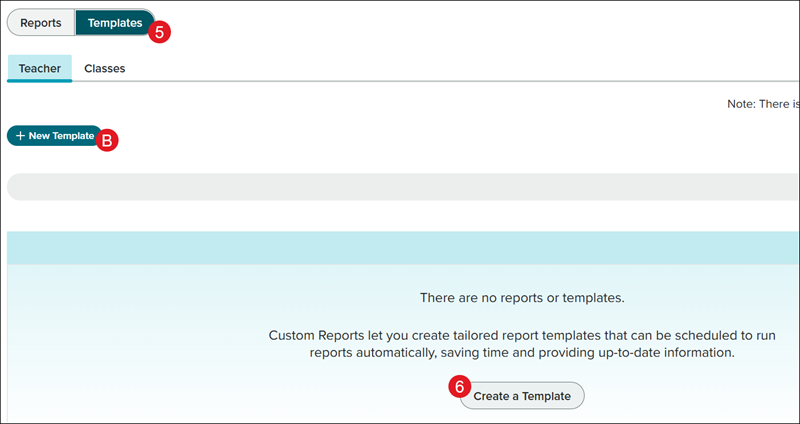
5. Click on Templates.
6. Click the Create a Template button.
Note: This button is available on the Reports page if no reports have been generated.
If a template has been previously created, click the +New Template (B) button.
Create Report Template
1. Enter a Template Name.
2. The Type will be auto-selected based on whether a class was selected or not.
3. Click the Next button.

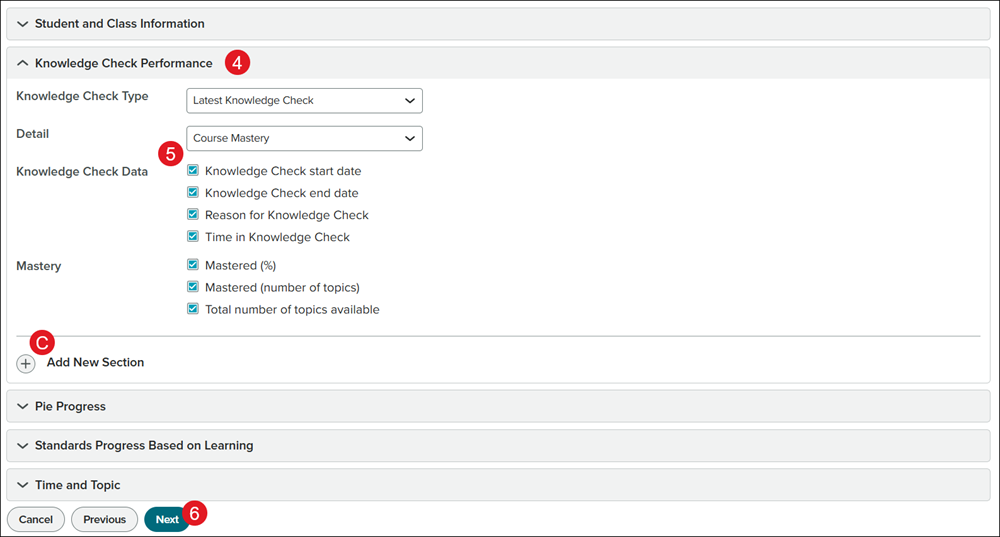
4. Click on a blade to view the options for that section.
5. Click the checkbox or select from the drop-down depending on the options available for the section. Options available will depend on if a class was selected or not.
Note: You can add multiple sections to a single report.
C. Click the +Add New Section button to add additional options for the report for that section.
6. Click the Next button.
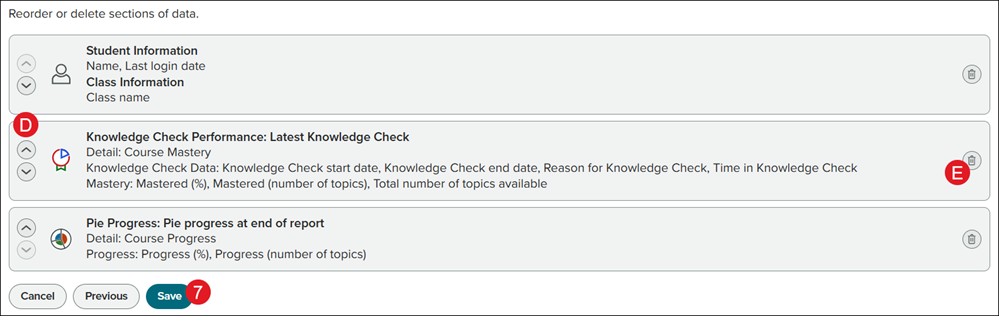
D. Click the up/down arrows to reorder the sections of data.
E. Click the trash can icon to delete the section.
7. Click the Save button.
Schedule Report
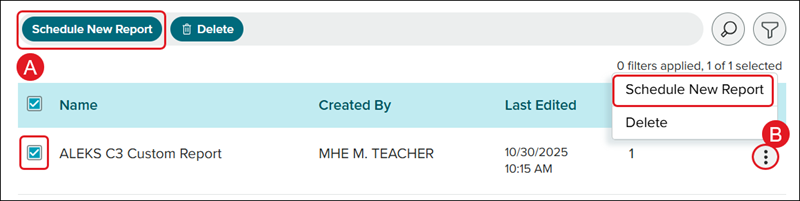
If a template is already created, on the Templates page, check the box next to the template and click the Schedule New Report button (A) or click the kebob icon to the right of the template and click Schedule New Report (B) from the menu.
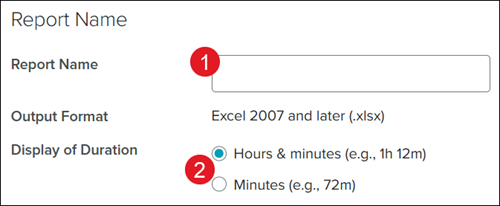
1. Enter a Report Name.
2. Select the radio button beside the preferred Display of Duration.
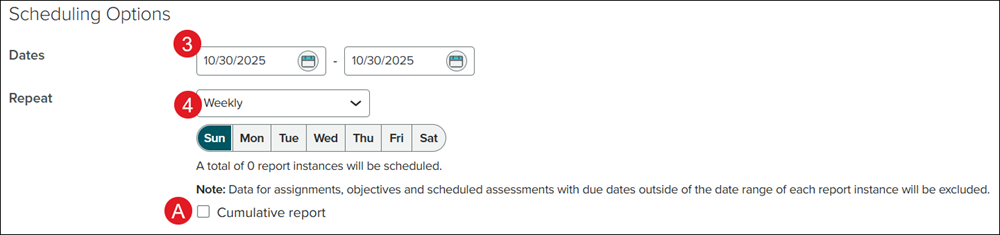
3. Select the Date range of no more than 12 months for the report data.
4. Select a Repeat option from the drop-down.
Depending on the option selected, you may have to select the day(s) to generate the report.
Note: Data for assignments, objectives, and scheduled assessments with due dates outside of the date range of each report instance will be excluded.
A. Check the box next to Cumulative report, if preferred.
Select this option if you will run this report repeatedly and want to track growth from one report to the next. Rather than using a new start date for each instance of the report, a cumulative report will use the same start date for each instance of the report and include all selected data from that start date to the date the report is due.
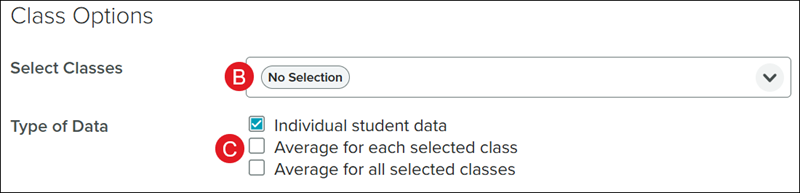
If you did not select a class, you will see a Class Options section.
B. Select Classes you want to view in the report from the drop-down.
C. Check the Type of Data box(es) you want included in the report.
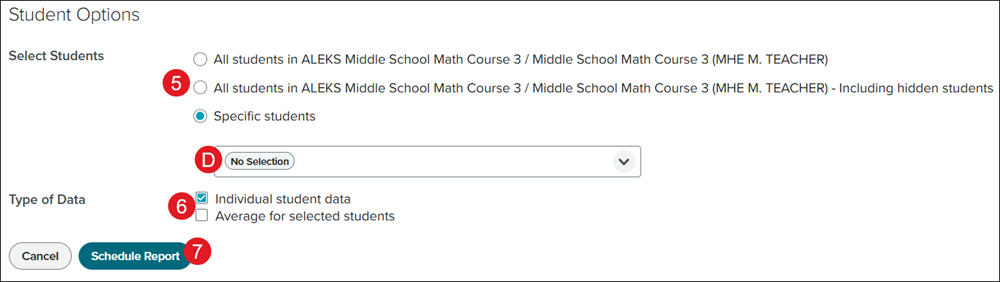
5. Select the radio button for the Select Students option.
D. If Specific Students is selected, click on the student(s) you want included in the report from the drop-down.
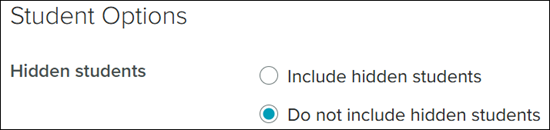
Note: You will only see these options if you selected a class before creating a Custom Report. Instead, you will be able to choose whether to include or exclude Hidden Students.
6. Check the Type of Data you want included. This is not an option if you did not select a class.
7. Click the Schedule Report button.
Manage Reports & Templates
Once you have created a report or template, they can be found Custom reports page under their respective buttons.
Reports Page
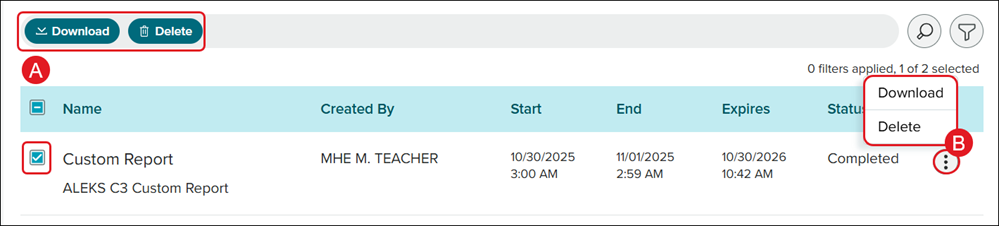
On the Reports page, checkmark the box to the right of the report and click the Download or Delete button (A) or click the kebob to the left of the report and select the options from the menu (B).
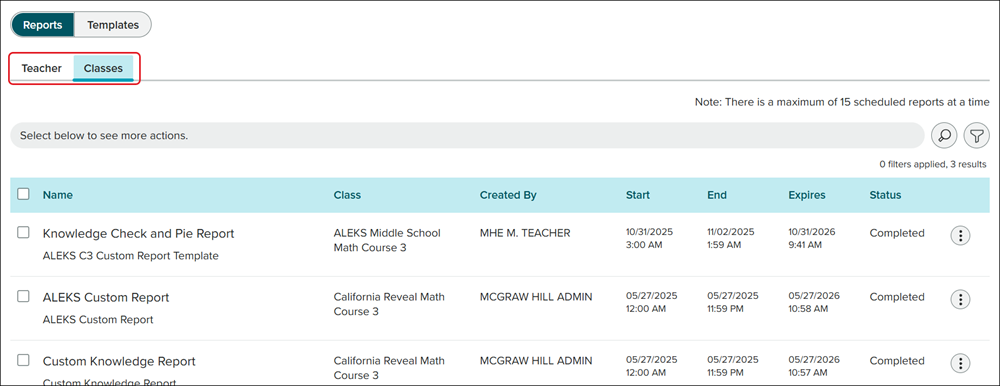
If do not select a class, you will be able to manage reports from the Teacher and Class levels.
Currently if you want to Edit or Cancel a scheduled report, you will need to do so from the classic ALEKS view as it is not yet available in the new ALEKS view.
Templates Page
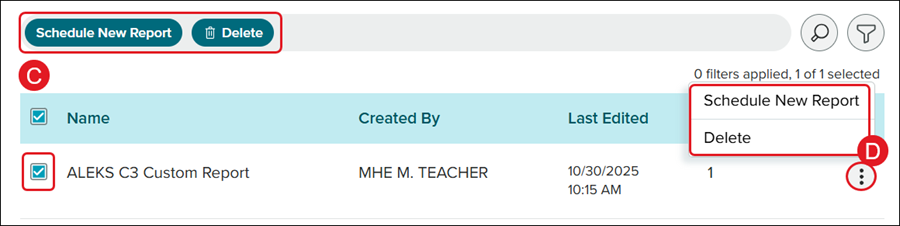
On the Templates page, check the box next to the template and click the Schedule New Report or Delete button (C) or click the kebob icon to the right of the template and select the option from the menu (D).
Currently, if you want to Edit or Duplicate a template, you will need to do so from the classic ALEKS view as this is not yet an option in the new ALEKS view.