Manage K-12 Connect® Class Roster
Manage your class roster in Connect® by adding, removing, or moving students between sections.
- AP Connect
- Getting Started & Orientation
- SSO & Manual-Rostering
- Customer Support
- Direct Login & Auto-Rostering
- Middle School
- Class Management
- Direct Login & Manual-Rostering
- High School
- AP, Honors & Electives
- Classroom Teacher
- SSO & Auto-Rostering
- PreK-12


For a full page view of the demo, click here.
For a Spanish version of the demo, click here.
Article Contents
Access Student Roster
On your My Courses page, click the Student roster icon.

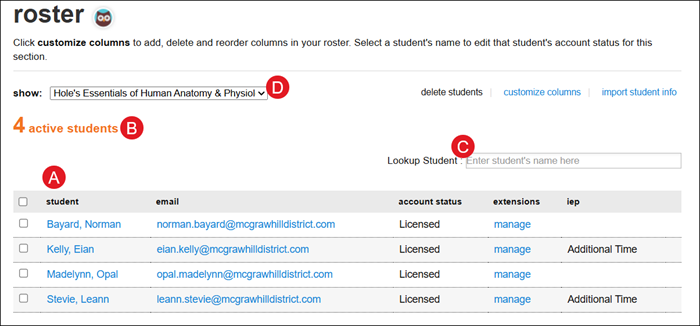
A. The roster page lists all students that are registered for the selected section.
Each student will be listed with their first and last name, the email address they used to register for their account, and their account status.
B. The active students count is for all students who have successfully registered for the section, even if their account status shows as License expired.
C. Use the Lookup Student field to search for a specific student in the roster.
D. If you have more than one section for the course, you can navigate between the different sections by using the show drop-down.
Customize Roster Columns
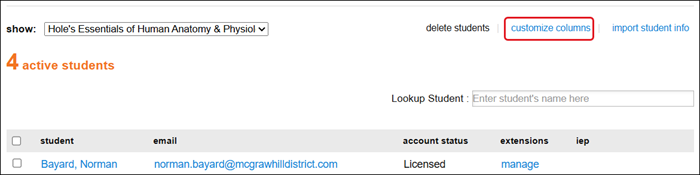
1. On your My Courses page, click the Student roster icon.

2. Click the customize columns link.
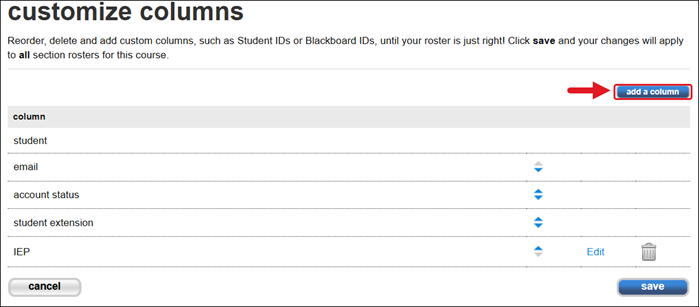
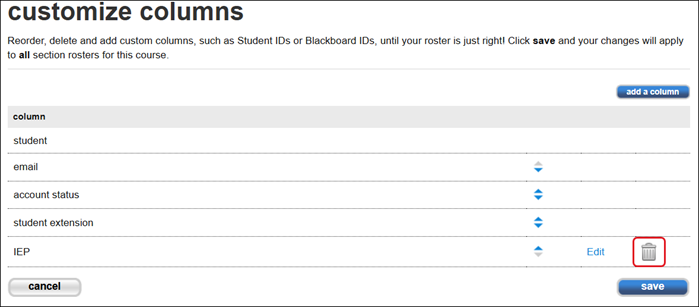
To reorder existing columns, click on the up/down arrow to the right of the column.

Click the add a column button to add additional columns to the roster page view.
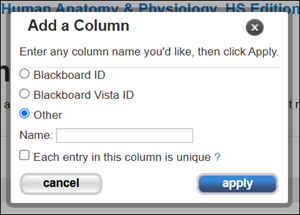
On the Add a Column pop-up, click the radio button next to the column options you would like to add.
If you select Other, you will need to enter a Name and select if each entry for that column will be unique to each student or not.
Click the apply button to add the column.
You can delete custom columns by clicking the Delete (trash can) button. You will not be able to delete non-custom columns.
To make changes to a custom column, click the Edit link. You will not be able to edit non-custom columns.
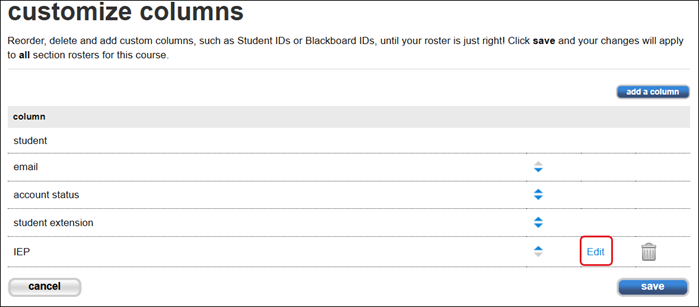
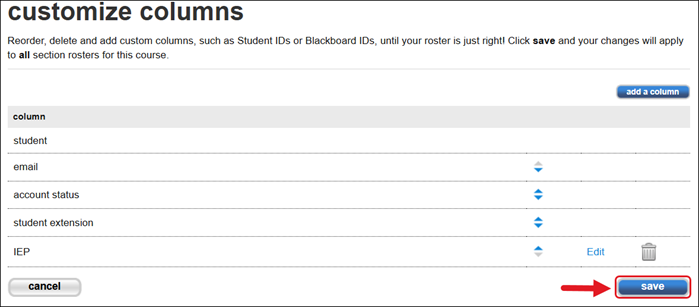
Click the Save button to confirm any changes.
Import Student Info
If you added any custom columns to your roster page, you will need to complete an import of student information to ad details to those columns.
1. On your My Courses page, click the Student roster icon.

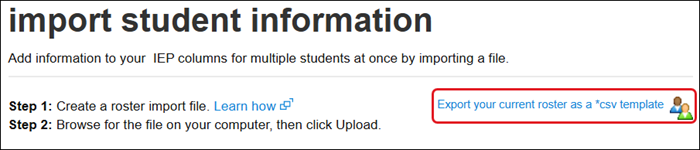
2. Click the import student info link.

3. Click the Export your current roster as a *csv template link.
Save the downloaded file somewhere easy to find on your computer then open the file.
On the downloaded file, enter all necessary information that needs to be included in the custom columns you created.
Resave the file to ensure your latest changes are saved.
4. On the import student information page, click the Choose File button and select the file you saved.
5. Click the Upload button.

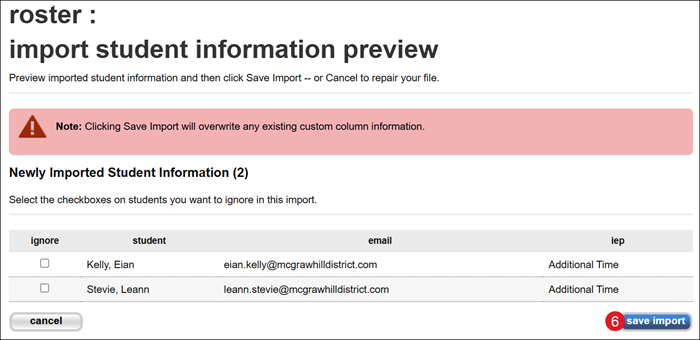
6. On the preview page, click the save import button.
The information added to the file will then display in the custom column you created.
To change the information in the custom columns at any time, you will need to complete a new student info file.

Manage Extensions
If you have students that need to have individual time extensions for assignments, you can add them from the roster page.
1. On your My Courses page, click the Student roster icon.

2. Click the manage link in the extensions column.

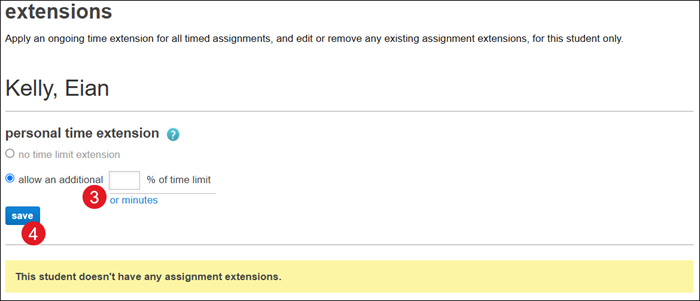
3. On the extensions page, select the radio button to allow an additional % (percentage) of time limit.
Click the or minutes link to add the number of minutes instead of a percentage.
4. Click the Save button to confirm changes.
If a student has an extension set, you will see an extension icon for that student.

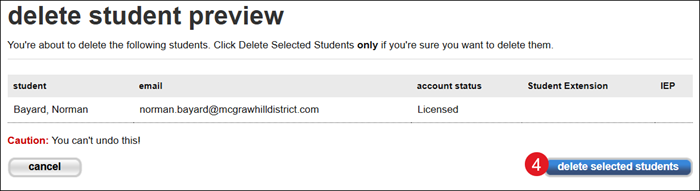
Delete Students
When removing students from the class roster, if they need access to the class once again, they will have to reregister, which results in them using another purchased student Connect license.
1. On your My Courses page, click the Student roster icon.

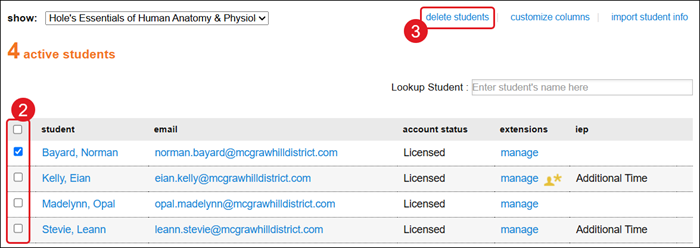
2. Checkmark the student(s) you want to remove from the roster.
3. Click the delete students link.
4. On the preview page, click the delete selected students button. Remember, this cannot be undone!