Manage K-12 Connect® Class Roster
Manage your class roster in Connect® by adding and removing students, as well as managing time extensions.
- Customer Support
- PreK-12
- Classroom Teacher
- High School
- Direct Login & Auto-Rostering
- Direct Login & Manual-Rostering
- SSO & Auto-Rostering
- SSO & Manual-Rostering
- AP, Honors & Electives
- AP Connect
- Class Management
- Getting Started & Orientation
- Back-to-School Setup


Article Contents
Manage Personal Time Extensions
Access Student Roster
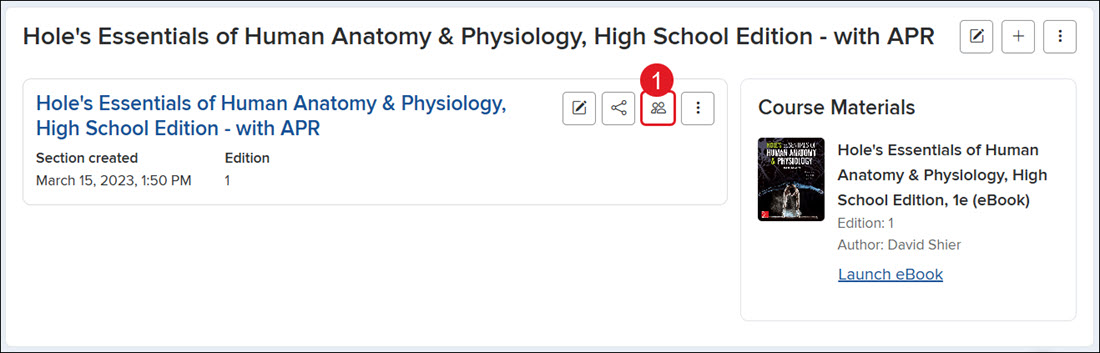
On your My Courses page, click the Student roster icon for the section.
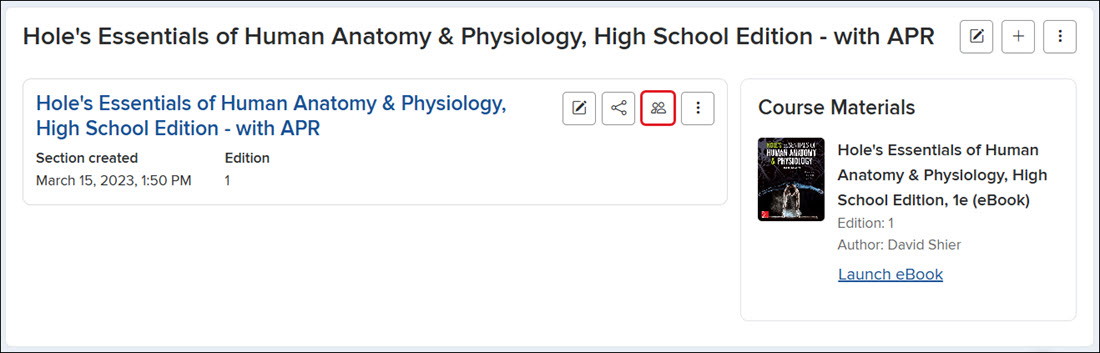
A. It can also be accessed by clicking on the section name and then on Student Roster from the navigation menu.
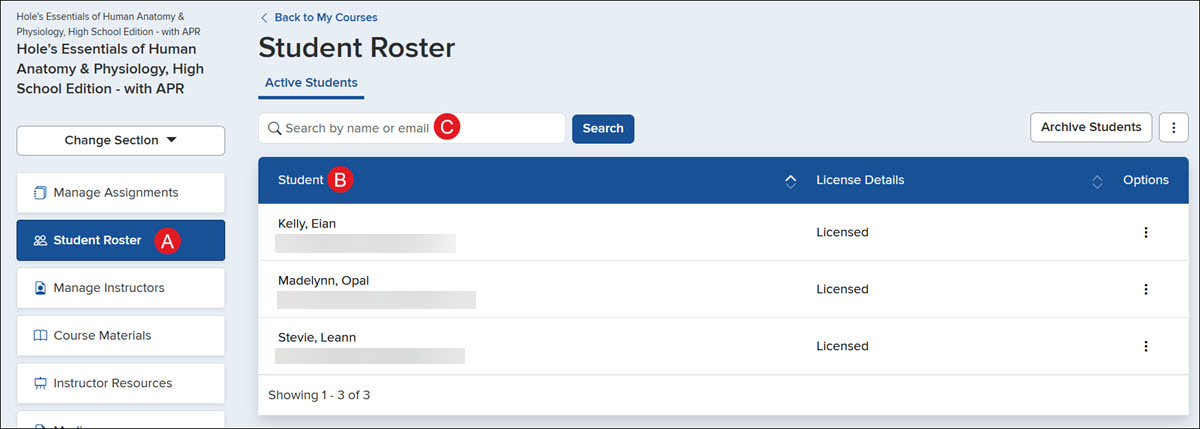
B. The roster will show all students who have registered for the class, with their name, the email address used to register, and their License Details.
C. Use the Search to locate a specific student by name or email address.
Add Custom Roster Columns
1. Click the Student Roster Options button.
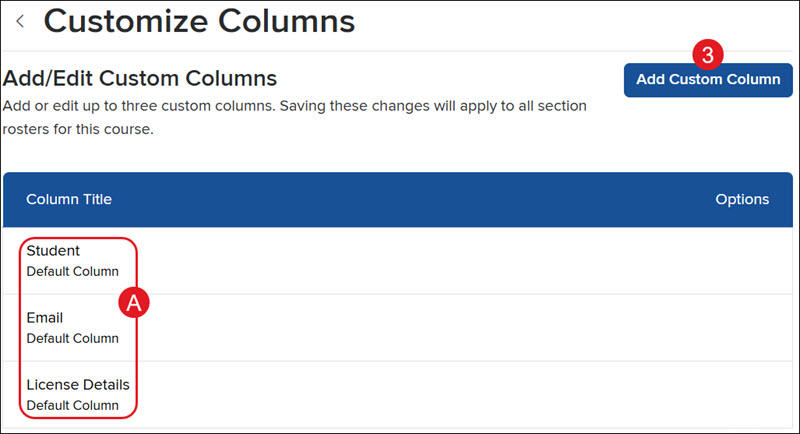
2. Click Customize Columns on the menu.
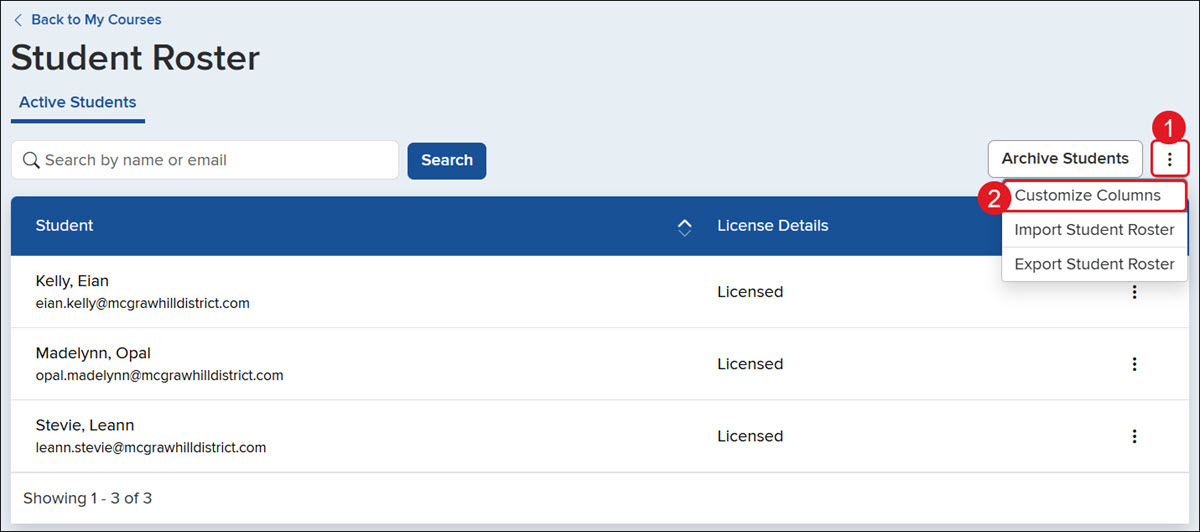
A. The Student, Email, and License Details columns are set by default and cannot be changed or removed.
3. Click the Add Custom Column button.
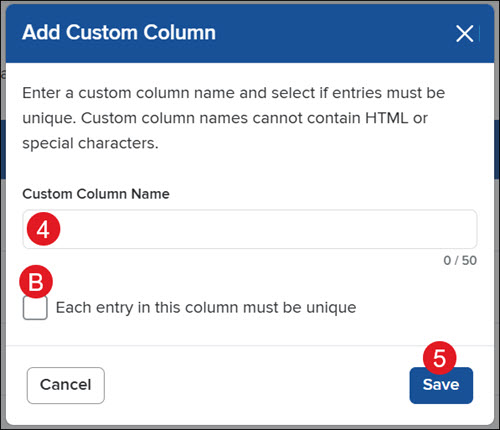
4. Enter a Custom Column Name.
B. If you would like each entry detail to be different for this column, check the Each entry in this column must be unique box.
5. Click the Save button.
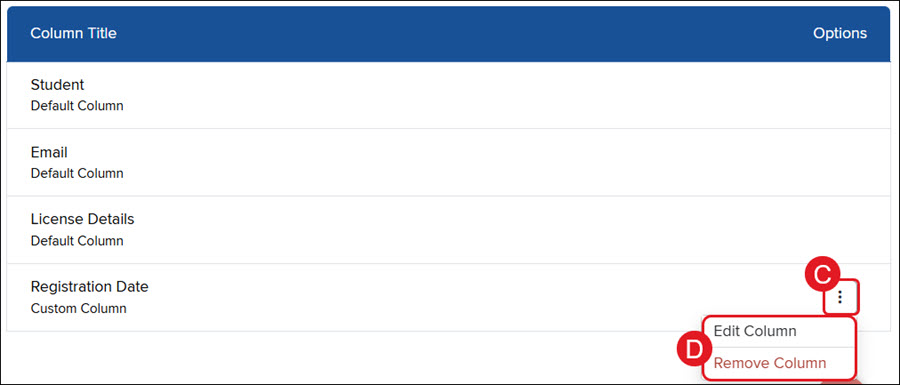
To edit or delete the customized column:
C. Click the Options button to the right.
D. Click Edit or Delete from the menu.
Export Student Roster
1. On your My Courses page, click the Student roster icon.
2. Click the Student Roster Options button to the right.
3. Click Export Student Roster from the menu.
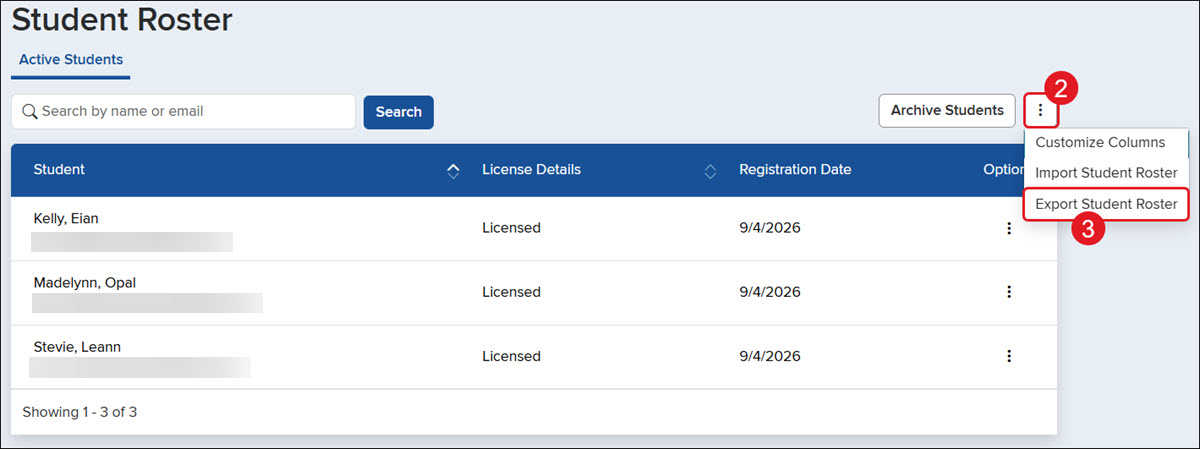
The file will download in .CSV format.
Import Student Roster
Import a student information file to add or edit the custom column data in your student roster.
Create your own roster file to import and upload, or export your current roster as a .csv template to edit, then upload.
Note: You will be unable to import the edited file if changes are made to the titles of custom columns in the exported file or template. If data already exists in custom columns, importing again will overwrite previously added information.
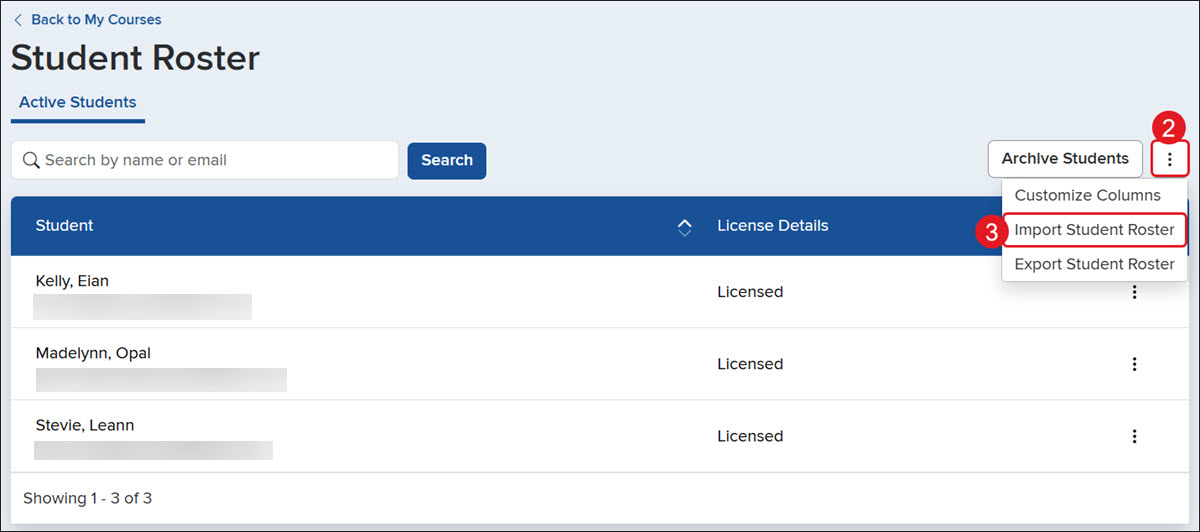
1. On your My Courses page, click the Student roster icon.
2. Click the Student Roster Options button to the right.
3. Click Import Student Roster from the menu.
4. Click the Choose File button and select your completed file.
5. Click the Continue button.
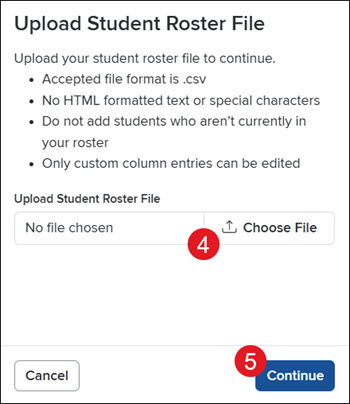
Depending on how large the file is, it may take a few minutes for the import to complete.
6. On the Preview Imported Student Information page, check/uncheck the students you want to overwrite the data for.
7. Click the Import Roster button.
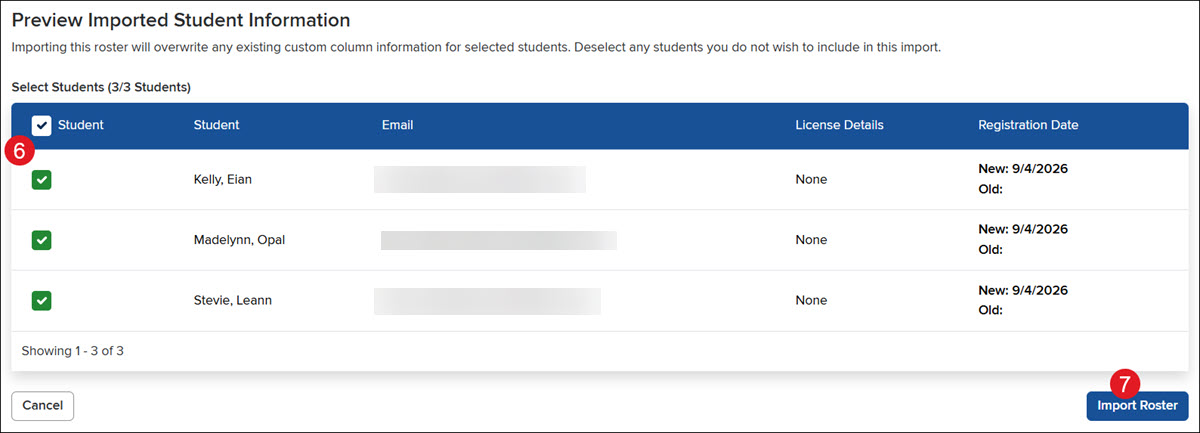
The page will then refresh to the Student Roster screen with the new/edited customized information.
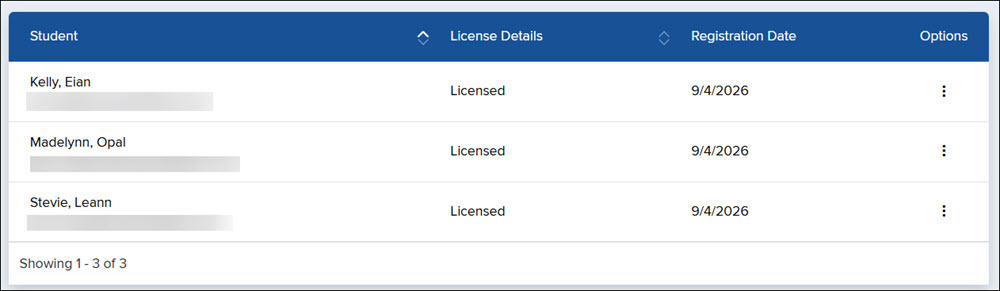
Manage Personal Time Extensions
Give students extra time to finish all timed assignments. This extra time will apply to both current and future Question Bank assignments with time limits.
1. On your My Courses page, click the Student roster icon.
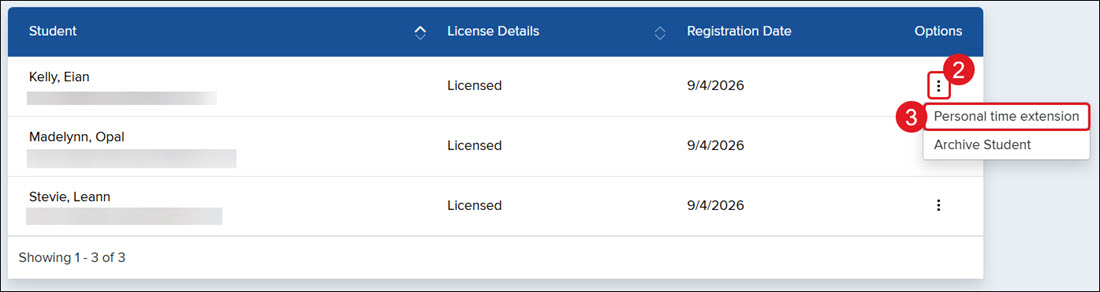
2. Click the Options button to the right of the student.
3. Click Personal time extension on the menu.
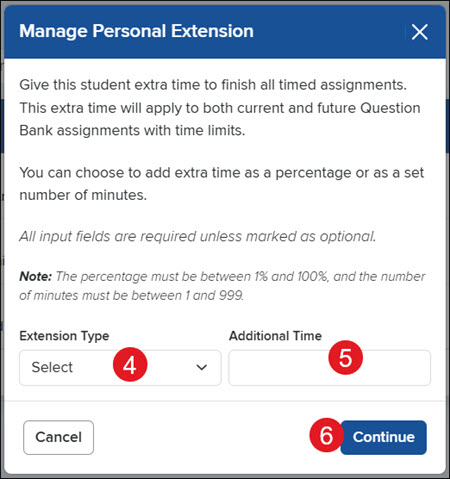
4. On the pop-up, select the Extension Type from the drop-down.
5. Enter the Additional Time that is needed.
6. Click the Continue button.
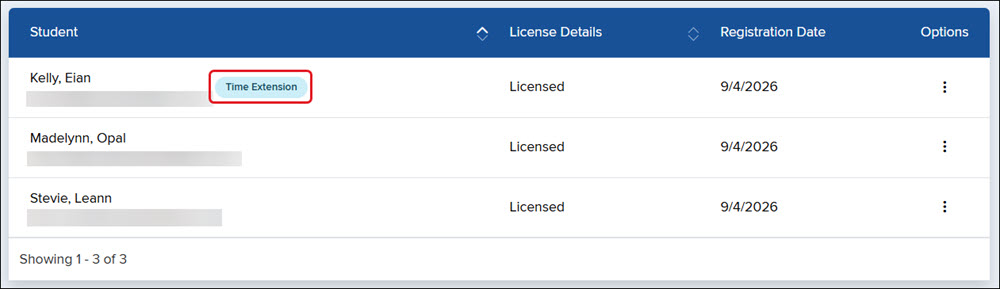
If a time extension has been added for a student, they will show a Time Extension tag beside their name in the roster.
Archive Students
When removing students from the class roster, if they need access to the class once again, they will have to re-register, which results in them using another purchased student Connect license.
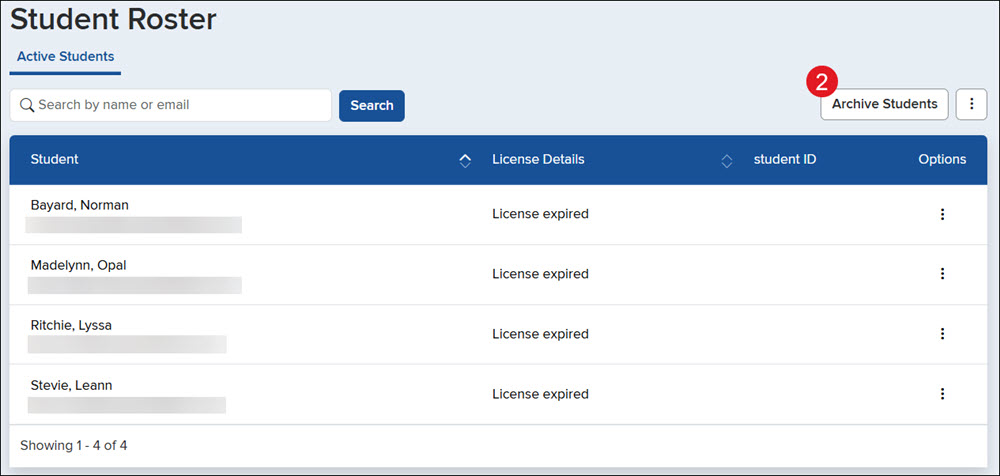
1. On your My Courses page, click the Student roster icon.
2. Click the Archive Students button.
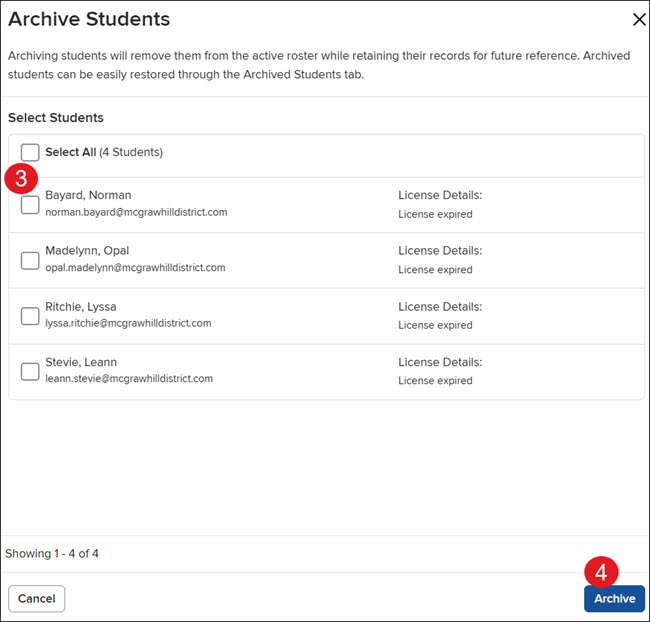
3. On the Archive Students panel, check the box next to the student(s) you want to archive from the roster.
4. Click the Archive button.
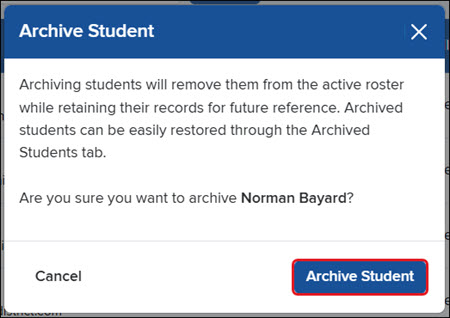
You can also archive a single student by clicking on the Options icon to the right of their name and then clicking Archive Student from the menu.
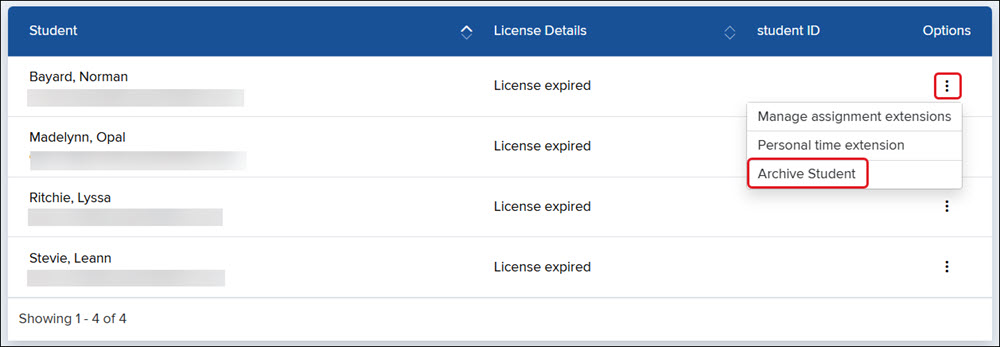
On the pop-up, click the Archive Student button to confirm.