Share ConnectED Classes With Teachers
Manage shared classes in ConnectED to collaborate with co-teachers.
- Networks 2014 (K-5)
- ConnectEd
- SSO & Manual-Rostering
- Customer Support
- iScience 2017
- Middle School
- Direct Login & Manual-Rostering
- Glencoe Algebra 1 2014
- High School
- Glencoe Algebra 1 2018
- Classroom Teacher
- SSO & Auto-Rostering
- Glencoe Science 2017
- PreK-12
- Elementary School
- World Languages
- Visual & Performing Arts
- Inspire Science 2017
- Math
- Asi se Dice 2016
- Health
- Glenoce Algebra 2 2018
- Social Studies
- Glencoe Math Course 1
- Direct Login & Auto-Rostering
- Glencoe Math Course 2
- Glencoe Math Course 3
- Core
- Class Management
- Core Plus Math 2015
- Glencoe Health 2014
- McGraw Hill My Math 2013 & 2016
- McGraw Hill My Math 2018
- Glencoe Algebra 2 2014
- Science
- Preschool
- Getting Started & Orientation
- Back-to-School Setup


This article walks teachers through sharing ConnectED classes with other teachers in their school using the same program.
For a full page view of the demo, click here.
For a Spanish version of the demo, click here.
Depending on the roles you have assigned, you may have the additional options to share by District or School. If you do not see these options, you will need to have the Organization Administrator role assigned to your account.
Article Contents
Share a Class by Teacher
Note: When sharing a class with individual teachers, those teachers have to be using the same program and be in the same school.
1. SSO or sign in at my.mheducation.com.
2. Click on your Teacher Edition.
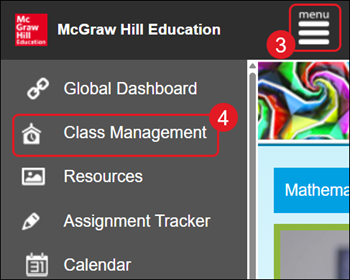
3. Click on the Menu button at the top-left.
4. Click on Class Management.
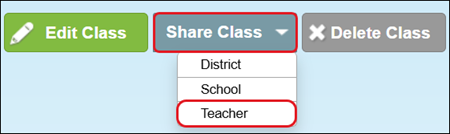
5. Click the Share Class button.
For those with extra permissions will need to click on the Teacher option from the menu.
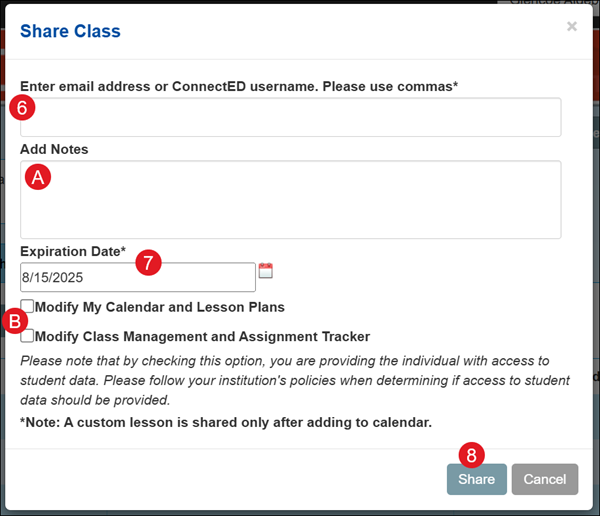
6. On the Share Class pop-up, enter the email address or ConnectED username for the teacher(s) you want to share the class with. Separate each entry with a comma.
A. Add Notes if needed.
7. Select an Expiration Date. This will be the date the teacher(s) you share the class with will no longer have access.
B. Check the box next to any Modify option(s) you would like the teacher(s) to have for the class.
Note: These options do allow the teacher(s) to access student data.
8. Click the Share button.
Share a Class by School
1. SSO or sign in at my.mheducation.com.
2. Click on your Teacher Edition.
3. Click on the Menu button at the top-left.
4. Click on Class Management.

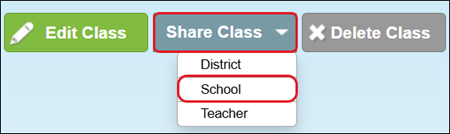
5. Click the Share Class button.
6. Click School from the menu.
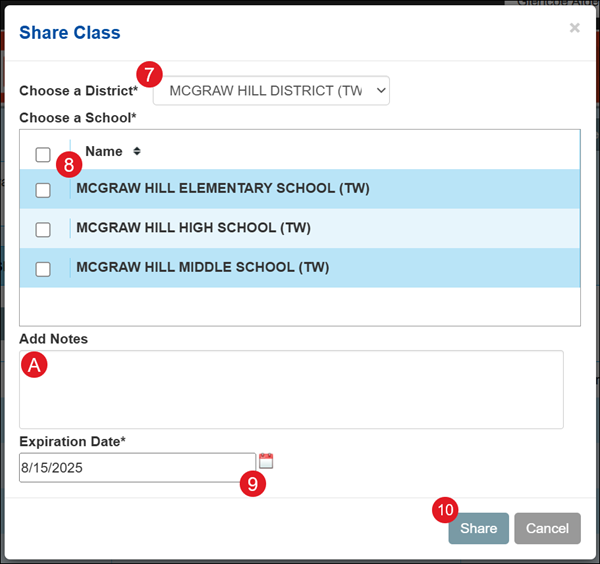
7. On the Share Class pop-up, Choose a District from the drop-down if you're assigned to more than one.
8. Check the box next to the School(s) you want to share with.
A. Add Notes if needed.
9. Select an Expiration Date. This will be the date the teacher(s) you share the class with will no longer have access.
10. Click the Share button.
Share a Class by District
1. SSO or sign in at my.mheducation.com.
2. Click on your Teacher Edition.
3. Click on the Menu button at the top-left.
4. Click on Class Management.

5. Click the Share Class button.
6. Click District from the menu.

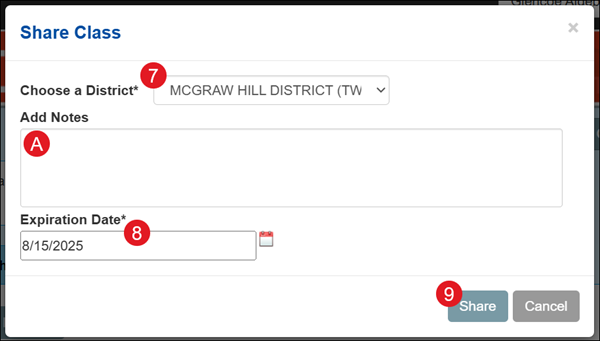
7. On the Share Class pop-up, select a District from the drop menu if you're assigned to more than one.
A. Add Notes if needed.
8. Select an Expiration Date. This will be the date the teacher(s) you share the class with will no longer have access.
9. Click the Share button.
Manage Shared Classes
1. SSO or sign in at my.mheducation.com.
2. Click on your Teacher Edition.
3. Click on the Menu button at the top-left.
4. Click on Class Management.

5. Click the Shared tab.
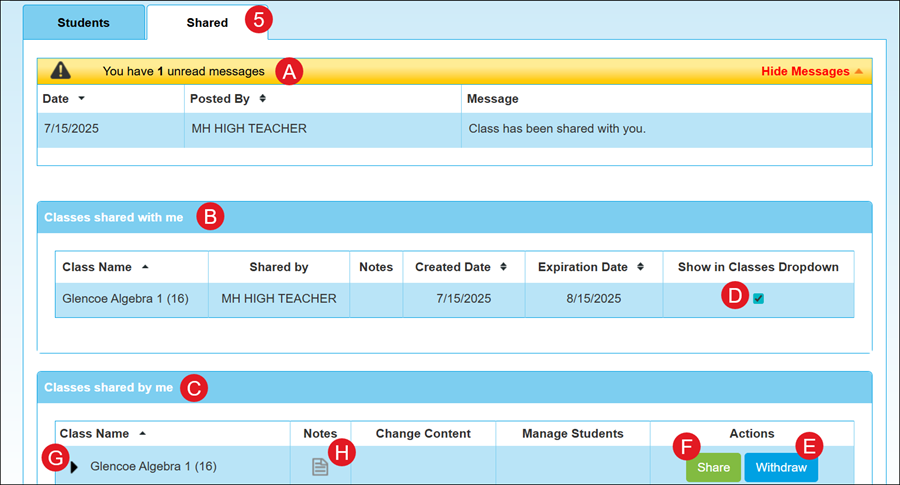
A. If any classes have been shared with you, you will see any unread messages at the top, advising a class has been shared with you.
B. Any classes a teacher has shared with you will show in the Classes shared with me section.
C. Any classes you have shared with the district, school, or another teacher will show in the Classes shared by me section.
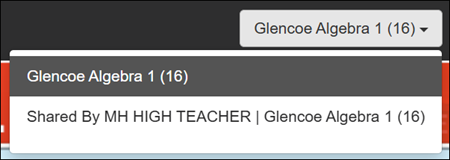
D. Any classes shared with you, the Show in Classes Dropdown is automatically checked. Uncheck the box if you do not want it to show in your class drop-down.
E. In the Classes shared by me section, click the Withdraw button if you no longer want to share the class.
F. Click the Share button to add schools or teachers to those you shared the class with.
G. Click the arrow next to the Class Name to see which teachers, school, or district the class is shared with.
H. Click the Notes icon to add or remove any notes for the shared class.