Create and Roster an Achieve3000 Literacy Class
Learn how to create and roster an Achieve3000 Literacy class on portal.achieve3000.com.
- PreK-12
- Customer Support
- Classroom Teacher
- Elementary School
- Middle School
- High School
- Direct Login & Manual-Rostering
- SSO & Manual-Rostering
- Supplemental
- Literacy
- Achieve3000 Literacy
- Getting Started & Orientation
- Back-to-School Setup
- Class Management


These steps should only be used if they are signing in through the achieve3000.com site and not through my.mheducation.com. If you are accessing the program through my.mheducation.com, refer to the Open Learning Class Management Resources article.
Article Contents
Create a Class
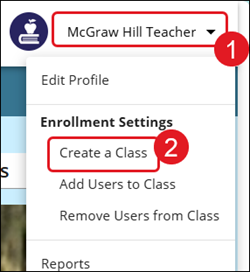
1. Click Profile/Settings (your name) at the top-right of the site.
2. Under Enrollment Settings, click Create a Class.
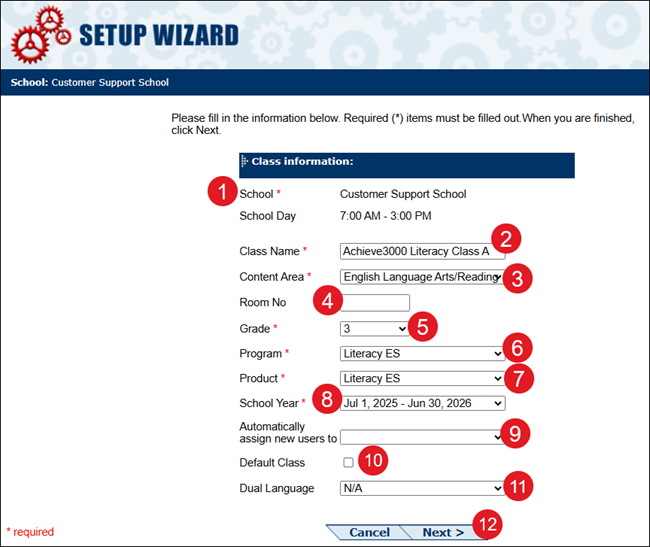
The Setup Wizard will open in a new browser window.
3. If associated to multiple schools, select the school.
4. Enter a Class Name.
5. Select a Content Area from the drop-down.
6. Enter a Room No. This is optional.
7. Select a Grade from the drop-down.
8. Select a Program.
9. Select a Product. This will only show after selecting a Program.
10. Select the School Year.
11. Select to Automatically assign new users to a scaffold. This is optional.
12. Check the box if you want this class to be set as the Default Class. This is optional.
13. Select if the class is Dual Language. This is optional.
14. Click the Next button.
13. Select the user(s) you want to add to the class from the list of students and teachers.
To select multiple users at one time, hold the CTRL button while clicking on names.
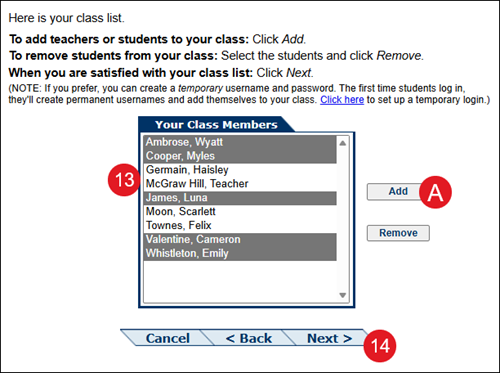
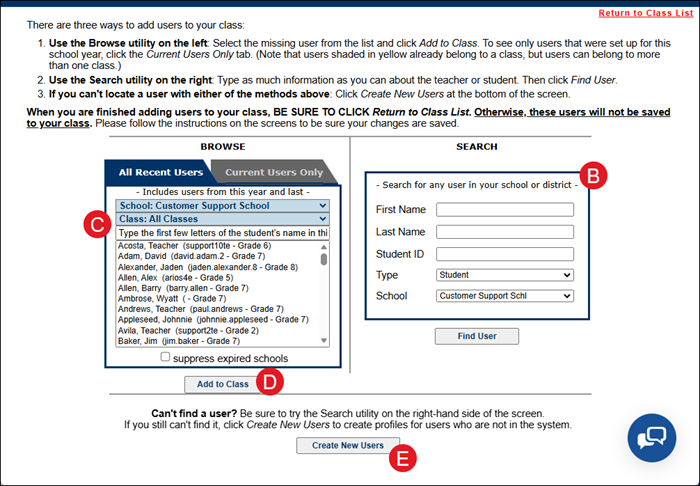
If you're unable to find the student in the list, click the Add button (A). Use Search (B) to locate the student, select the student from the Browse panel (C), and click the Add to Class button (D).
E. If the student does not yet have an account, click the Create New Users button and follow the steps in the next section.
14. Click the Next button.
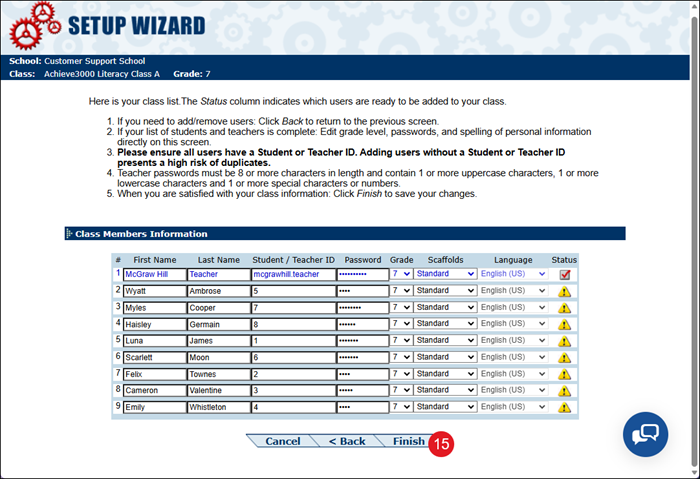
15. Click the Finish button after confirming user information.
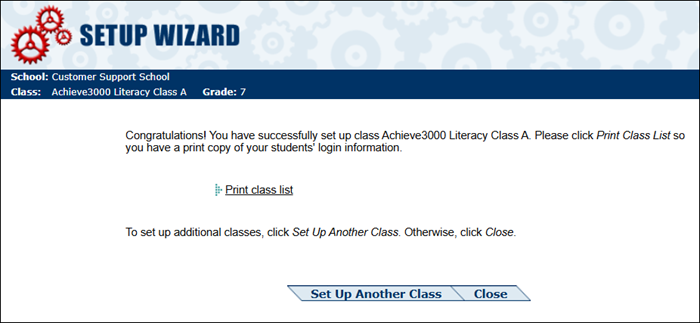
16. Click to Print class list, Close the screen, or Set Up Another Class.
Create New Users
1. Click Profile/Settings (your name) at the top-right of the site.
2. Under Enrollment Settings, click Add users to Class.
The Setup Wizard will open in a new browser window.
3. Select the Class from the list.
4. Click the Next button.

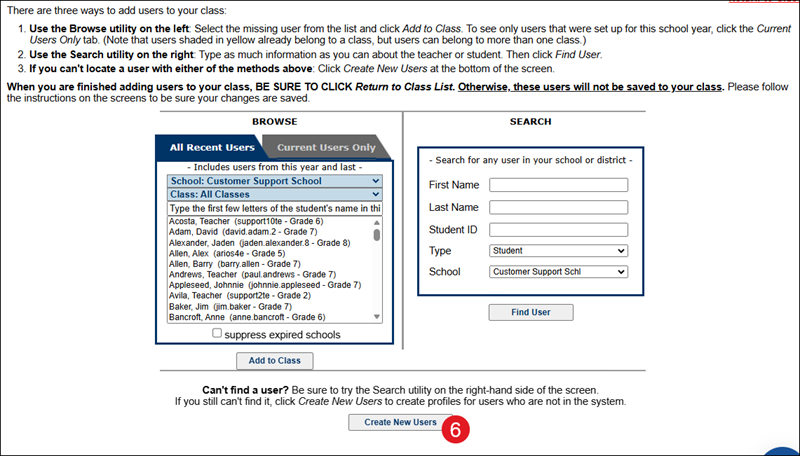
5. Click the Add button.

6. Click the Create New Users button.
7. Select the Type: Student or Teacher.
8. Enter a First Name.
9. Enter a Last Name.
10. Enter a unique Student/Teacher ID. This identifier needs to be unique to your school/district.
11. The Password auto-generates based on the name entered. This can be changed to any password you would like to have for the user by entering it into the field.
12. Select the Gender: Male or Female.
13. Select the preferred Peer-to-Peer Email option from the drop-down.
14. Select the preferred Audio Support option.
15. Select the type of Scaffolds.
16. The Language is set to the default class language type.
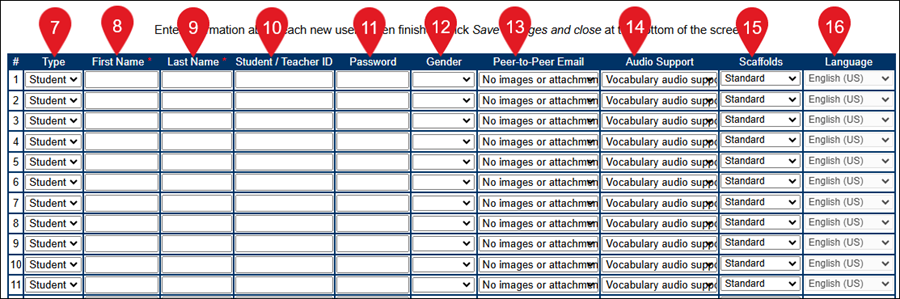
Up to 30 students can be entered at a time for the class.
17. Click the Save Changes and Close button at the bottom.
You can then add the student to the class from the Your Class Members list.
Remove Users from Class
1. Click Profile/Settings (your name) at the top-right of the site.
2. Under Enrollment Settings, click Remove Users from Class.
The Setup Wizard will open in a new browser window.
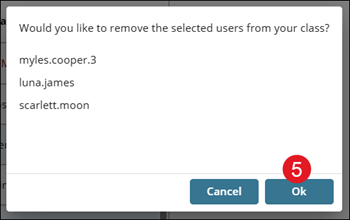
3. Check the box next to each user that you want removed.
4. Click the Remove From Class button.
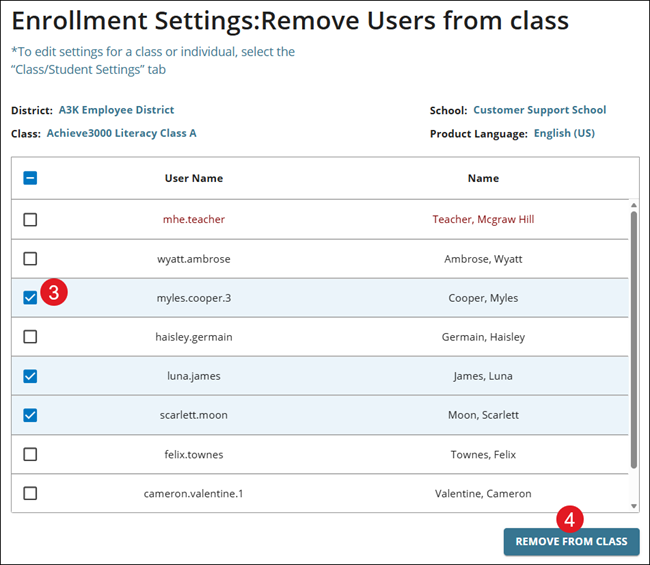
5. On the pop-up, click the OK button to confirm.