Navigating Achieve3000 Literacy Five-Step Literacy Lessons
Manage Achieve3000 Literacy lessons, including assigning content and monitoring student progress.
- Customer Support
- PreK-12
- Classroom Teacher
- Elementary School
- Middle School
- High School
- Direct Login & Auto-Rostering
- Direct Login & Manual-Rostering
- SSO & Auto-Rostering
- SSO & Manual-Rostering
- Supplemental
- Literacy
- Achieve3000 Literacy
- Plan & Present
- Grades & Assignments


Article Contents
Access Lessons
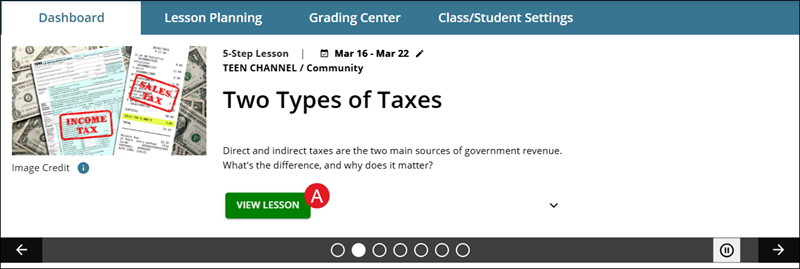
If the lesson is showing in the Lesson Carousel at the top of the dashboard, click on the View Lesson button (A) to open the lesson.
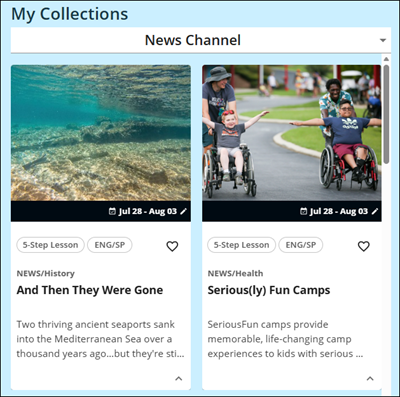
Lessons can also be accessed by selecting an option from the My Collections panel and clicking on a lesson.
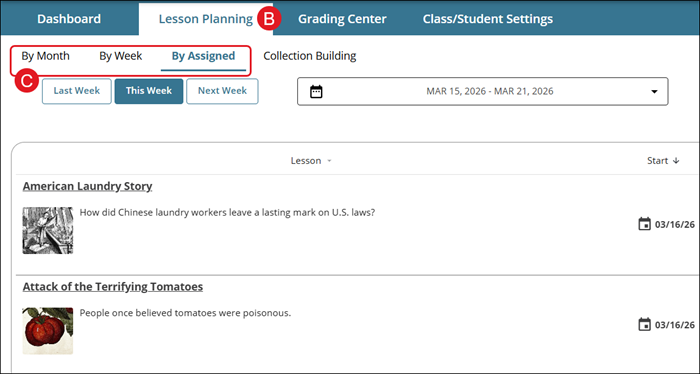
Click on Lesson Planning (B) to view a breakdown of lessons By Month, By Week, and By Assigned (C).
Each lesson is separated into two sides – the left will present the lesson article, also known as the "reading panel", while the right panel, known as the "instructional panel", is where student work is completed and other supporting materials are accessed.
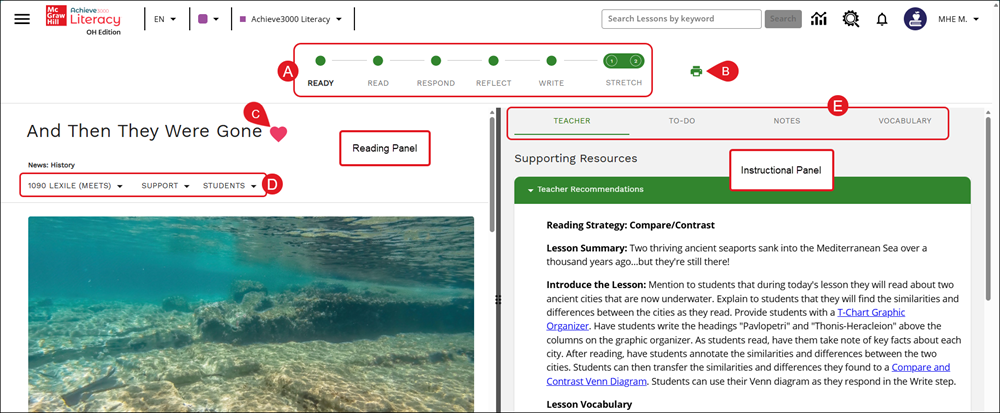
A. Click a Lesson Step bullet point to navigate through the different parts of the lesson.
Note: Not all lessons have the same number of steps. Lesson steps are gated by default in the Student Edition.
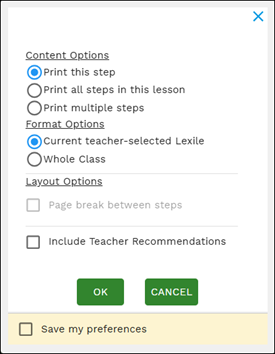
B. Click the Print icon to save/print the article.
On the pop-up, select the Content, Format, and Layout Options you want included in the printed material.
C. Click the Favorites (heart) icon to add/remove the article from your favorites collection.
D. Select a Lexile, Standard/Enrichment/Support option, and Students from their selected drop-downs.
E. Click on the Teacher, To-Do, Notes, and Vocabulary tabs to access additional supporting resources for the lesson.
The Teacher tab provides additional resource links to help prepare and teach the lesson.
The 5-Step Literacy Routine
The 5-Step Literacy Routine is a proven method for developing the core skills that are essential for success in college & career, including the independent reading of complex texts.
Each step reinforces specific literacy skills and standards. These steps are presented as bullets on the Lesson page.
Step 1 - Ready
Step 2 - Read
Step 3 - Respond
Step 4 - Reflect
Step 5 - Write
Additional Step - Stretch

Stretch Lessons
While there is tremendous value in students working at their Lexile level, students still have the challenge of the grade-level text they will see when they work with high-stakes assessments. The Stretch lesson helps with this task as it's instructional tool that teachers can use to help students build a bank of strategies they can apply when encountering text that is too hard or when faced with words that they don’t know.
The Stretch Article (step 1 of Stretch) is presented to students after the Write step in a 5-Step lesson. Students will see the same article that they read in the Read step, but this time it will be presented at grade level or higher, depending on their current Lexile level. It provides students with the opportunity to demonstrate independence with complex informational texts. This gives students the option to work with the same article they saw in Step 2 of the 5-Step Literacy Routine, but this time at their Stretch level. Students that are currently below grade-level expectations will be stretched to grade level, while students currently meeting grade-level expectations will be stretched one lexile band higher. This encourages them to apply reading skills with material of greater complexity.
- Students who are below grade level are stretched to the grade level version.
- Students who at grade level are stretched above grade level.
- Students who are above grade level are stretched above that.
Important! Direct instruction is recommended to support students with this more rigorous text. Students should not be reading it independently.
Use the Teacher Recommendations and Teacher Materials in the Teacher tab to support instruction using the Stretch article. Here, you will find discussion questions at different DOK levels, tips for supporting emerging readers, and tips for helping students prepare for high-stakes assessments.
The Stretch Activity (step 2 of Stretch) is a series of multiple-choice questions designed to measure reading comprehension as students engage with the more rigorous text of the Stretch article. These questions do not count towards the Lexile adjustments at the end of each month or towards the goal of 40-activities per semester/80-activities per year targets. These questions are presented above the student's Lexile level and may be very difficult. Students will see their results immediately after completing the Stretch activity questions.
The Stretch Article provides students with the opportunity to demonstrate independence with complex informational texts. This gives students the option to work with the same article they saw in the Second Step (Read) of the 5-Step Literacy Routine, but this time at their Stretch level. Students that are currently below grade-level expectations will be stretched to grade level, while students currently meeting grade-level expectations will be stretched one Lexile band higher. This encourages them to apply reading skills with material of greater complexity. The Stretch Activity measures student proficiency of specific standards after reading the Stretch article.
Lesson Tools
To activate the tools within a lesson, highlight a word, a group of words, or a sentence within the article.

Highlight
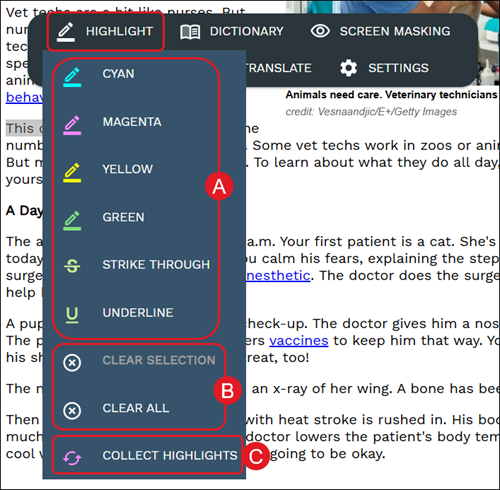
A. The Highlight option provides many selections to choose from including different colors, strike through, and underline.
B. To remove any highlights, select the word(s)/sentence(s) you want to remove the highlight from, click Highlight on the tool menu, and then the Clear Selection or Clear All options.
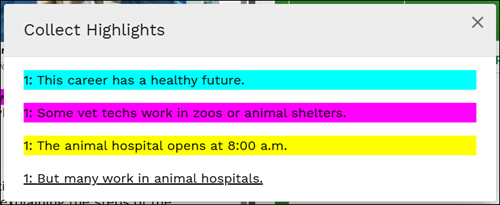
C. To view all markings made in the article, select a word/sentence and click Collect Highlights from the Highlight menu. More than one highlight will need to be created for this option to function.
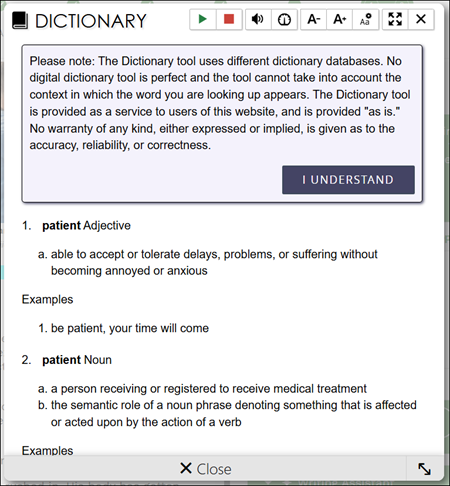
Dictionary
To look up a definition for an unknown word, click and highlight the word within the lesson. Click on Dictionary from the toolbar.
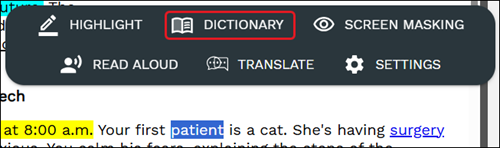
On the Dictionary pop-up, you can listen to the definition aloud, zoom in/out, and change reading speed.
Note: The Dictionary tool uses different dictionary databases. No digital dictionary tool is perfect and the tool cannot take into account the context in which the word you are looking up appears. The Dictionary tool is provided as a service to users of this website, and is provided "as is." No warranty of any kind, either expressed or implied, is given as to the accuracy, reliability, or correctness.
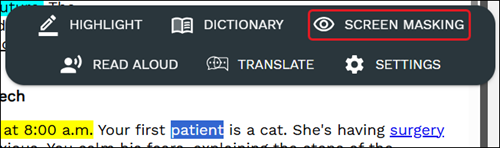
Screen Masking
Screen Mask is a document reading tool that follows your mouse or touch to help eliminate page distractions so you can focus on reading one passage at a time.
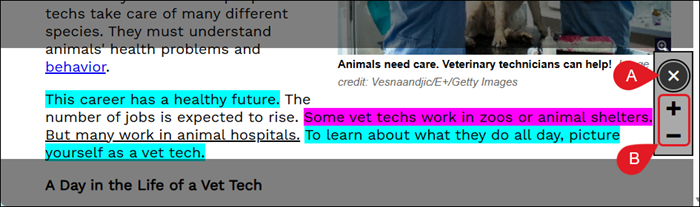
To turn the feature on, highlight any word within the lesson and click Screen Masking from the toolbar.
A. Click the Close (x icon) button to close out the Screen Masking tool.
B. Click the Enlarge (plus icon) or the Shrink (minus icon) buttons to make the highlighted space larger or smaller.
Read Aloud
To have the text of the article read to you, select the text you want read aloud and click the Read Aloud button on the toolbar.
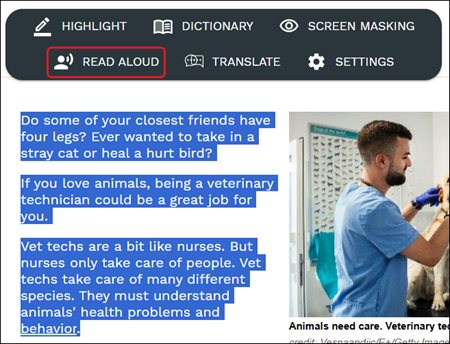
From the Read Aloud player, you can Play, Pause, and Stop the text being read. Clicking the speaker icon allows you to change the volume, while clicking the speedometer icon allows you to adjust the reading speed.

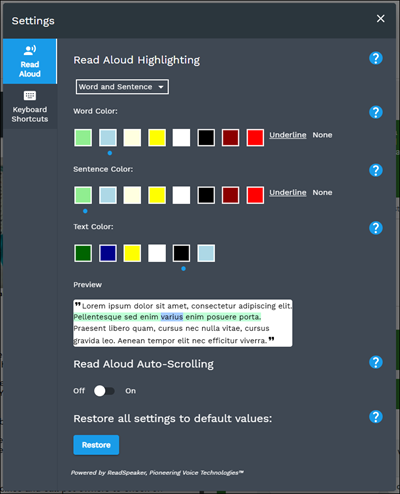
To make adjustments to the Read Aloud settings, click the Settings option from the toolbar.

The additional settings include highlighting sentences and auto-scrolling as it reads through the text.
Translate
You can translate words within the lesson to a different language by highlighting the word(s) and clicking on Translate from the toolbar.
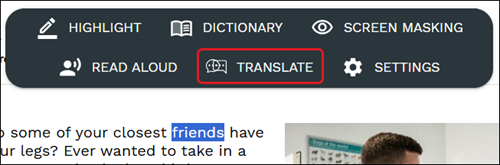
Select the language from the drop-down list.

The Translate pop-up will then open with the translated word(s). You can have the word(s) read aloud from here as well.
Note: The text has been translated for your convenience using translation software powered by Google Translate. Reasonable efforts have been made to provide an accurate translation, however, no automated translation is perfect nor is it intended to replace human translators. Translations are provided as a service to users of this website, and are provided "as is." No warranty of any kind, either expressed or implied, is made as to the accuracy, reliability, or correctness. Neither ReadSpeaker nor the website owner is in any way responsible for the translation.

Lesson Calendar
The Lesson Calendar can be accessed by clicking on the Lesson Planning tab (A) on the Achieve3000 Literacy homepage.
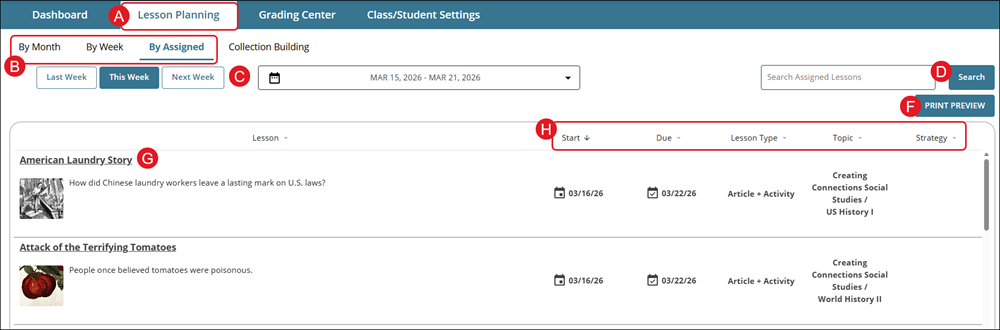
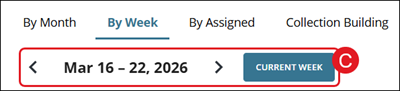
B. Click to view the lesson calendar By Month, By Week, or By Assigned.
C. If By Assigned is selected, click to view the lessons by Last Week, This Week, or Next Week, or click on the calendar drop-down to select a specific calendar week.
If By Month or By Week is selected, use the arrows to navigate between weeks or click the Current Week button.
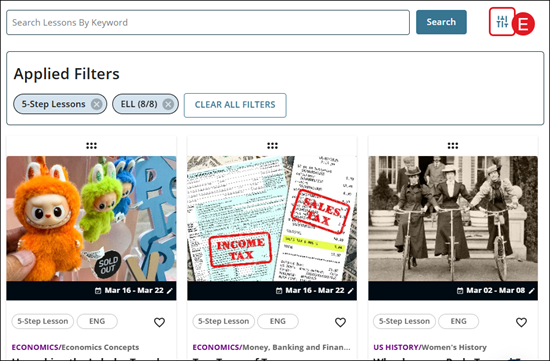
D. Enter a keyword in the Search field to locate a specific lesson on the calendar.
Additionally, on the By Month and By Week pages, additional Filters (E) can be selected to view specific lessons that have been assigned.
F. On the By Assigned view, click the Print Preview button to view the list of lessons assigned to the class.
G. Click on a lesson link to navigate to that lesson's page.
H. On the By Assigned view, the lessons can be sorted by Start date, Due date, Lesson Type, Topic, or Strategy.
Lesson Assignments
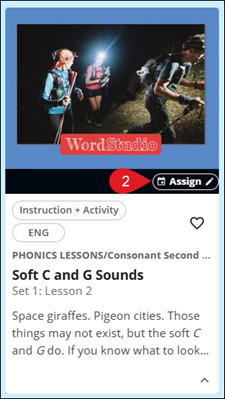
1. Either from the Achieve3000 Literacy homepage or from the Lesson Planning page, locate the lesson you want to assign.
2. On the lesson tile, click the Assign button.
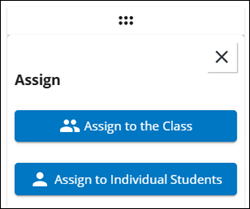
3. Select to Assign to the Class or Assign to Individual Student.
Under Lesson Planning, when on the By Month or By Week pages, you can also click and drag the lesson to a spot on the calendar. This will automatically assign the lesson to the entire class.
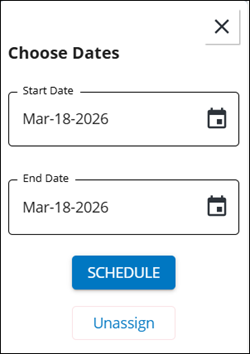
4. If Assign to the Class was selected, enter the Start Date and End Date for the lesson.
If Assign to Individual Students was selected, checkmark the students and then select a Start and End Date.
5. Click the Schedule button.

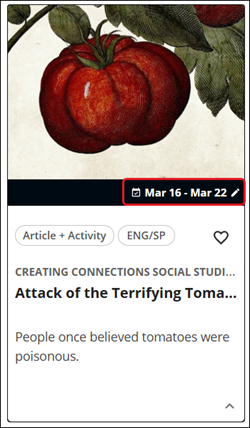
The assigned dates will show on the lesson tile as well as on the Lesson Planning page.
Click on the dates on the lesson tile to change the assignment dates or to unassign the lesson.