How do I add content to my Project?
Step-by-step guidance on adding chapters, sections, and custom content to your Create project.


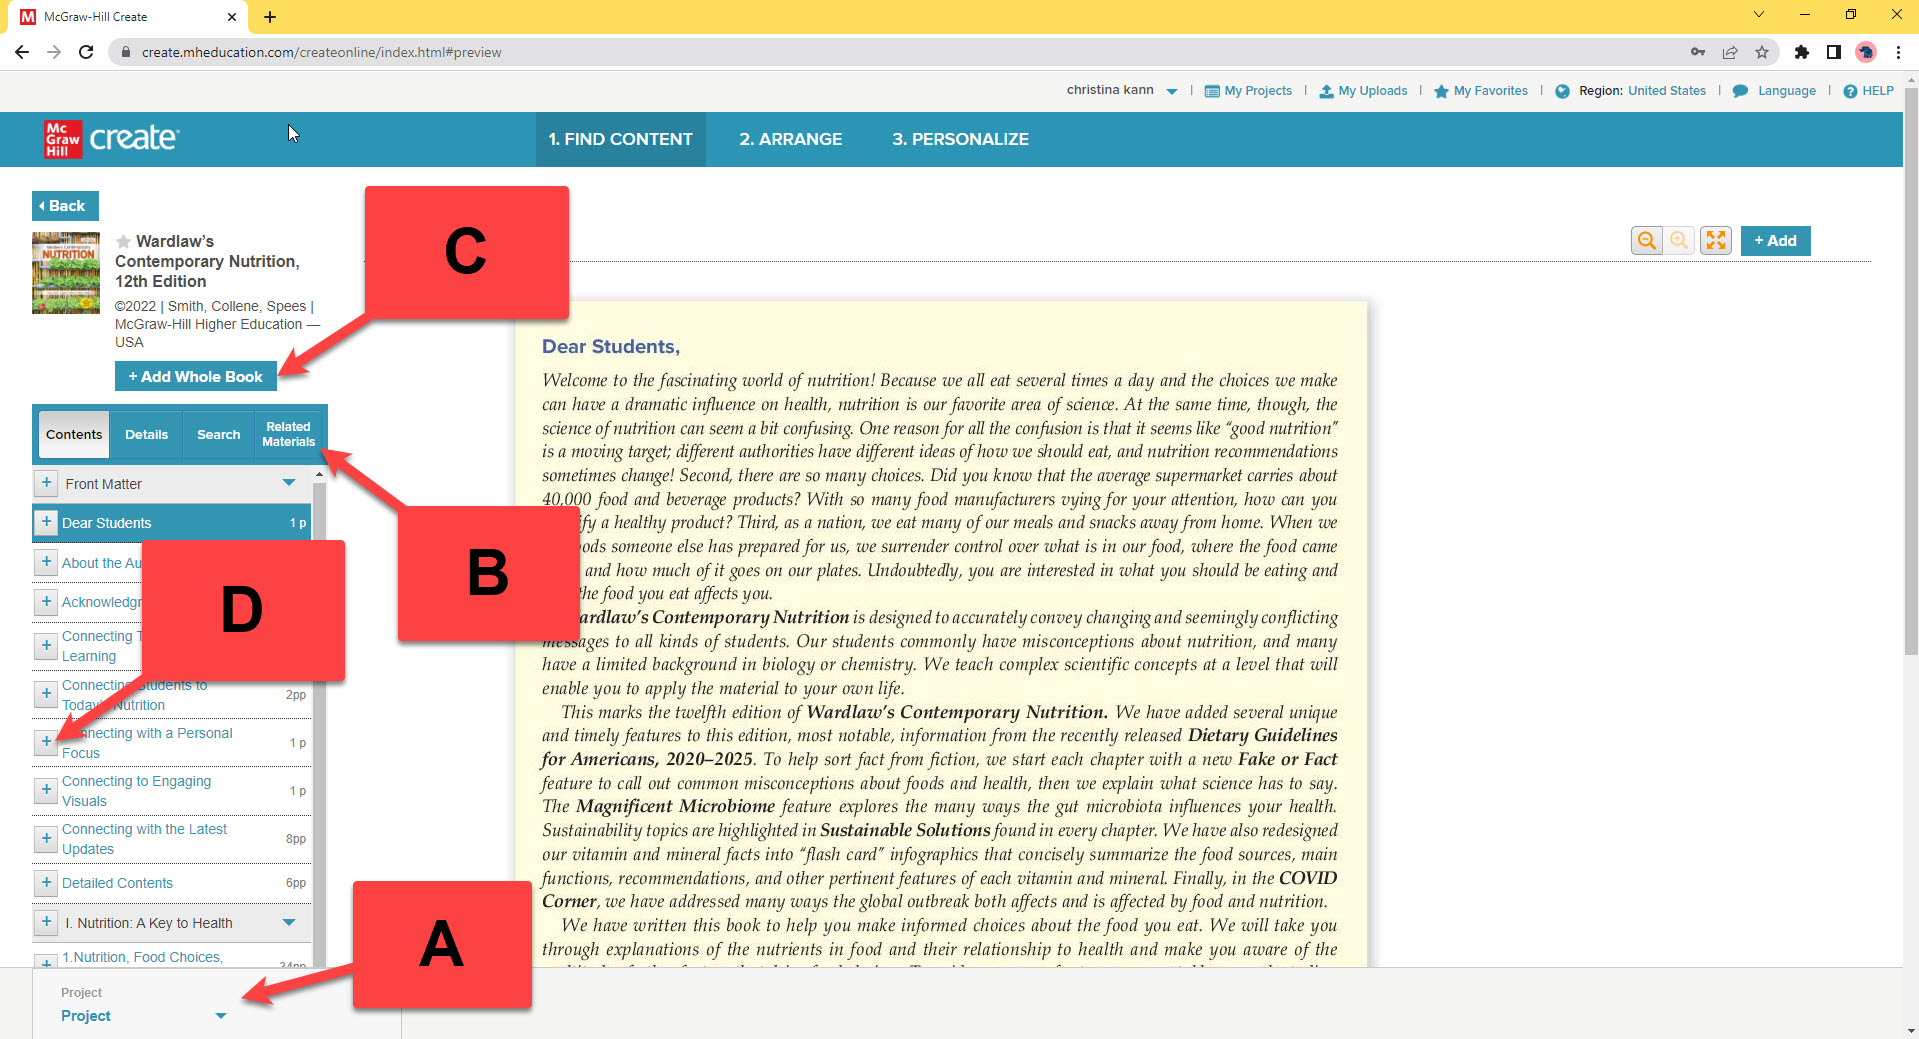
Step 1: Before you start adding content to an existing Project, make sure you have the correct Project selected. The name of the Project you are currently working on will be displayed at the bottom of the page (A). If you have not yet selected an ongoing Project or you have the wrong one open, you can select the correct Project in the bottom left corner.
If you have not yet started the Project you wish to add content to, you can just start adding content, and Create will automatically start a new Project for you.
Step 2: Search for the content you wish to add to your Project. You can open book listings in the left menu to view what’s inside (B).
Step 3: Click Add Whole Book (C) to add the entire title to your Project. If you wish to only add specific chapters or sections, click the plus button to the left of the title of the chapter or section you wish to add in the left menu (D). Alternatively, open a chapter or section by clicking on its title in the left menu, and then click Add in the top right corner.
Once a selection has been added to your Project, the Add button will change to Added in the top right corner and the plus sign in the left menu will change to a minus sign. If you add the whole book, the Add Whole Book button will change to Remove Book. All these buttons change from adding buttons to removing buttons so you can easily remove something if you make a mistake or change your mind.