Connect - Get your students started
Get students started in Connect with registration, access, and first-time login steps.
Tags
- Higher Ed Student
- Higher Education
- Customer Support
- Connect
- Instructor


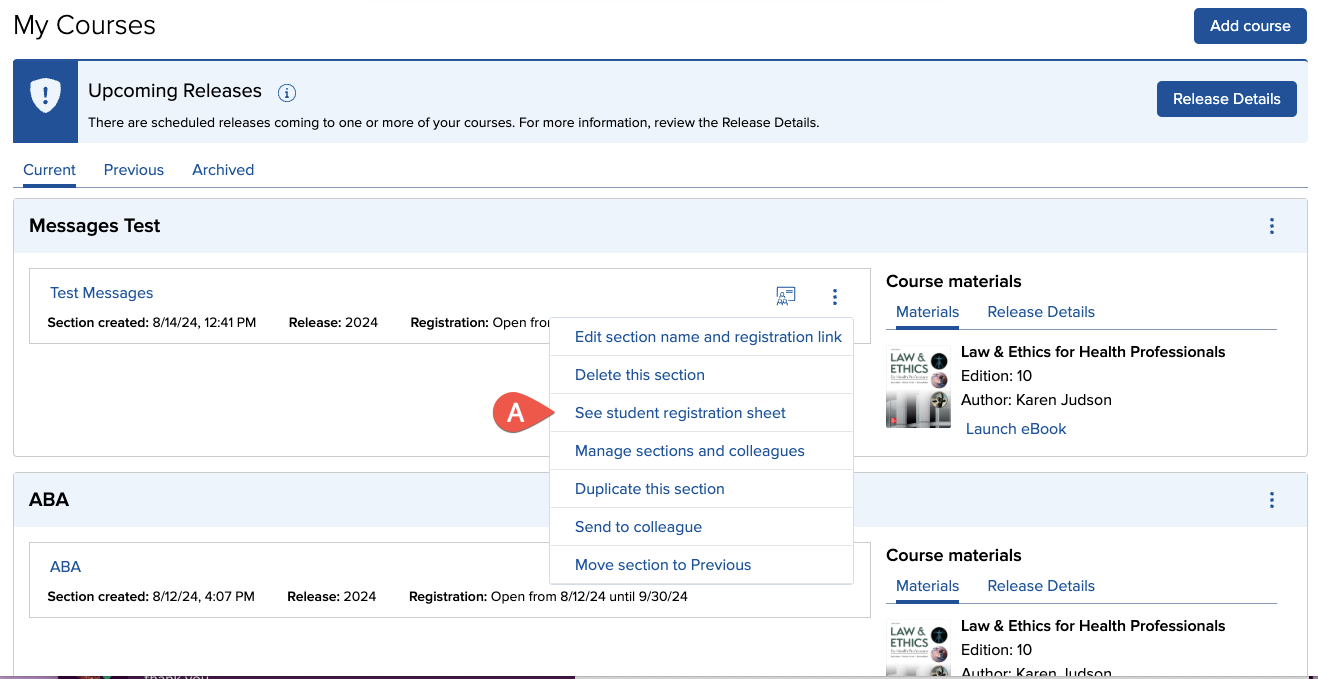
In your my courses page, in the section whose registration information you want to access, click the registration info icon (A).
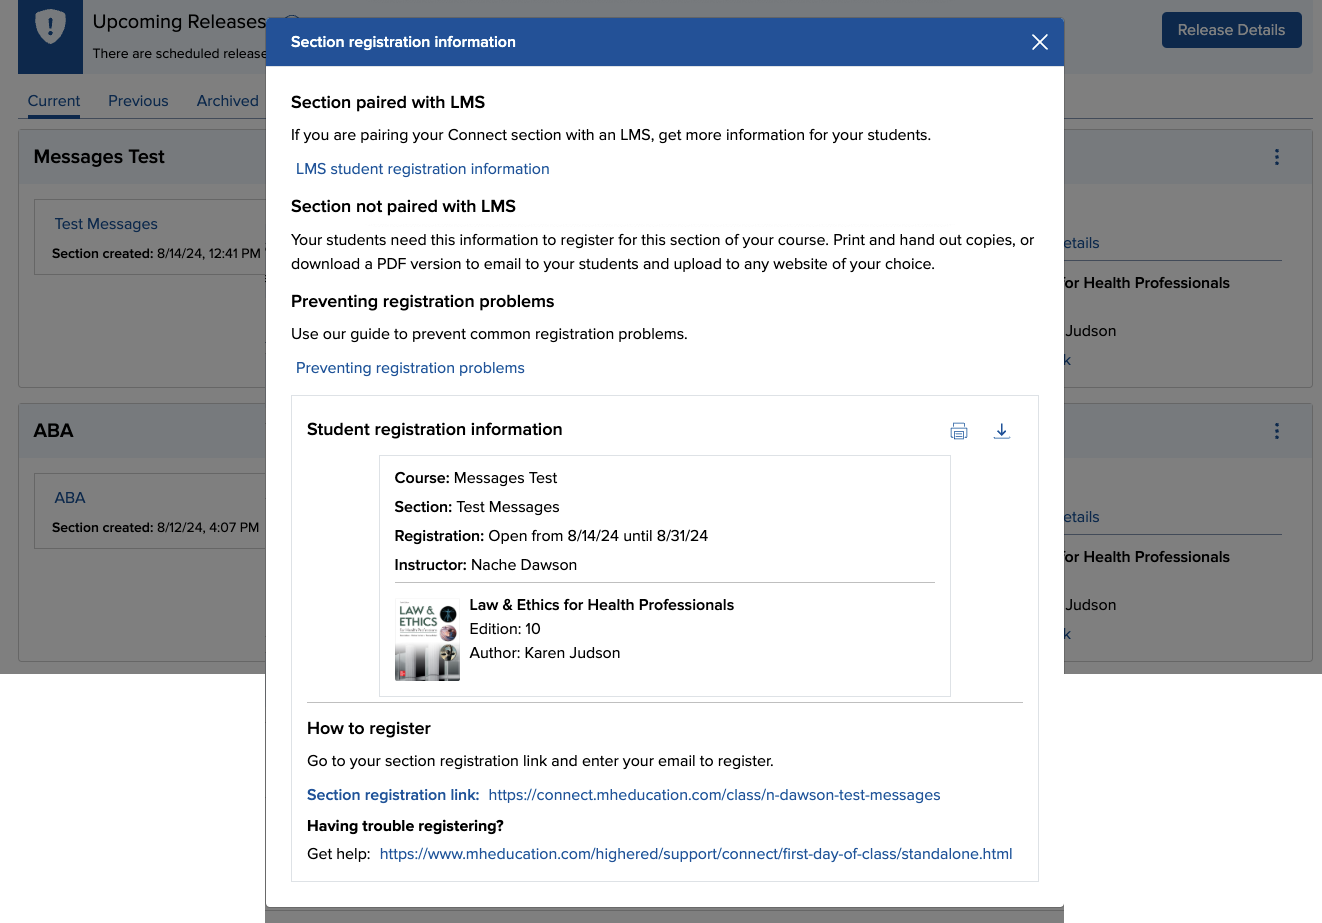
Customized student registration instructions will open with the section's specific web address (A). You may want to print a handout for your students or copy and paste your section-specific web address into your syllabus or learning management system for your students to access. Remember: You will have one unique web address for each section of your course created in Connect. Repeat the above process for each section.
When students visit your section-specific web address, they verify the course and section information, and click Register Now (A) to get started. Students can choose to watch a video of the registration process before registering on their own. Students will enter their email address to begin creating their account.

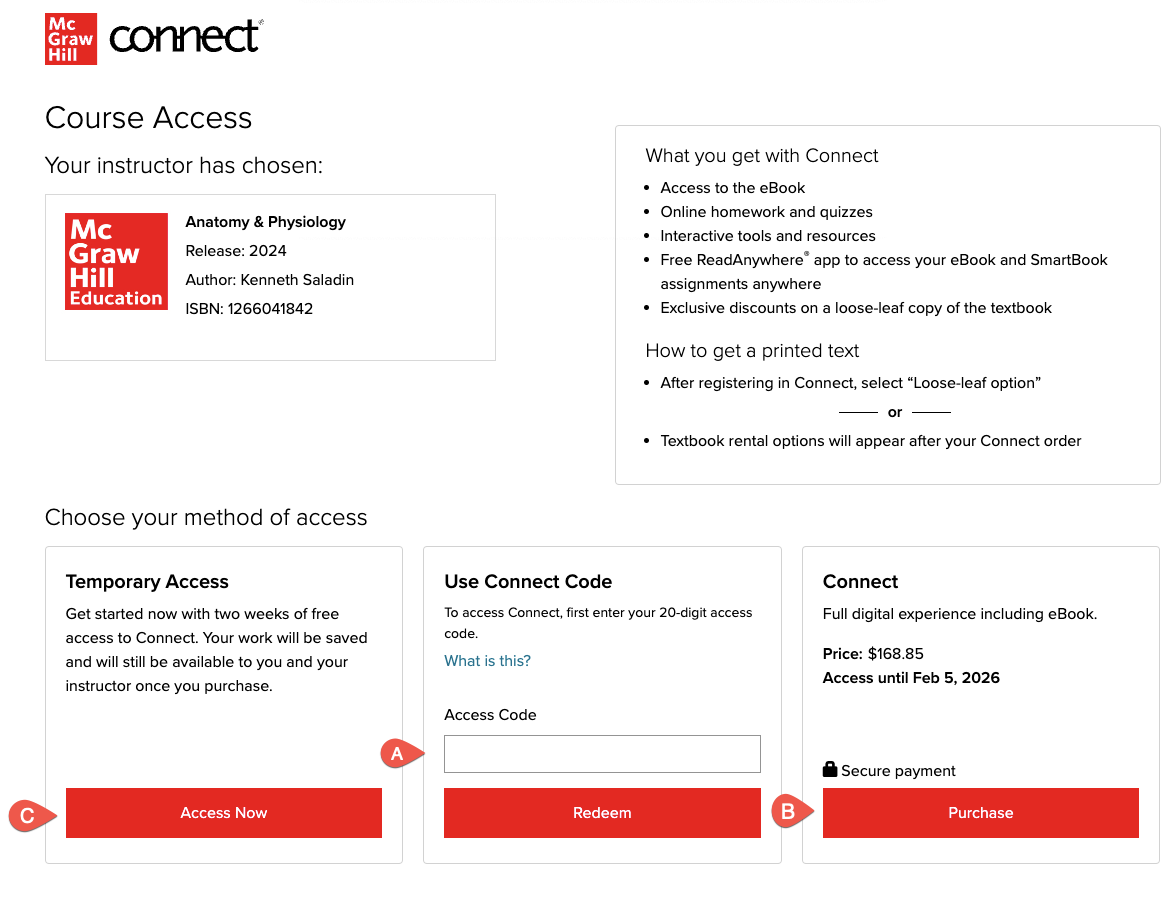
Next, students will enter the access code (A) included with their textbook package (if applicable), purchase access directly online (B), or start courtesy access (C).
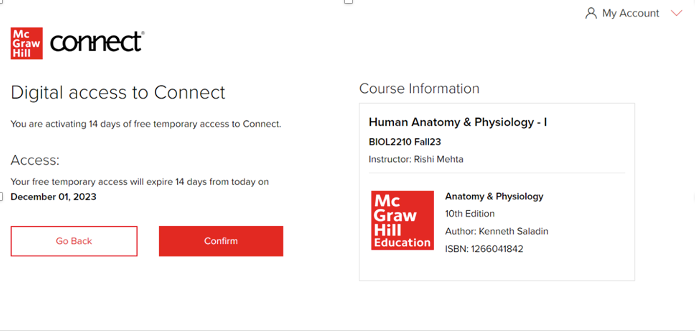
Note: Temporary access enables students to register without entering or purchasing an access code and receive full access before being required to obtain access. This option is convenient for students awaiting financial aid; those who may drop the class and do not want to commit to purchasing Connect just yet. All students will be able to register and get started with assignments at the start of your course.
Students will complete the registration process and click Access Now, which will populate your section's roster and provide them with access to your course and section.
Best Practices:
If students change sections during the term, simply provide them with the web address of the new section they need to be transferred into, have them click Access Now, and follow the prompts. Connect will recognize their account and allow the students to easily register in the new section.
Customized student registration instructions will open with the section's specific web address (A). You may want to print a handout for your students or copy and paste your section-specific web address into your syllabus or learning management system for your students to access. Remember: You will have one unique web address for each section of your course created in Connect. Repeat the above process for each section.
When students visit your section-specific web address, they verify the course and section information, and click Register Now (A) to get started. Students can choose to watch a video of the registration process before registering on their own. Students will enter their email address to begin creating their account.
Next, students will enter the access code (A) included with their textbook package (if applicable), purchase access directly online (B), or start courtesy access (C).
Note: Temporary access enables students to register without entering or purchasing an access code and receive full access before being required to obtain access. This option is convenient for students awaiting financial aid; those who may drop the class and do not want to commit to purchasing Connect just yet. All students will be able to register and get started with assignments at the start of your course.
Students will complete the registration process and click Access Now, which will populate your section's roster and provide them with access to your course and section.
If students change sections during the term, simply provide them with the web address of the new section they need to be transferred into, have them click Access Now, and follow the prompts. Connect will recognize their account and allow the students to easily register in the new section.